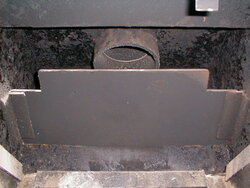
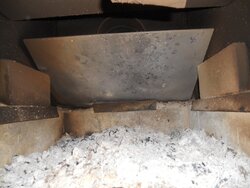
The top always had different temperature of the heating levels. The hottest being the top, and simmer on the lower section in front. The baffle equalizes the temps more and I use a trivet to simmer since it's now hotter in the front.
This isn't my calculations, it is what Fisher came up with as the optimum solution to reduce smoke in tests in the Goldilocks;
This is from post #120 of the Everything Fisher thread;
5/16 steel plate, same as top material. Plate measures 20 1/2" long (21 inch inside firebox width)
Plate measures 8 inches wide. Notches at corners are cut 3 inches in from ends, 2 inches removed from the 8 inch width of the plate. (3 X 2 notch cut out)
Tack welded from top to angle iron and firebox sides on 30* angle. (measured with machinist protractor, not a guess)
Upper cooking surface measures 8 inches from rear to radius edge of bend. 6 inch flue pipe centered on 8 inch width of upper surface.
Front edge of Baffle Plate is 6 inches down from upper stove top plate.
Flue pipe extends 3 inches below top plate. (extends 3 inches into fire box above baffle)
Vertical straight edge against plate front edge shows flue pipe is set back 1/2 inch beyond plate edge.
Extending straight edge flat on baffle plate, (continuing 30* angle towards stove front) straight edge contacts center of lower bend radius with 3 1/2" air space between baffle plate and radius bend. (3 1/2 X 21 inch opening)
This stove has been used since 1982 when new, mostly only seasoned oak, and baffle has never been cleaned. No rust, metal looks brand new with no warping, no discoloration.

That is what I modeled baffles on since it was tested and proven over time in my own stove.
.....................................................................................................................................................................................................................................................
If you want to get technical with your angle and smoke space, you need an IR thermometer and preferably probe thermometer in the pipe. (to compare stove top and exhaust temps) No one can tell you your optimum angle and smoke space since it is adjusted (optimized) for your
chimney, not stove. I've found angling towards the lower bend and a minimum space of the same square inch of outlet is as good as it gets with good draft. Decreased draft with exterior or uninsulated flue, or oversize flue requires a larger smoke space allowing more heat up.
Bottom line is I don't think the adjusting makes a measurable difference in wood consumption.


