Thanks everybody! Yes BeGreen, I am definitely happy I didn't get that Majestic. This one was a lot more money, but it's WAY better at what it does, and looks better, too. Yes, I do have in-between photos, ReallyHot, and here they are, although they didn't appear in the correct order. You can pretty well tell which is which, though:
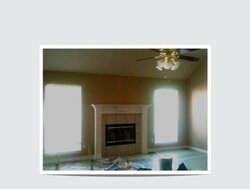
"Before" is , as you guessed, the before, which looks better in the picture than it actually looked in person; it was truly hideous.
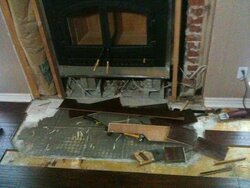
"Tearing up the floor" is basically where I started, with studs, and me reshaping the cut-out in the hardwood flooring. The design for the raised hearth was both wider, but shallower, than the old hearth extension. I was able to re-use most of the old flooring pieces. Luckily whoever installed the original flooring left me a box, so I was able to use a couple of them to fill in the gaps.
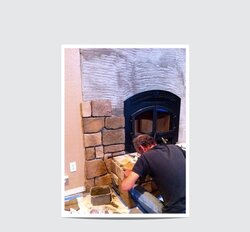
"Mortaring the Stones" is yours truly, mortaring the stones to the scratch coat.
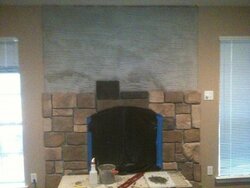
"More progress" is the project, after a little more progress
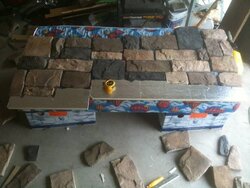
"Layout" , is how I eventually laid out all of the stone, so it fit the space. This is without a doubt, the hardest part, trying to get the stones to fit together in the desired space, without creating patterns, getting too many stones of the same color in one place, or creating excessively long straight lines. At first, I was running back and forth from the garage to the fireplace, trying first one piece and then another, to get a few pieces to fit into a space. Then, I got smart(I think). I took a couple of pieces of foam insulation that I had leftover from building an insulated box for my whole house fan, and created a template in the shape of the current line of stones, and at the width of the space i needed to fill. Then , I could fit the next stones to the template, without having to run back and forth. This made it WAY faster and easier to get the pieces to fit. They are laying on an old box springs from my son's previous bed, which were almost exactly the same width as the space I needed to fill.
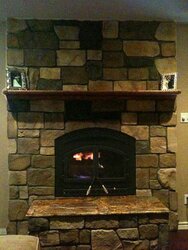
Fireplace in Stone", is the finished project, albeit a crappy picture.
I hand-cut ALL of the stones, including the curve around the top of the unit, with a diamond wheel on an angle grinder. For the curves, I drew a line on the back of the stone, and just followed that curve. For the straight cuts, I started out drawing lines to follow, but later decided that I could make straighter cuts by just marking both sides, then eyeballing it as I cut, looking down the edge of the cutting wheel to keep myself straight. I have seen many fireplaces where they lay out the stones around the faceplate to create the opening, but I wanted it to look like the opening was cut into an existing wall, rather than the wall created around the fireplace.

 Really nice job !!
")