How I do a cold start in my Fireview - photo essay

  • Active since 1995, Hearth.com is THE place on the internet for free information and advice about wood stoves, pellet stoves and other energy saving equipment.

    We strive to provide opinions, articles, discussions and history related to Hearth Products and in a more general sense, energy issues.

    We promote the EFFICIENT, RESPONSIBLE, CLEAN and SAFE use of all fuels, whether renewable or fossil.
Status
Not open for further replies.

Slow1

Minister of Fire
Hearth Supporter
Nov 26, 2008
2,677
Eastern MA
Seems to be the new 'in' thing to do so I wanted to try and see if I could capture the moment (or a few). So here goes my attempt. I apologize for blurry pictures, new camera to boot...

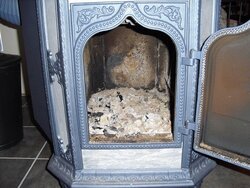
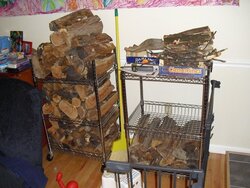
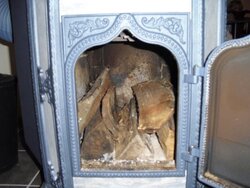
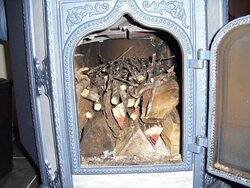
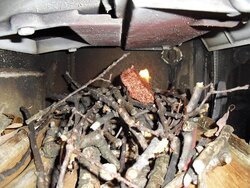
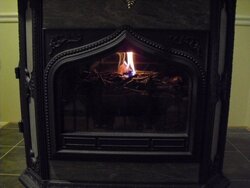
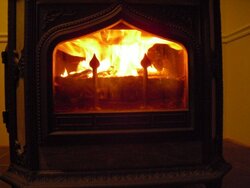
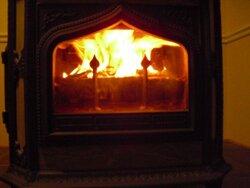
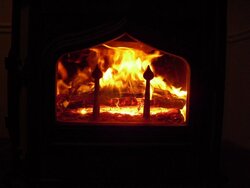
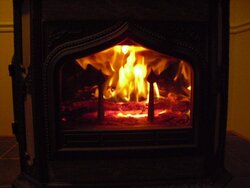
Anyway - first few pictures here show my empty stove left alone from last burned out fire, didn't even have to even out the ashes this time. Also my wood storage space (yeah, needs tidying up a bit, not all truth is clean and neat). Then (if the pictures stay in order) you can see how I place a few splits on the bottom and build the base. I put a total of 5 splits into this one - no magic number, just what seems to cover the bottom and up the sides a bit....
 

Attachments

  • CIMG0016.jpg
    CIMG0016.jpg
    89.6 KB · Views: 499
  • CIMG0017.jpg
    CIMG0017.jpg
    82.6 KB · Views: 487
  • CIMG0019.jpg
    CIMG0019.jpg
    54.5 KB · Views: 484
Next I fill in with kindling - and some smaller bits. In this case I'm using some pieces of cedar and mostly yard clean-up sticks since we had raked a couple weeks ago and have a pile in the garage to clear out...
 

Attachments

  • CIMG0020.jpg
    CIMG0020.jpg
    100.1 KB · Views: 470
  • CIMG0021.jpg
    CIMG0021.jpg
    46.4 KB · Views: 466
So that sat there for a few days actually as it was too warm to light up.. however this morning it was finally cold enough to go so... A bit of super cedar on top and off it goes. Note that I opened the air to 4 (all the way) and obviously had the cat bypass open to light. I close the door fully and don't open it again until reload...
 

Attachments

  • CIMG0065.jpg
    CIMG0065.jpg
    100.2 KB · Views: 474
  • CIMG0067.jpg
    CIMG0067.jpg
    41.7 KB · Views: 480
Slow, although we do it just a tad differently, your way should work out great too. I'm betting you like that new stove, eh?
 
5 minutes after first lighting - good SC burn and top is starting to burn nice. No meaningful smoke in the box either...
 

Attachments

  • CIMG0069.jpg
    CIMG0069.jpg
    46.5 KB · Views: 455
  • CIMG0070.jpg
    CIMG0070.jpg
    41.7 KB · Views: 456
10 minutes after initial light - I now reduce air to 2
 

Attachments

  • CIMG0071.jpg
    CIMG0071.jpg
    41.8 KB · Views: 468
  • CIMG0072.jpg
    CIMG0072.jpg
    37.8 KB · Views: 458
25 minutes after first fire - air is still at 2, flue temp is now almost at 400 but rising fast (IR shows it over 400) so I decide to go ahead and engage the cat (this flue temp is 22" above the exit so at exit it is much higher). So I will reduce air to 1, and engage cat.
 

Attachments

  • CIMG0079.jpg
    CIMG0079.jpg
    28.7 KB · Views: 461
Final picture in series - this is a minute after engaging the cat....
 

Attachments

  • CIMG0081.jpg
    CIMG0081.jpg
    38.3 KB · Views: 448
Yes Dennis we do like the stove. As you told me a long time ago I have learned to get it fired up in very little time. I tried to get a picture of the cat glow after it was engaged but kept getting a reflection off the glass instead... need to work on my photo skills :)

I left that first load running at 1 and it got the house warming up nicely. Got home from driving the carpool and loaded up the stove for the day - was still about 1/2 the load in there but I don't want the sitter to have to feed it today so I added 4 more. That should be more than enough. I am really enjoying the fact that I can start the cold stove and only touch it twice after lighting it up (one air adjustment, then the air/cat engage) and I'm done with it for the morning. Of course it takes more time when shooting pictures and dealing with the rolling eyes of the wife :)
 
I can just picture it: "Why on earth are you taking pictures of a flame?!" :roll:
 
Nice post Slow1. I do similar start ups, top down method works great in this stove. I wish it would get colder outside so I can just go 24/7 but it's not happening, only need one good firing in the evening to keep the house up to temp all day long.

A little bragging rights, last night when I went to start my evening fire I still had enough coals to rekindle after 24 hours. Must of been that huge chunk of White Oak I placed in the bottom back of the stove.
 
Wet1 said:
Nice photo essay! How long before the reload?

Hmm.. Well, I started it up around 5:45a and was back from driving the carpool at a bit after 8 so it was probably about 8:15 by time I got to the stove so I would estimate 2 1/2 hours from start.

It was a bit too early to be feeding as there were still flames going in there and when I opened up the door I had to do it slowly to make sure the smoke didn't get pulled into the room. On the flip side it took almost no time at all to get the new wood fully engulfed and the cat re-engaged.
 
Awesome Pics!!!

That's just what I needed to see!! I played around with our fireview some today with a small break-in fire (outdoors with temporary chimney setup). Surprisingly, I had a bit of trouble getting my fire going. Had to play around with it 3 or 4 times before getting my VERY DRY lumber scraps to burn. I used newspaper rolled and knotted and noodles on top of the lumber scraps, split thinner for kindlng. I think I was too conservative with my kindling.

Thanks again Slow1 you are right on time!!

Kenny

John 3:16
 
Status
Not open for further replies.