MH Puzzling Together

  • Active since 1995, Hearth.com is THE place on the internet for free information and advice about wood stoves, pellet stoves and other energy saving equipment.

    We strive to provide opinions, articles, discussions and history related to Hearth Products and in a more general sense, energy issues.

    We promote the EFFICIENT, RESPONSIBLE, CLEAN and SAFE use of all fuels, whether renewable or fossil.

byQ

Minister of Fire
May 12, 2013
529
Idaho
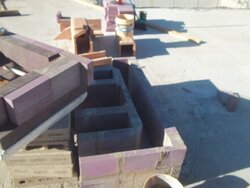
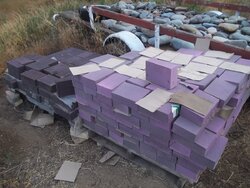
Well I've started building a masonry heater. I have almost everything I need (maybe need some more refractory cement). I've complicated things for myself - the door is too big for the plans I have, 70% of the firebrick are sloped (think of a pyramid), and the 80 or so straight bricks are really really dense - 20 pounds per brick (6"x9"x3"). And all of the bricks are bigger than standard.

The brick (the dark ones are straights, lighter 1/4" sloped),
mh 006.JPG

I rented a brick saw and split 80 firebricks and took the slope off 2 sides and one side of 80 more - so I've got a mixture of brick. I tried to cut the dense bricks and it was a problem. I will need to be patient with these. So I could use the door, I increased the plans a little bit, 4" wider & 2" deeper. Oddly the bigger bricks span the firebox floor in one direction without needing to be cut - I didn't plan it.

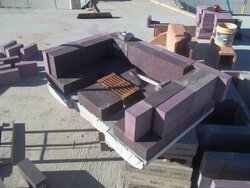
I've built the under the firebox area. And I have the refractory cement base to put on top of it. Problem - it weighs a lot. I stacked the base on some blocks and thought maybe I could just slide it over - no good. I am going to need help. It has to be placed straight down. Here it is. I threw a few bricks on top of the base to see what the firebox would look like and the dimensions of it (~26" wide).
mh 001.JPG
The below firebox area,
mh 003.JPG


This heater is going to be massive for it's size. It is sitting on 21" of reinforced concrete. The amount of mass to move is striking.
 
Last edited:
  • Like
Reactions: MikeK
That is quite a project. It is being built out in a yard?
 
It is on an insulated slab with deeper concrete with no insulation where the MH sits. I'm building an ICF (insulated concrete form) house. I've laid a couple of ICF rows but I want to finish the MH, and than go back to house building (I've waited a couple of years). Usually the walls and roof go on and than the masonry heater.

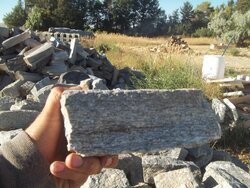
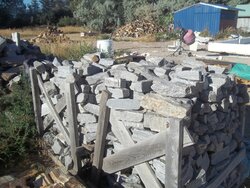
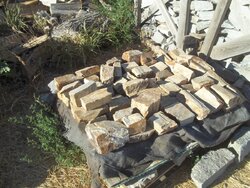
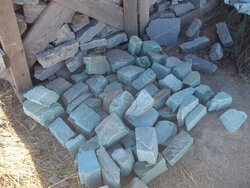
Here is the gray granite, petrified wood, and green stone I've gathered for the outside. For heat transfer 4" or less thickness is best but 5" is okay, too. I have some thicker stone that I can use around the chimney (the clay flue).
mh1 003.JPG mh1 001.JPG
mh1 002.JPGmh1 004.JPG
 
  • Like
Reactions: Smolder
I see. Well, good luck with your project.
I love those heaters and was all geared up to build a Tulikivi for the log cabin I was building in the NC mountains.
But, the fiancee did not like the look of the Tulikivi so I built the American fireplace pictured at left.
I must admit the fireplace looks great.
But it is nowhere near as efficient as the masonry heater.
So, I have the fireplace and a Jotul wood stove.

When I was researching the Tulikivi, 20 years ago, I read that 10 percent of new construction in Finland had masonry heaters only, and it gets really cold in Finland. Wish I had one.
 
For some reason log cabin style houses and masonry heaters go well together. Around this area - Idaho, Montana, & Colorado there are quite a few log cabin style houses, and a few of them have masonry heaters. I think log style homes are more open which works well with a masonry heater.
 
My neighbor helped me place the refractory concrete firebox base into place. I laid the floor bricks and started cutting/dry fitting brick for the 2 firebox walls(maybe mortar tomorrow). This firebox is going to be big. I think it will hold a 100 lbs of wood.

mh2 002.JPG mh2 001.JPG
 
  • Like
Reactions: Smolder
Well I got the firebox mortared. I have some firebrick powder from cutting so many bricks so I placed it between the 2 walls in the firebox - can't hurt. It should help heat transfer and still not interfere with the expansion area.

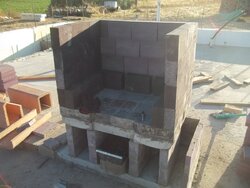
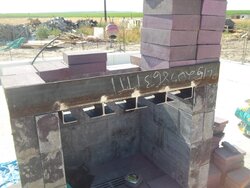
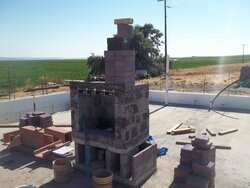
The angle iron lintel is in place with the little metal holders below to hold firebrick splits to act as a heat shield (this helps protect the vulnerable area above the firebox). I thought I had plenty of firebrick but I did the math and it is going to be close. To see how high I could go, I stacked the brick (see 2nd picture). The height comes out around 7 feet. Oh well, it should probably be 8 feet but there isn't enough brick. There will be a bench so that will grab some heat, too.

I've decided to omit the bake oven - costly and besides I have a metal tray I can stick in the bottom if I want to cook something. Tomorrow I corbel (narrow the volume of the area above the firebox). This is going to be tricky because I have to use bricks with one side that is slanted. I'll cancel out the angle by sandwiching 2 slanted bricks together.

mh3 002.JPG mh3 001.JPG
 
Last edited:
  • Like
Reactions: Smolder and jetsam
It's got to be exciting to see this finally starting to take shape. Is the firebrick special order or could you pick up some more to take it up to 8' as planned?
 
Last edited:
Looking good!

What kind of brick mason experience do you have?
 
This is brick someone bought at a Government liquidation, and than resold. I thought about getting some more brick but I think I'll make do with what I have on hand. The door is big so the heater grew to fit it. The height I have is good for the original plans but the firebox was smaller. The height to width ratio doesn't have to be exact. My house isn't that big so even with this heater being a little short it is still big enough. I'm guessing this will be a 1.5 to 2 day firing schedule heater (very dense materials should hold heat longer than say a clay brick exterior).

I have very little brick experience but have worked with concrete and flagstone some. I went to one masonry heater build and assisted, but mostly watched closely. I'm taking it slow.
 
Very well, press ahead. Obviously a complicated job.
 
Well, I bought some more firebrick - it is straight no more slants for me. Now, I can get this thing up to 8 feet tall.The brick came from a dismantled kiln. Looks like good brick. How much easier it would have been if I started with this brick. The slants cost much more in the long run because they need to have some angle cut out of them and you waste mortar correcting them while laying - I'm learning.

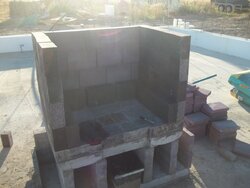
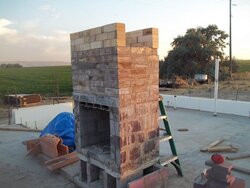
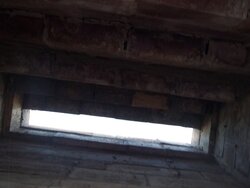
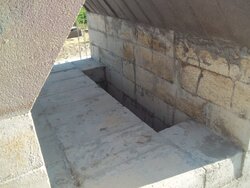
The area above the firebox has been build up but the inside area is decreased until there is just a 2" slit left for the gasses to go through (see 2nd picture). Tomorrow, I might open this up bigger with the grinder. And above this slit is a chamber where the gasses swirl around before running down the side chutes (side chutes not built yet).
mh3 002.JPG mh3 004.JPG

And here s a picture from inside the firebox looking up at the slit.
mh3 005.JPG
 
Last edited:
  • Like
Reactions: Smolder
That looks pretty awesome. Nice work!
 
Keep going! Looking good.
 
I called a mason and asked about the slit at the top of the corbled firebox being 2 to 2.5". He said it would be better to be 3.5". It might smoke if too narrow (air flow restricted too much). I knocked out some half bricks on the non angled side so now it is in the 3.5 to 4" range. I'm glad I asked.
 
Last edited:
chimney (the clay flue

Why are you using clay just put stainless it from the start. Most mh I have seen have class a ontop of them
 
Why are you laying the brick on edge just out of curiosity? I have found laying them on their face is much more durable. Not saying you are wrong just curious. And what mortar are you using?
 
bholler, I'm using sariset mortar as it is about the only mortar available where I'm at. PA is the best area for masonry supplies - Idaho is not. I'm using the clay flue for the start of the flue system because I have it. I will use 8" metal flue to connect to clay flue part of the chimney. As far as brick on edge - there are places where they are laid on edge and other places on face. I'm following plans as laid out by the Masonry Heater Association.

The reason they use bricks on edge in the firebox is probably heat transfer and expansion. Two standard bricks on edge equals about 5". One brick laid face down is 4.5". So about the same. But the 2 layer system is better because it has a built in expansion zone, and the 2 layers aren't connected to each other so can expand independently - remember this area can get very hot, up to 2000 F.

The other areas where bricks are laid on edge - under the firebox. I guess the bricks are strong enough. I would probably lay these face down given the choice. I laid two 6" bricks on edge (12") there and looking back I would lay one brick on edge (6") or 2 or 3 bricks face down. My bricks are bigger than the plan's bricks. The plan has two 4.5" bricks on edge (9"). Probably the bricks are on edge where they will take up as little space in the channels as possible - thus allowing better/more volume gas flow. All of the flowing gasses meet under the firebox before heading out the flue.


Ok just wondered I don't build masonry heaters I have worked on a few but never built one. But I would skip using clay at all and just go with stainless it will hold up much better
 
bholler, I think skipping the clay flue is a good idea - it cracks/breaks very easily. But I'm not clear on a stainless flue. In this design of MH the chimney will be starting at the bottom of the heater. And I need to have it on one side towards the front. So 8 to 10' of the stainless pipe would be embedded in rock (ie it will just look like part of the MH).

I guess I just leave an air gap around the stainless pipe that is buried in the rock? Or better to use vermiculite/perlite around it? Heat transfer from the flue to the rock surrounding is okay because the rock chimney part is inside the house.
why not just use a stainless liner not a class a chimney then insulate it with either insulation mix or wrap. Then you could swith over to class a when you get above the heater or just continue up with a masonry chimney and the liner. Again These are just ideas I am not a masonry heater builder.
 
Thanks I'll do something like that. Well I've reached the top of the core. You can see the chamber above the slit in the top of the firebox (I widened this slit to ~4"). I used up most of my slanted bricks up there on the top (purplish ones). I'm glad to get rid of them!

I need to put 2 refractory capping slabs on these top purple bricks. How this is going to be done I have no idea - they are heavy. I guess I'm going to need to set up some sort of scaffold - get a slab on the scaffold, and get help from my neighbor, again.

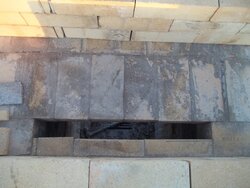
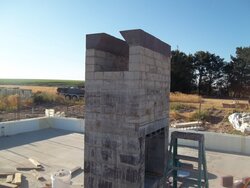
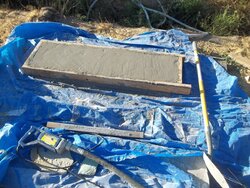
I had to pour the last capping slab (3rd picture). I knew I didn't have enough refractory cement so I threw small firebrick scraps into the cement mixer with the refractory cement. I still didn't have enough. I opened a hard bag I thought was no good and found some usable cement in it to finish. Next, brick splits mortared into place for the side channels. The core is almost done.
mh4 002.JPG mh4 003.JPGmh4 001.JPG
 
Last edited:
Update: Well the inspector came out and ok'd the MH core. I'm wrapping the MH in cardboard, and can than start laying rock up. The inspector thought It weird to use cardboard. But this is what is usually used. It acts as a gasket between the 2 layers (the core can flex and rise without damaging the cooler outside layer). The cardboard won't burn because 2 needed ingredients are missing - air and flame.

I bought some 12" x 8" x 8" clay flue liners that will be 'inside' the MH and protected by clay brick with a 1/2" gap. At 9 or 10 feet, I will switch over to stainless double walled pipe. I laid a 4.5" pad of perlite concrete around the core - this is the width of the outer layer of rock (no sense in sending heat into the slab).

My core turned out okay. But there are areas I could improve on. I had to use scaffolding and blocks to slowly get the 2 caps up on top (~200 lbs each). Sorry no pictures due to my camera's shutter not working.

Performance? The greater than normal mass to volume ratio of this heater will mean it will want to absorb and hold heat (maybe more than it should). It will stay hot longer but probably won't get rid of its heat as fast as a lighter volume to weight ratio heater. But it is an oversized unit for the house so it shouldn't be a problem.
 
Last edited:
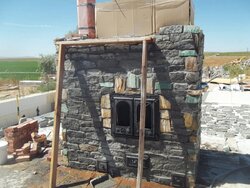
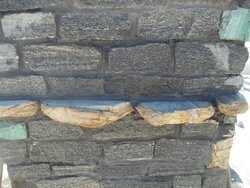
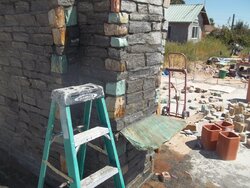
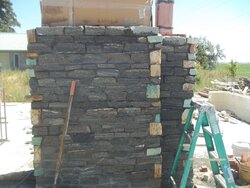
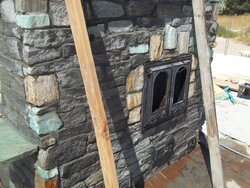
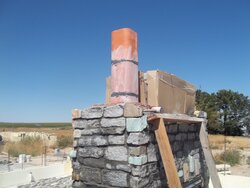
My camera decided to start working again so I took a few pictures. I'm getting tired of laying granite stone. Looks like I'll have enough stone - depending on how high I make the chimney. For the chimney, I decided to use 8"x8"x12" clay flue surrounded by brick with a 1/2" air gap. Maybe switch to double walled stainless steel or just take the granite surrounded clay flue all the way up.

The wood in the picture is for bracing for a shelf to be made out of whitish rocks (I made one on the side - see 2nd picture). Also, I made a cat bed area out of a large green flagstone (3rd picture) on the other short side..

The fireplace door is fitted in - and it is big for a masonry heater. I put the little air/ash door in upside down (oops) but managed to pound it out and reinstall it. The air damper is in - about 5 feet up the chimney.
80% mh 001.JPG80% mh 002.JPG 80% mh 004.JPG 80% mh 003.JPG 80% mh 005.JPG 80% mh 006.JPG