Mini split recommendations

  • Active since 1995, Hearth.com is THE place on the internet for free information and advice about wood stoves, pellet stoves and other energy saving equipment.

    We strive to provide opinions, articles, discussions and history related to Hearth Products and in a more general sense, energy issues.

    We promote the EFFICIENT, RESPONSIBLE, CLEAN and SAFE use of all fuels, whether renewable or fossil.
Thanks for the detailed write up coaly. I either have or can borrow the tools I need. I’ll need to get some of the thread sealant.

I haven’t decided (my wife hasn’t told me. Lol) where the mini split is going. It would be nice to keep the run from inside to outside at 25’ or under. I imagine she would want the outside unit on the back of the house. But maybe it could go on the side by the electric panel. That would be easy since my outside panel has spaces for breakers as well.
I know I have some 30 amp 220 breakers left. Maybe I have a 20 amp as well. I know when I was wiring the house I had issues finding some breaker sizes. Seems the Eaton BR series are hard to find because of the covid shortages.
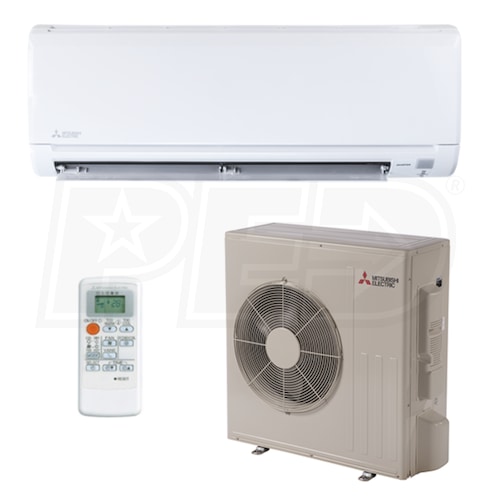
Be very careful on where you locate the outdoor unit, its a big cause of failures in snow zones. Yes some units have electric pan heaters but its no substitute for location. Ideally put it well up off the ground in any area not subject to drifting and ideally out of the prevailing wind. Ideally you want it in place where the wind scours the snow, usually on the downwind side of the building. There are shutters that can be installed to make a big location a bit better but its far better to do it right. No matter what consider what its going to look like with slanted roof over it as in many cases one is going to be needed. I have seen them installed directly under drainage points from the roof so when it rains they are constantly under steady stream of water. The other thing is the keep in mind wintertime snow banks. My install is near a driveway and I was always careful to do post plowing clean up so that the plow guy did not inadvertently push the banks back and wreck the unit.

BTW the pan heaters are usually in the 40 watts range, they take a long time to melt out a unit full of snow.
 
Thanks for the detailed write up coaly. I either have or can borrow the tools I need. I’ll need to get some of the thread sealant.

I haven’t decided (my wife hasn’t told me. Lol) where the mini split is going. It would be nice to keep the run from inside to outside at 25’ or under. I imagine she would want the outside unit on the back of the house. But maybe it could go on the side by the electric panel. That would be easy since my outside panel has spaces for breakers as well.
I know I have some 30 amp 220 breakers left. Maybe I have a 20 amp as well. I know when I was wiring the house I had issues finding some breaker sizes. Seems the Eaton BR series are hard to find because of the covid shortages.
Rember you will have to slope a condensate drain line. Mr cool units don’t need flare tools or vacuum pumps. But if you step up to the other units that require those you have many more choices. But I’m not sure you can save any money.
 
I think behind the house would be the best area as far as protection from the wind and snow. I’ll have to push for that spot.

Otherwise it would be on the side with the roof possibly unloading on it. In that case I’d have to build a little roof over the unit.
 
Mine is on a gable end of the house so no snow dumps. It you have the chance of snow slides off a roof make sure you avoid placing one there or make sure the roof can take the force of snow slide.
 
Rember you will have to slope a condensate drain line. Mr cool units don’t need flare tools or vacuum pumps. But if you step up to the other units that require those you have many more choices. But I’m not sure you can save any money.

I believe I’m moving away from the mrcool diy line. The price jump is very high and those extra tools are really cheap and look easy to use. You dont need to cut and flare if you do what you would have done with the extra lineset from a diy kit. You do need a 140$ pump that comes with the gauge set. A fancy 200$ torque wrench that can maybe be rented, and some folks like to nitrogen purge their systems too. It all looks very easy. The flaring tool is only about 40$ and looks foolproof. The money favors the standard units, plus bigger profit if you’re doing more than one.

The warranty on the diy units does not require a pro so there’s that. The diy units are identical to all the other Chinese mini splits so you’re not getting a better unit.

Then the tough part is sizing them. Easy to get enough heat in the dead of winter with units that are oversized the other 95% of the time.
 
Suggestion, for DIY. Flare joints are a typical failure point, even for some pros. Get a good quality tool and practice on a few scrap pieces of tubing first. And as noted, make sure you are not voiding the warranty with a DIY install.
 
The two techs who pumped down both my systems did not like flare fittings and cut them off at the indoor unit and brazed them. They did use them on the outdoor unit but cut of the factory supplied flares on the line set I had pulled.
 
My dad is wanting to put in a mini split system as well. It might be worth it for the two of us to split the cost of the tools, and get the regular system instead of the DIY.

Am I understanding correctly that you lose the warranty with the regular system unless a pro installs it?
 
Also what kind of torque wrench are we talking about here? I have the regular automotive type torque wrenches in 1/4”, 3/8”, 1/2”, and 3/4” drive. Could you use one of those with a crows foot to tighten the flares?

I would imagine the torque is probably in inch pounds. No 3/4” drive torque wrench for this job. Lol.
Torque varies with tubing size given in foot pounds.

A crows foot works. I didn’t have one, but have a nice brass fish scale. I calculate the length of a combination wrench, or adjustable wrench with hole in the end. Snug the fitting. Put a backup wrench on fitting and let it hang. Put the open end wrench on the nut, hook the fish scale which is graduated in pounds on the end of wrench through hole or closed end of wrench. As you pull on the scale holding the backup wrench, pull to the poundage required. As an example, a 12 inch wrench from center of tubing to where scale attaches, pulled to 1 lb. on the scale is 1 foot pound torque. Pulling on the wrench with the scale shows the foot pounds torque when wrench stops moving at desired foot poundage. I torque axle nuts that are above my 1/2 drive torque wrench range with my weight on a pipe with a breaker bar the same way. Calculate your weight at how many feet away from axle center you need to apply the correct weight for foot pounds of torque required. I put the pipe all the way down the wrench, make a mark on the pipe at correct distance away from center of axle for torque needed with my weight, place my foot directly over mark on pipe and let my weight tighten it until it no longer moves. Did the same with locomotives and steam engines not having torque wrenches that go that high. Old timers in the shops didn’t have fancy torque wrenches. Fish scales and length of leverage calculation.
 
The two techs who pumped down both my systems did not like flare fittings and cut them off at the indoor unit and brazed them. They did use them on the outdoor unit but cut of the factory supplied flares on the line set I had pulled.
Most HVAC guys will cut off the factory flares not trusting them. I do too, having a precision flaring tool that the dies come together exactly, has a depth gauge that inserts tubing the correct amount, and the mandrel has bumps that work the flare into shape without thinning the wall, and polish the inside when loosening mandrel to remove tool. My precision flaring tool also angles the flare a few degrees off, so the flare nut angles the flare to match the seat perfectly when torqued. Wear in dies and mandrel on factory machines may not be as accurate as the tool you’re used to. It takes practice to get it perfect every time. A good flare tool allows cutting lines to exact length, and I made one coil at compressor for vibration. Copper hardens with time and looses flexibility.
 
My dad is wanting to put in a mini split system as well. It might be worth it for the two of us to split the cost of the tools, and get the regular system instead of the DIY.

Am I understanding correctly that you lose the warranty with the regular system unless a pro installs it?

I just ordered the slightly more expensive diy mr cool set for the warranty reason. It’s the only mini split I could find that can be amateur installed and warrantied. What if the non DIY mini is dead on arrival? You got nuthin.

The biggest drawback other than cost for the DIY is that you can’t cut the lineset so you have to coil the extra somewhere and the directions want you to lay this coil horizontally so that oil can’t pool. Not sure if I’ll follow that rule.

For torque wrenches no, you can’t use a crows foot on a regular automotive torque wrench. The settings are high enough like 20 foot lbs but you need an “hvac” torque wrench. These are like 200$. I don’t know why but the professionals are quite consistent that you need an hvac wrench.

Vacuum pump, gauge set, torque wrench, flare tool, pipe cutter. Optional is micron gauge, nitrogen tank, nitrogen regulator.
 
One more thing. I’m running the 10 gauge 30 amp circuit right now and wire costs 50% more at big box stores than at Amazon. Just order it! The 100’ roll of 10/2 was 230$ at Home Depot!
 
I just ordered the slightly more expensive diy mr cool set for the warranty reason. It’s the only mini split I could find that can be amateur installed and warrantied. What if the non DIY mini is dead on arrival? You got nuthin.

The biggest drawback other than cost for the DIY is that you can’t cut the lineset so you have to coil the extra somewhere and the directions want you to lay this coil horizontally so that oil can’t pool. Not sure if I’ll follow that rule.

For torque wrenches no, you can’t use a crows foot on a regular automotive torque wrench. The settings are high enough like 20 foot lbs but you need an “hvac” torque wrench. These are like 200$. I don’t know why but the professionals are quite consistent that you need an hvac wrench.

Vacuum pump, gauge set, torque wrench, flare tool, pipe cutter. Optional is micron gauge, nitrogen tank, nitrogen regulator.
As long as you use the the crows foot on a 90* angle to wrench handle the torque is accurate. If you extend the open end of crows foot forward, away from handle this lengthens wrench from center of square drive to center of flare nut. The wrench will be under torquing since you are lengthing the lever.
 
As long as you use the the crows foot on a 90* angle to wrench handle the torque is accurate. If you extend the open end of crows foot forward, away from handle this lengthens wrench from center of square drive to center of flare nut. The wrench will be under torquing since you are lengthing the lever.
The install manual for the mr coil unit actually disallows socket style torque wrenches and requires the hvac torque wrench.

From a physics perspective, I don’t think it matters which way you put the crows foot on the square drive. It’s just a torque measurement. Both applied and received acting about a central axis.
 
I was looking at the HVAC torque wrenches online. Kind of a weird combination of tools. Something imprecise like an adjustable wrench (all sixteenths. Lol) and something precise like a torque wrench. Kind of funny looking.
 
You guys are really getting into the weeds here with the torque specs. Yes it's a good idea to use a torque wrench, and usually required by the install manual, but the type won't make a difference as long as it's in the right range.

If the warranty wants you to use HVAC wrenches, challenge them to prove that you didn't.
 
  • Like
Reactions: stoveliker
I just ordered the slightly more expensive diy mr cool set for the warranty reason. It’s the only mini split I could find that can be amateur installed and warrantied. What if the non DIY mini is dead on arrival? You got nuthin.
Is this for the house or shop?
 
Is this for the house or shop?
For the house! I’ve been wanting to do this for years. 24k btu but wife doesn’t want the ugly inside unit in the living room so it’s in a less ideal place but fingers crossed.
 
The install manual for the mr coil unit actually disallows socket style torque wrenches and requires the hvac torque wrench.

From a physics perspective, I don’t think it matters which way you put the crows foot on the square drive. It’s just a torque measurement. Both applied and received acting about a central axis.
I guess they wouldn’t approve of my fish scale. A pound of force on the end of a lever is the same no matter what you use, as long as the measuring device is accurate, and length of lever is calculated.
 
For reference, the torque specs we're talking about here are in the range of 20-30 ft-lbs. Nothing super tiny or tight.
 
For the house! I’ve been wanting to do this for years. 24k btu but wife doesn’t want the ugly inside unit in the living room so it’s in a less ideal place but fingers crossed.
Congratulations. I hear you. My wife is a stickler about this stuff too, but we have traveled enough that she has seen mini-splits for a long time and is more used to them. Hopefully, your wife will get used to it quickly, after all, she let the Princess in. ;)
 
  • Like
  • Haha
Reactions: Highbeam and EbS-P
Congratulations. I hear you. My wife is a stickler about this stuff too, but we have traveled enough that she has seen mini-splits for a long time and is more used to them. Hopefully, your wife will get used to it quickly, after all, she let the Princess in. ;)
After a while, you really do not notice them. My wife was the same way but convinced her that the benefits would far outway the "box" on the wall. My wife will not even let me tear off the wood clapboards and change to vinyl siding. She put her foot down on that one. It has and we love our unit. DIY Mr. Cool 24k. I love to take a walk outside and stare at the drain tube pissing out water. Always puts a smile on my face. I was done dealing with window units. I have posted on other threads we use it more days for heat than cooling on the shoulder season to get us to firewood season. Going to put one up at the winterized cabin next year. We have no heat but a wood stove up there.
 
A unit I could install myself without calling out an HVAC guy is a bonus.
I have had little difficulty finding an HVAC guy who is willing to come and do the freon work once I've done the rest of the install. He'll charge $60-80/hour for perhaps 2 hours, plus the cost of refrigerant. Maybe $200.
 
  • Like
Reactions: EbS-P
I’m not sure you can get any name brand unit for 2k.
THE top brand, two-ton, for right at $2K. Of course, this doesn't include the line-set and other installation parts.
 
  • Like
Reactions: EbS-P