
tearing down some walls. It does have insulation in it, but it is r-11. Should be r-13 ( outside walls) Should I reinsulate or will r-11 be fine. Never really used r-11 before.
reinsulate or not
- Thread starter chrisasst
- Start date
-
Active since 1995, Hearth.com is THE place on the internet for free information and advice about wood stoves, pellet stoves and other energy saving equipment.
We strive to provide opinions, articles, discussions and history related to Hearth Products and in a more general sense, energy issues.
We promote the EFFICIENT, RESPONSIBLE, CLEAN and SAFE use of all fuels, whether renewable or fossil.
You are using an out of date browser. It may not display this or other websites correctly.
You should upgrade or use an alternative browser.
You should upgrade or use an alternative browser.
- Status
- Not open for further replies.
SolarAndWood
Minister of Fire
smokinj
Minister of Fire
SolarAndWood
Minister of Fire
btuser
Minister of Fire
chrisasst said:tearing down some walls. It does have insulation in it, but it is r-11. Should be r-13 ( outside walls) Should I reinsulate or will r-11 be fine. Never really used r-11 before.
No way. Don't waste the money. Seal around openings and any penetrations in the sill/top plate.
DuckDog
Burning Hunk
I am, and have been for a while, renovating my house room by room. Not sure how big your space is but in the big scheme of things of it all, it is not going to cost that much. I removed all the traditional fiberglass r-11 for Roxul ComfortBatt r-14. Fire, moisture and "critter" resistant. Cost for me was less that $100 per room. The way I look at it, I will only ever have the drywall off once, might as well do it all since I am there.
I'd remove the R-11 and put R-19 if that 's a 2x4 wall cavity.
You lose a bit of insulation value if you compress it, but if those are old walls with actual 4" studs you'll end up with close to R-19.
If you have a 3-1/2 inch cavity you'll end up with around R-17 which is still better than R-15, R-13 and R-11.
Once the wall is covered back up inside there's not much you can do is except for for add insulation sheathing on the outside.
You can always skim the paper off the R-11 batts and lay them on top of what you've got in the attic.
At a temp diff of 60°F (i.e. 10°F outside), the difference R-11 and R-13 is 60/11 - 60/13 = 0.83 BTU/hr per sqft. If the wall was 15 ft long, this is ~100 sq ft and 83 BTU/hr. Equivalently, it is 0.83/60 *24 = 0.332 BTU per sq ft per degree-day. The 100 sqft wall would be 33 BTU/degday * 5000 degdays = 165,000 BTU per heating season. With oil heat, that would be about $5/yr in energy savings (per 100 sq ft redone).
I'm not getting too excited here.
I would ONLY do it for comfort reasons (i.e. if that room was always cold/unbalanced), but not otherwise. And in that case, I would put polyiso or XPS boards under the drywall to get better than R-13. 1" polyiso (R-6) + R-13 batt might be more like R-20 with the thermal break, saving you $20/yr. Cha-ching!
If the trimwork would be a PITA, do what bill said ^^^^
If the room has a history of being cold, tear out the old, make sure all exterior-to-interior holes/seams are sealed with caulk/foam. Then put in faced r-19.
If the exterior of the home is 15+ years old (i.e. mid 90s or older) and the room has a history of being cold, then also consider adding 1/2 to 1 inch foam sheathing on the studs before drywalling. Attach it via glue and slap it on the studs. Then drywall on top (with screws going into the studs). That'll be more expensive, but it'll really help the room become comfortable.
If the exterior of the home is 15+ years old (i.e. mid 90s or older) and the room has a history of being cold, then also consider adding 1/2 to 1 inch foam sheathing on the studs before drywalling. Attach it via glue and slap it on the studs. Then drywall on top (with screws going into the studs). That'll be more expensive, but it'll really help the room become comfortable.
Hello
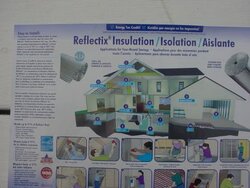
I would add Reflectix foil over the insulation before closing the wall up.
Not only does it add R4 to make your walls R15 but it reflects any interior radiant heat back into the room in the winter so the room is warmer and in the summer it reflects the sun's radiant heat back outside so the room is cooler!! Win-Win situation!!
Another bonus is it also reflects all kinds of radio signals and radio waves that penetrate your skull while you sleep !
!
You can buy it at your local Lowe's or Home depot in 16 " wide rolls and staple it up with a cheap staple gun!!
See pic below!
I would add Reflectix foil over the insulation before closing the wall up.
Not only does it add R4 to make your walls R15 but it reflects any interior radiant heat back into the room in the winter so the room is warmer and in the summer it reflects the sun's radiant heat back outside so the room is cooler!! Win-Win situation!!
Another bonus is it also reflects all kinds of radio signals and radio waves that penetrate your skull while you sleep
!You can buy it at your local Lowe's or Home depot in 16 " wide rolls and staple it up with a cheap staple gun!!
See pic below!
Attachments
PapaDave
Minister of Fire
I had reno'd a room a couple years ago. R-11 in the walls, but that stuff had shrunk or something, because it was only about 2" thick behind the paper. I've never seen that before.
I tore it out and put in r-15 batts. Just my .02
I tore it out and put in r-15 batts. Just my .02
Highbeam
Minister of Fire
All of my walls are handily equipped with foil faced R-5 fiberglass batts. Freaking 1.5" inches thick. Can't even believe they used it but it was 1963 so....
btuser
Minister of Fire
Only 10% of your heat loss is through the walls. So if you take out r11 and squish in r13 you're getting about 18% better which is really only about 1.85% (multiply your heat bill by .0185. Yeah, not that much.) of your current heat loss. I just don't sweat that. You'd save more money by getting a thermostat with a decimal place setting, say 67.89876655444 degrees. Its the infiltration/convection from a non-sealed cavity that's going to get you far more than the marginal gain of R-Value in the wall. Now, I would agree if its 40yr old chewed-up foil-faced stuff that wasn't installed correctly and serious gaps are evident. If its pink and well placed I'd leave it.
I like the idea of the foam board on the inside. It would provide added r-value but more importantly also a thermal break.
I like the idea of the foam board on the inside. It would provide added r-value but more importantly also a thermal break.
joefrompa said:If the room has a history of being cold, tear out the old, make sure all exterior-to-interior holes/seams are sealed with caulk/foam. Then put in faced r-19.
If the exterior of the home is 15+ years old (i.e. mid 90s or older) and the room has a history of being cold, then also consider adding 1/2 to 1 inch foam sheathing on the studs before drywalling. Attach it via glue and slap it on the studs. Then drywall on top (with screws going into the studs). That'll be more expensive, but it'll really help the room become comfortable.
+1, good advice.
mecreature
Minister of Fire
Sometimes the best insulation installed incorrectly will not keep the heat in/cold out. If you do it do it right.
I recently did an addition and remodel. I used eco batts all over.
ECOBATT
new insulation was 2x6 walls, sprayed foam then High density bats. added together Total R-value was suppose to get me real close to 30.
old 2x4 walls I re-did myself. It had unfaced 11 in it. I took it out and replaced it with Kraft faced High density R-15 after hitting all the corners and crevices with foam spray inside and out. I bet mine was a lot older and in worse shape then yours.
I also went like 39 in the ceiling all over old and new.
Everything is sealed up real good now.
peakbagger
Minister of Fire
I am a big fan of opening up the wall, fillign in any voids in the existing insulation, sealing up the outlet boxes by spraying foam on the exterior (making sure to cover the wire penetrations) and then installing 1/2" of taped Isoboard foil faced foam over the wall. I usually leave a gap at the base and foam in the gap so that its tight to the floor. THen I spend a lot of time foaming the window frame and the header above before trimming. Obviously if you dont have reasonably efficient double pane windows its time to change them. If you insist on keeping old windows with sash weights, consider retrofitting them to eliminate the sash pockets.
The combination of getting rid of air infiltration and covering the face of the studs with foam board really makes a difference and also helps smotth out an iregularities in the framing.
The combination of getting rid of air infiltration and covering the face of the studs with foam board really makes a difference and also helps smotth out an iregularities in the framing.
SolarAndWood
Minister of Fire
peakbagger said:and then installing 1/2" of taped Isoboard foil faced foam over the wall
The interior face under the drywall right? I've considered doing an inch on the interior of the windward wall of the house but was told I was wasting money and space. Do you foam under the extension jams as well?
jharkin
Minister of Fire
peakbagger said:Obviously if you don't have reasonably efficient double pane windows its time to change them. If you insist on keeping old windows with sash weights, consider retrofitting them to eliminate the sash pockets.
This is a myth that just wont die, mostly because the window companies make so much money on replacements.
The reality is that the amount of money you save in energy bills on window replacements can often take so long to recover (sometimes 40+ years!) that the replacement windows themselves will have failed and need replacing again. And when they do fail they will probably just have to be replaced completely, unlike old windows that pretty much any DIYer can fix with parts available at any hardware store. In fact, as long as they are maintained and painted periodically old growth wooden single pane windows can last pretty much indefinitely.
A MUCH better option is to weatherstrip that window and add a good quality wood or aluminum storm window. You will get 80% of the benefit of a replacement ant 20% of the cost, with far less labor and maintaining the character of the original windows if you have an old historic house. Typical payback for storms is 5 years or less.
And I can tell you from personal experience that if you rip out the sash weights and put in spring tracks you will curse yourself later when you are fighting with a sticky window that wont budge. Just caulk the wight pocket really good.
http://www.cntenergy.org/media/Alternatives-To-Window-Replacement.pdf
http://mysite.verizon.net/vze7aq8e/sitebuildercontent/sitebuilderfiles/about_old_windows.pdf
http://www.uga.edu/napc/programs/napc/pdfs/Popular Window Replacement Myths.pdf
http://mysite.verizon.net/vze7aq8e/homewindowrestorationwork/index.html
peakbagger
Minister of Fire
I am not sure on which extension jambs you referred to. Prior to mounting the interior casing around the windows and doors, I spray low coefficient of expansion foam between the framing and the extension jambs so it ends up flush with the drywall. Then I mount the interior casing and seal with caulk between the wall and casing (make sure the caulk is paintable).
I use the 1/2" of foam board on the interior. My justification is that the studs "light up" with a thermal camera in a conventional wall while they barely register with 1/2" of foam board. The foam board with foil tape on the seams and foam around penetrations is a real good vapor barrier.
With regards to the comments about window replacement. Economically it may not make sense and if you have a historical structure with high quality windows that is your call on window replacement. I have seen some high quality retrofits of older windows, specifically Windowmaster in New Hampshire does a great job and their hardware holds up well. I also have seen very poor quality track conversions that were installed poorly so you get what you pay for. For many tract homes built post WW2 and many prewar, the single pane windows are low quality with no architectural value and usually have poor hardware, I stand by my recommendation to consider changing these out despite the very long payback. I personally can feel the difference in the amount of radiant heat transmission through a single pane versus a proper double pane. Especially if its living space I use frequently, I dont mind spending some extra money to improve the space despite the hard ecomomics. As for sash pockets, they are a big thermal hole in the wall and storm windows doesnt mitigate it.
I also have double celluar blinds with side tracks installed on many of my windows. I beleive they are R-4 and they make even a bigger difference on a cold day.
peakbagger
Minister of Fire
I bought them from here
http://cellularwindowshades.com/energy_saving_side_track.html.
Before I found these I bough some without the tracks from American Blind. They are okay, but the hardware is a bit lower quality.
http://cellularwindowshades.com/energy_saving_side_track.html.
Before I found these I bough some without the tracks from American Blind. They are okay, but the hardware is a bit lower quality.
SolarAndWood
Minister of Fire
So, if you have a deep enough wall, would you trim the windows out with interior storms and the blind in between to keep the dust out of them?
peakbagger said:I bought them from here
http://cellularwindowshades.com/energy_saving_side_track.html.
Before I found these I bough some without the tracks from American Blind. They are okay, but the hardware is a bit lower quality.
Bummer, they won't work on our big windows. We don't have a flat casing surface, 1.5" from the window. Our windows have a fancy shadow box detail with stepped casing.
- Status
- Not open for further replies.
Similar threads
- Replies
- 1
- Views
- 265
- Replies
- 23
- Views
- 1K
- Replies
- 3
- Views
- 455