Removing FMI 42GC zero clearance and alcove build for Hearthstone Mansfield 8012

  • Active since 1995, Hearth.com is THE place on the internet for free information and advice about wood stoves, pellet stoves and other energy saving equipment.

    We strive to provide opinions, articles, discussions and history related to Hearth Products and in a more general sense, energy issues.

    We promote the EFFICIENT, RESPONSIBLE, CLEAN and SAFE use of all fuels, whether renewable or fossil.

jesse72

New Member
Jul 17, 2023
29
Sparks, NV
Hello all and thanks for all of the helpful info you have created on this forum.

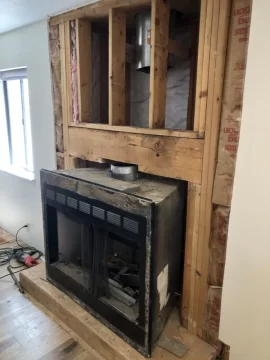
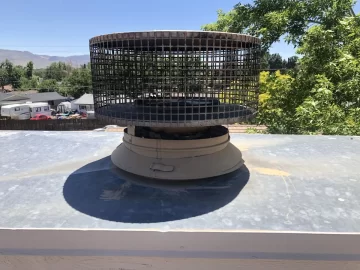
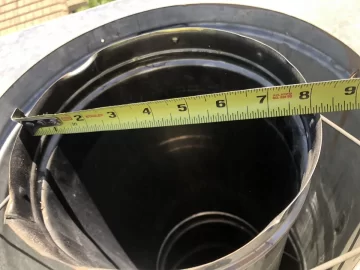
I am in the process of removing an FMI 24GC zero clearance fireplace that was original to the home when it was built in 1988. It has a wood framed / wood sided exterior chase on our 2 story home in which the fireplace is on the first floor. The flue is currently a 12" outer 8" inner double walled air cooled device that I am 99% sure I cannot use for my wood stove...

I played with the idea of using an insulated 6" ID flue liner to increase the heat capacity inside of my existing ZC flue, but I have decided against that, unless you all think that is OK to do? I doubt it though

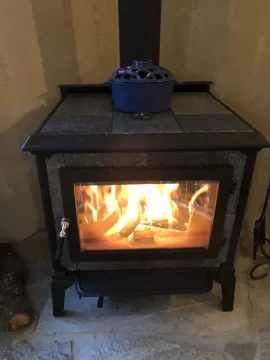
I have a 2017 Hearthstone Mansfield 8012 soapstone stove that I installed in my previous home and then removed and took with us when we sold the home which was in Oakhurst, CA. I love that stove and have really enjoyed it.

So he is my plan:

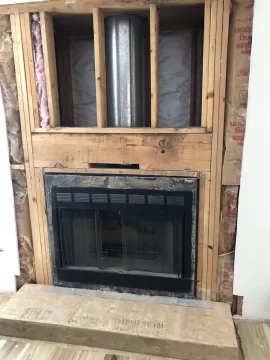
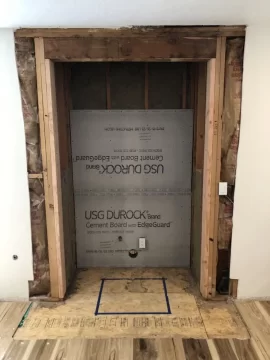
1: Remove old ZC stove (DONE)

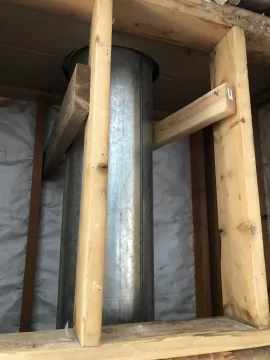
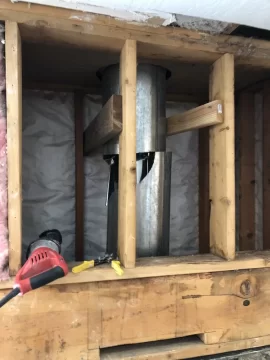
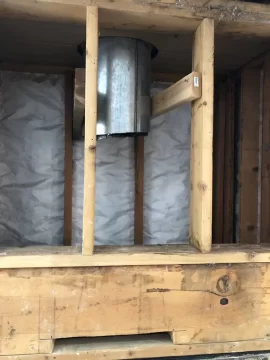
2: Remove old flue

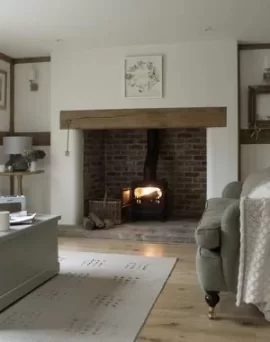
3: Frame an alcove protruding from the wall about 10-12" to allow the stove to sit inside the old ZC framing but also be flush at the front. I don't really want it sticking half way into the room. The first floor is only about 900 sqft and I don't think I will loose much heat by having it in an alcove. The alcove will allow for a small mantle as well and we like the style of it.
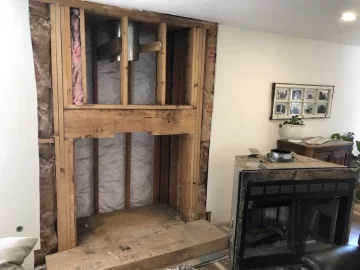
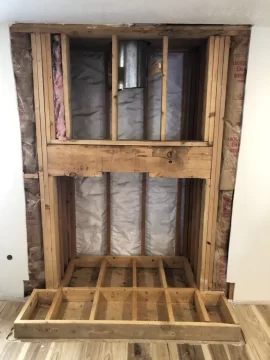
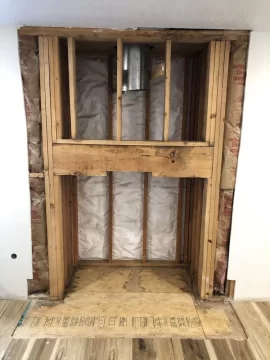
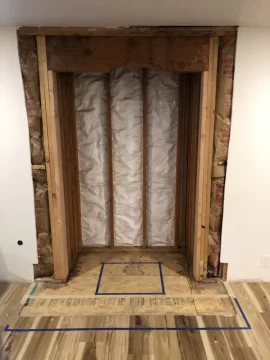
a) my current framing opening is 53" wide, 26" deep and I plan to move the header up to 60" height for a higher mantle.
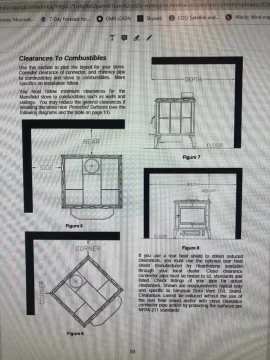
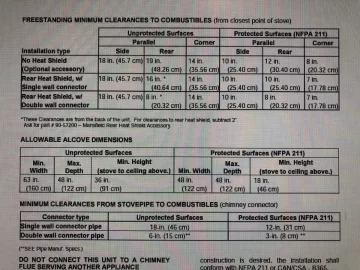
b) Hearthstone allows for 10" clearance per side and 10" in the rear with the blower and shield. (which I have) and 18" above the stove to the alcove ceiling.
c) the minimum size my alcove can be is 48" wide 46" high and 34" deep. Once I add all the heat sheilding I will be at that width and depth but probably about 60" high.
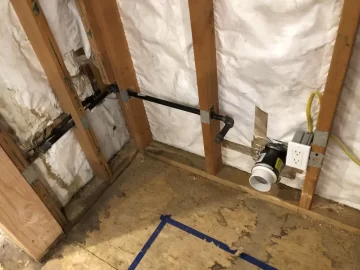
d) the ZC had electrical and gas already ran to it. I want to run the gas line to the rear of the alcove and cap it off, for a possible future gas stove if I ever have to use one.
e) I will run the electric outlet to the rear of the alcove for my blower, adding a wall switch to operate it.
f) I plan to put an outside air supply in the rear of the alcove also, I haven't used that for my stove previously but would like to now.

4: I plan to use metal hat-track channel (horizontally on the studs for air gap) durarock, and brick vaneer to achieve the NFPA 211 non-combustable clearances allowed my Hearthstone. (more questions on that process in future posts!)

- not sure if I should add some roxsul insulation between the studs or not.

5:For the hearth I plan to use durarock and solid brick installed over the 3/4" plywood subfloor.

6: Replacing the existing flue with Class A flue to extend from the stove pipe up through the chase aprox. 22' and install a new or modify the existing chase cap for the smaller size flue. There are 2 fire stops that exist in the chase and I am not sure how I will modify those for the smaller flue

I am sure I am forgetting a few things but that is my rough plan, I have been reading and reading for months to research all of this and I know I will have more questions soon. Feel free to add your thoughts or input and concerns if you have any!

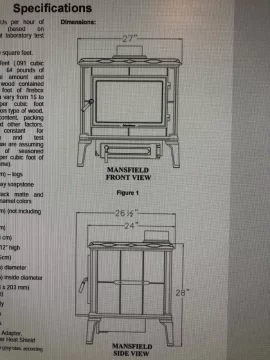
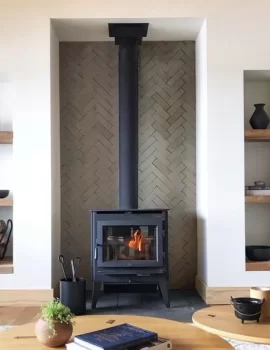
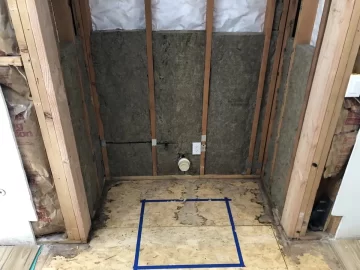
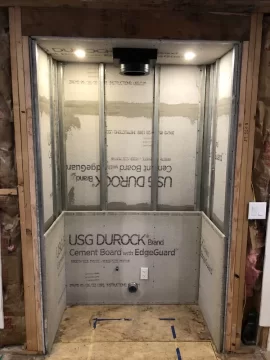
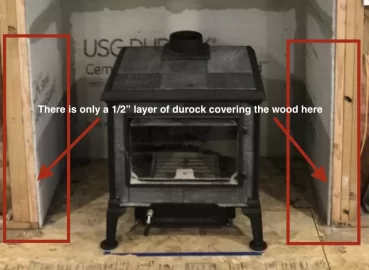
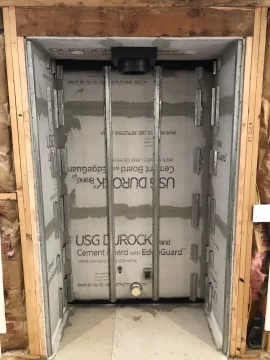
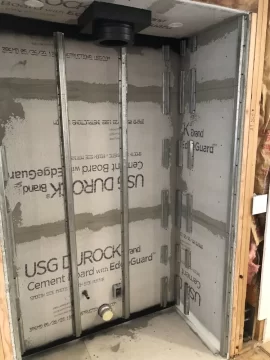
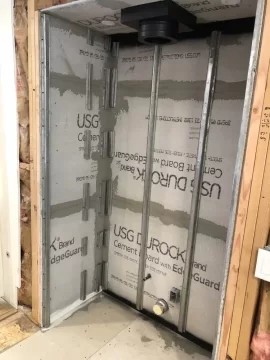
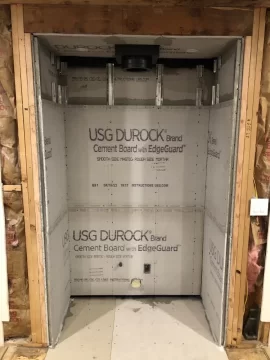
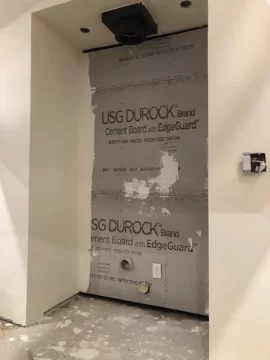
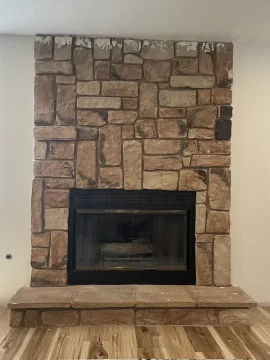
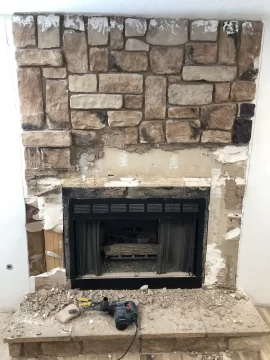
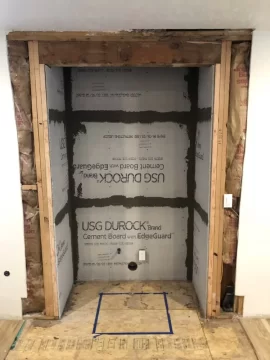
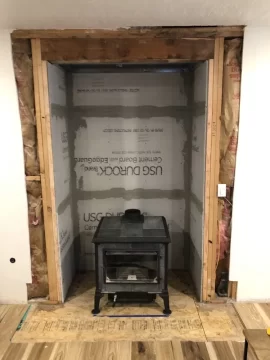
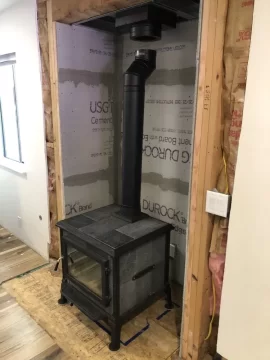
The photos are my ZC removal and the current blank slate that I am in, my Hearthstone Mansfield and an internet picture of the basic idea that I am going for plus some specs on my stove.
IMG_5533.jpeg IMG_4908.jpeg IMG_5702.jpeg IMG_5703.jpeg IMG_5705.jpeg IMG_5706.jpeg IMG_5711.jpeg IMG_5716.jpeg IMG_5721.jpeg IMG_5723.jpeg IMG_5677.jpeg IMG_5681.jpeg IMG_9426.jpeg IMG_0909.JPG IMG_4221.jpeg IMG_4220.jpeg IMG_4222.jpeg
 
Last edited:
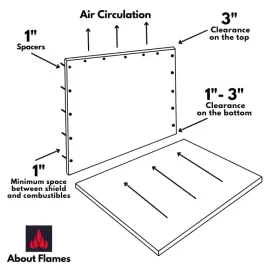
The metal channels should be vertical, following the studs so that the airflow behind them is unimpeded. There needs to be a 1" gap and the top and bottom of the cladding to permit free, convective airflow behind the heatshielding. Will the alcove ceiling be made from metal studs and clad with cement board so that is non-combustible?
 
The metal channels should be vertical, following the studs so that the airflow behind them is unimpeded. There needs to be a 1" gap and the top and bottom of the cladding to permit free, convective airflow behind the heatshielding. Will the alcove ceiling be made from metal studs and clad with cement board so that is non-combustible?
Thanks for your input Begreen,

The alcove ceiling will be metal studs with cement board, that is correct.

Since the existing part of the alcove are wood studs, (I will frame the new part out of metal studs) would you recommend that I sheet the studs with cement board directly, then add the vertical metal channels, and then another layer of cement board on top of the metal channels? That way the air gap is not heating the wood studs?

-Or- is it acceptable to put my metal channel directly onto the existing 2x6's?

I think I will use roxsul to insulate between the studs as well

Thanks again!
 
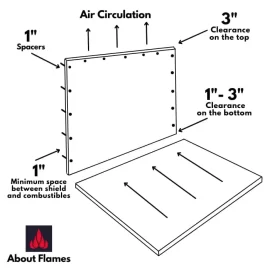
There is no need for metal channels unless you want to use them instead of metal studs. The cement board can be attached to the studs directly. Use the heavier gauge studs, not the flimsy light-duty ones. You could also cut 3" strips of cement board and double them up to make 1" thick firring strips on the studs. The key issue to keep in mind is that the hot air behind the shield needs to be always vented. This is the purpose of the 1" gap at top and bottom.
 
Sounds good, thanks for that. I didnt think about cutting strips of cement board for the air gap
 
There is no need for metal channels unless you want to use them instead of metal studs. The cement board can be attached to the studs directly. Use the heavier gauge studs, not the flimsy light-duty ones. You could also cut 3" strips of cement board and double them up to make 1" thick firring strips on the studs. The key issue to keep in mind is that the hot air behind the shield needs to be always vented. This is the purpose of the 1" gap at top and bottom.
In regards to the air gap at the top and bottom to allow vertical ventilation:

How can that 1" gap be concealed? It seems like a person cannot add their tile or veneer over that gap otherwise it would be useless.
I don't think that it will be very great to have a gap at the bottom of the alcove allowing debris to build up in and won't be very visually apealling.

Wood-stove-heat-shield-spacers.jpeg
 
In practice, from other pictures posted, the 1" gap is barely visible.
 
  • Like
Reactions: jesse72
In regards to the air gap at the top and bottom to allow vertical ventilation:

How can that 1" gap be concealed? It seems like a person cannot add their tile or veneer over that gap otherwise it would be useless.
I don't think that it will be very great to have a gap at the bottom of the alcove allowing debris to build up in and won't be very visually apealling.

View attachment 314077
Thanks for your input Begreen,

The alcove ceiling will be metal studs with cement board, that is correct.

Since the existing part of the alcove are wood studs, (I will frame the new part out of metal studs) would you recommend that I sheet the studs with cement board directly, then add the vertical metal channels, and then another layer of cement board on top of the metal channels? That way the air gap is not heating the wood studs?

-Or- is it acceptable to put my metal channel directly onto the existing 2x6's?

I think I will use roxsul to insulate between the studs as well

Thanks again!
Hello. Jesse72: Any updates on your completed project? I am in the process of a similar project and would like to install a Lopi Evergreen stove into an existing alcove our builder installed for a gas fireplace. When researching the fireplace that was included in the home pricing, we decided to skip the install since it was a very cheap / inexpensive gas fireplace (junk) and decided to have them drywall over the bumpout / alcove and just get a credit upon completion of the home build. I am ready to start removal of the drywall and expose the alcove, and was curious on how you created your "non-combustible" section within the wood studed alcove.
Thanks,
 
  • Like
Reactions: jesse72
chuch68: Thanks for asking! Ive been meaning to update this for a while and havent gotten to work on it much until the last couple days.

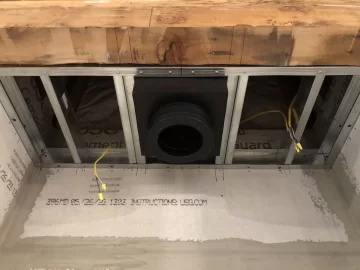
We changed out mind on the design style a little and deleted the mantle and raised the alcove ceiling all the way up. The first pic is the new design idea.

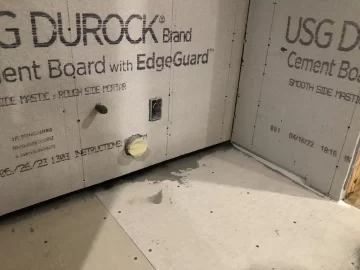
There was already gas supplied to the old ZC fireplace so I routed it to the rear of the alcove for possible future use (you never know).

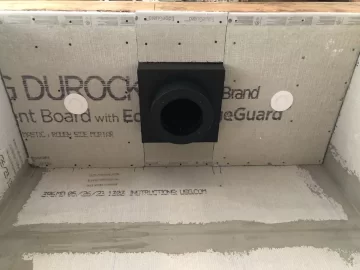
I added a outside air vent for possible use too, not sure if I will use it or not. (Also, the PVC adaptor is now a metal one)

I also added an outlet with a switched plug and a hot plug, as well as wired the ceiling for 2 lights on a dimmer

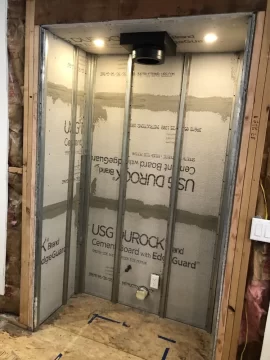
I insulated the whole thing with Roxul

I framed the alcove ceiling with metal track and studs, using the extra heavy gauge studs for the ceiling support box

Installed a layer of DuraRock directly to the studs.

To achieve my 1" air gap I used "hat track" vertically on the studs over the first layer of DuraRock

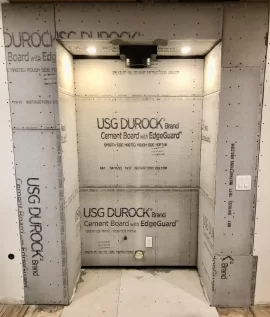
Now I am in the process of finishing the second layer of DuraRock on the hat track. After that I will use more mortar and tape to seal it up.

The back of the alcove will be tile, as will the floor, the sides will be smooth wall finish to match our other walls.

I hope this helps! Any comments or concerns please let me know

IMG_5911.jpg thumbnail_IMG_5940.jpg thumbnail_IMG_5986.jpg thumbnail_IMG_6028.jpg thumbnail_IMG_6034.jpg thumbnail_IMG_6067.jpg thumbnail_IMG_6681.jpg thumbnail_IMG_7122.jpg thumbnail_IMG_7329.jpg thumbnail_IMG_7724.jpg thumbnail_IMG_7730.jpg thumbnail_IMG_7736.jpg
 
chuch68: Thanks for asking! Ive been meaning to update this for a while and havent gotten to work on it much until the last couple days.

We changed out mind on the design style a little and deleted the mantle and raised the alcove ceiling all the way up. The first pic is the new design idea.

There was already gas supplied to the old ZC fireplace so I routed it to the rear of the alcove for possible future use (you never know).

I added a outside air vent for possible use too, not sure if I will use it or not. (Also, the PVC adaptor is now a metal one)

I also added an outlet with a switched plug and a hot plug, as well as wired the ceiling for 2 lights on a dimmer

I insulated the whole thing with Roxul

I framed the alcove ceiling with metal track and studs, using the extra heavy gauge studs for the ceiling support box

Installed a layer of DuraRock directly to the studs.

To achieve my 1" air gap I used "hat track" vertically on the studs over the first layer of DuraRock

Now I am in the process of finishing the second layer of DuraRock on the hat track. After that I will use more mortar and tape to seal it up.

The back of the alcove will be tile, as will the floor, the sides will be smooth wall finish to match our other walls.

I hope this helps! Any comments or concerns please let me know

View attachment 315950 View attachment 315951 View attachment 315952 View attachment 315953 View attachment 315954 View attachment 315955 View attachment 315956 View attachment 315957 View attachment 315958 View attachment 315959 View attachment 315960 View attachment 315961
Looks great, thanks for posting the photos! That is exactly what I have planned but I am still unsure how to actually vent the 1" air gap between the furring channels and the wood studded walls. There would be a 1" air gap between both layers of durock, but how does this air gap actually vent? As someone stated in a previous post, there should be a min gap of 1" at the bottom of the side / back walls and 3" at the tops. This would look strange after adding the final finish materials (tile, stone veneer, etc.). I do not see these gaps in your second layer of Durock. Thanks again!

1695995920450.png
 
I don't see the required air gap, nor the required protection at the front of the hearth from the framing studs. In this case, the opening should be 74" without proper protection. 1/2" of cement board is not enough.

Screenshot 2023-09-29 at 12.30.27 PM.png
 
Last edited:
I don't see the required air gap, nor the required protection at the front of the hearth from the framing studs. In this case, the opening should be 74" without proper protection. 1/2" of cement board is not enough.

View attachment 315975
Hi Begreen, thanks for the input! The picture you referanced was just a mock up to see how the stove fit and to check my clearances. If you look at pictures after that one you will see the air gap created by the hat track. I will also be covering the face of those wall studs with cement board. Im not finished yet, and will post some more pictures as I continue on.

Also, in this situation where I have covered the wood studs in the alcove with cement board prior to creating the air gap; would it technically need the top and bottom venting? Since there is no combustable material directly behind the air gap? I appreciate your input as it can be difficult to navigate the particulars in a uncommon installation like this
 
Last edited:
Looks great, thanks for posting the photos! That is exactly what I have planned but I am still unsure how to actually vent the 1" air gap between the furring channels and the wood studded walls. There would be a 1" air gap between both layers of durock, but how does this air gap actually vent? As someone stated in a previous post, there should be a min gap of 1" at the bottom of the side / back walls and 3" at the tops. This would look strange after adding the final finish materials (tile, stone veneer, etc.). I do not see these gaps in your second layer of Durock. Thanks again!

View attachment 315965
chuck68, thanks for the comments! This process has been a pain to figure out, as its not a very standard install. Trying to decipher NFPA211 as a non professional isn't easy.

I am still unsure the way to vent the top and bottom without it looking terrible . I have seen 0 examples and every hearth surround I see on here is missing that aspect.

I think, in my mind that if there is cement board directly on the studs, then a 1" air gap, then more cement board over that then does it really need to be vented at top and bottom?
Thanks for all of your pics and ideas on your project! Looks great so far! I am an electrical engineer, so I am not an expert at this type of project. I would think that even though there is a 1" air gap between (actually trapped between), we still need to have some sort of natural convection airflow between them to vent the the heat out of the space. i have no idea (yet) as to how to keep this space vented yet either....
 
Also, in this situation where I have covered the wood studs in the alcove with cement board prior to creating the air gap; would it technically need the top and bottom venting? Since there is no combustable material directly behind the air gap? I appreciate your input as it can be difficult to navigate the particulars in a uncommon installation like this
Yes, the first back layer of cement board doesn't really make any difference as far as NFPA 211 clearance reduction goes. It may afford more protection but no one knows how much as it has not been tested. The air gap, top and bottom on the other hand, does make a significant difference. Without it, heat gets trapped in the cavity which becomes a vertical oven of a sort instead of a well ventilated shield. With proper shielding, the clearance drops down to 12 inches.
 
Thanks for all of your pics and ideas on your project! Looks great so far! I am an electrical engineer, so I am not an expert at this type of project. I would think that even though there is a 1" air gap between (actually trapped between), we still need to have some sort of natural convection airflow between them to vent the the heat out of the space. i have no idea (yet) as to how to keep this space vented yet either....
Yeah I agree on not wanting to have trapped hot air in the space. I am trying to find some kind of thin grate type of material that could be used to conceal the top and bottom venting gap.
 
Yes, the first back layer of cement board doesn't really make any difference as far as NFPA 211 clearance reduction goes. It may afford more protection but no one knows how much as it has not been tested. The air gap, top and bottom on the other hand, does make a significant difference. Without it, heat gets trapped in the cavity which becomes a vertical oven of a sort instead of a well ventilated shield. With proper shielding, the clearance drops down to 12 inches.
thank you for the link, that is helpful. I understand and do not want to have the hot air trapped in the air gap either, doesnt seem like a smart idea
 
Yeah I agree on not wanting to have trapped hot air in the space. I am trying to find some kind of thin grate type of material that could be used to conceal the top and bottom venting gap.
If the 1" high gap is painted black inside it will just look like a shadow line. The only one to really notice it may be you.
 
If the 1" high gap is painted black inside it will just look like a shadow line. The only one to really notice it may be you.
Thanks and I think that would help for sure. Brainstorming with the boss (wife) on how we can make it work for her visually...

I absolutely want to do it the right and safe way!
 
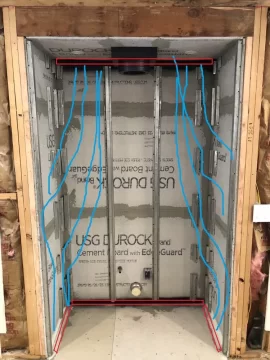
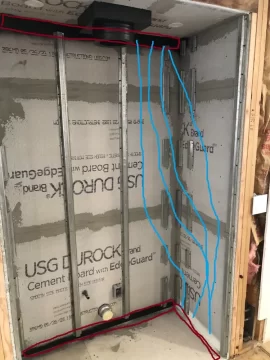
Well I have added the air gap with the top and bottom venting....with a small twist and I think it will work out just fine. Open to scrutiny but it is pretty much a done deal at this point.

Since only the back wall will be tiled (black herringbone) I painted the vent gap black. The side walls will be smooth drywall and painted off white, so I painted the gap white. However, I did not add a vent gap at the top of the sides to prevent it from looking terrible, only at the bottom is there a vent gap (see my crappy edited pics)

I used the hat track channel and cut it into sections on the side walls to allow air to flow up from the bottom vent and cross to the back wall where the venting should allow the heated air to be pulled into the top vent. Gas follows the path of least resistance correct?

Anyways, that was my wife's compromise on how it will look the best and I feel safe about it. let me know what you think!😬

IMG_8177.jpeg IMG_8178.jpeg IMG_8179.jpeg thumbnail_IMG_8177.jpg thumbnail_IMG_8178.jpg
 
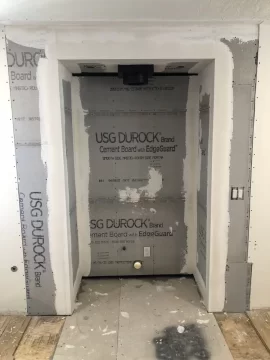
And here is where we are at the moment, almost done with the smooth wall texture. Then we can paint the side walls and tile the floor and rear!

IMG_8193.jpeg IMG_8195.jpeg IMG_8243.jpeg IMG_8282.jpeg IMG_8385.jpeg
 
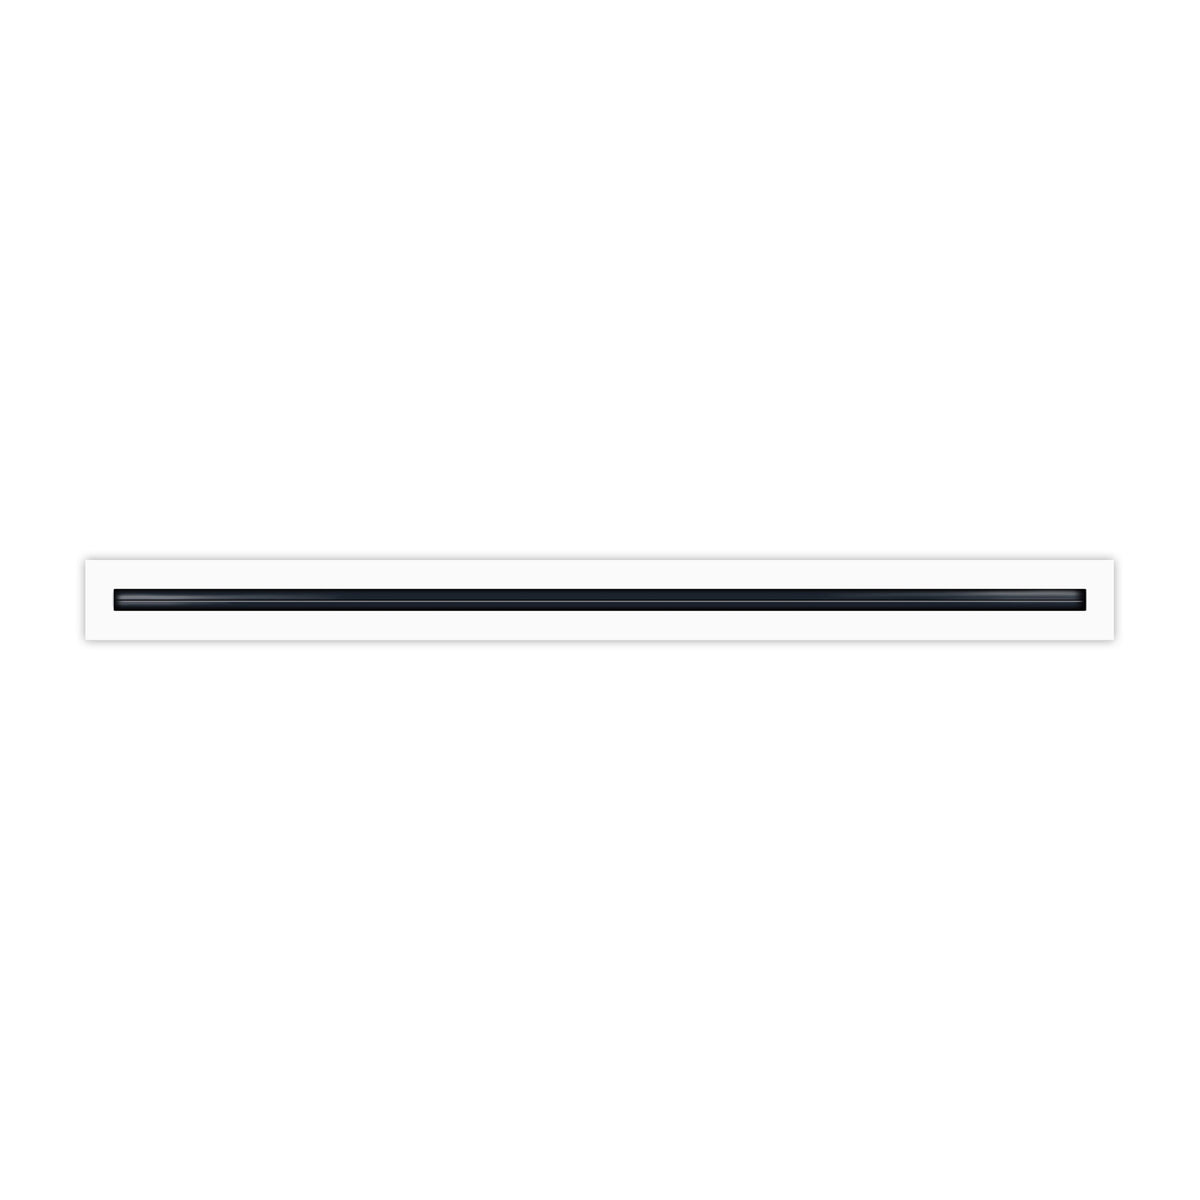
The sides of the stove are radiant. The side shields need air to convect behind them as much as the back does. Best to cut in a slit vent at tops of the side walls or the heat shielding is invalid. Maybe add a 1" slot diffuser at top?
 
The sides of the stove are radiant. The side shields need air to convect behind them as much as the back does. Best to cut in a slit vent at tops of the side walls or the heat shielding is invalid. Maybe add a 1" slot diffuser at top?
Thanks for that link, I was just showing those to my wife the other day. That's a good idea and would blend well and could be added after the fact as well