SS liner and insulation

  • Active since 1995, Hearth.com is THE place on the internet for free information and advice about wood stoves, pellet stoves and other energy saving equipment.

    We strive to provide opinions, articles, discussions and history related to Hearth Products and in a more general sense, energy issues.

    We promote the EFFICIENT, RESPONSIBLE, CLEAN and SAFE use of all fuels, whether renewable or fossil.
Status
Not open for further replies.

tkirk22

New Member
Hearth Supporter
Nov 20, 2007
299
VA Mountains
I'm still trying to figure out what to do for a liner.

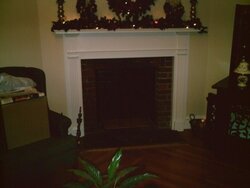
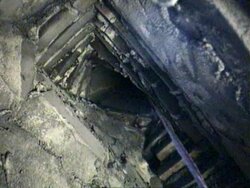
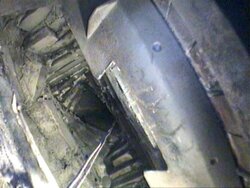
It's a 1940s home with an interior flue and I'll be putting a small insert into the brick fireplace. The flue is 8x12 clay tiles but they start about 3 feet above the firebox. The 3 foot unlined section also has a 45 degree twist (like a drill bit) in it to accommodate the corner fireplace. The distance from the top of the stove to the top of the chimney is 20.5 feet.

That's where my dilemma is. I can't use a 6" round SS insulated liner because it won't fit. If I go with a 5x7 oval liner, how will it handle the chimney twist? I've never handled stainless liners or the wrap insulation. If I "funnel-ize" the lower end of the liner and drag/push it through the twist is the insulation wrap strong enough to hold up without shredding or tearing? Is an oval liner flexible enough to be twisted that much without the seams breaking?

Would I be better off using a 6" round liner and bagged insulation: http://www.chimneylinerdepot.com/store/comersus_viewItem.asp?idProduct=57

Dilemma 2: The chimney sticks out 22" above the roof peak so I'm 14 inches short of the 3 foot rule. What's the best way to handle that 14 inches?

Kirk
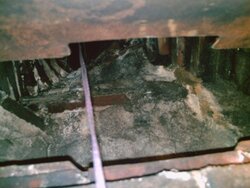
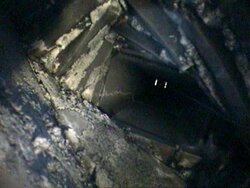
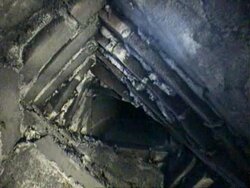
PS I tried to show the twist on the right photo. Sorry for the bad quality. I should have some better ones soon.
 

Attachments

  • SS liner and insulation
    PICT0003.jpg
    24.7 KB · Views: 810
  • SS liner and insulation
    PICT0007.jpg
    42.2 KB · Views: 808
You can test if the oval is going to go around that corner by using an ovalized piece of rigid pipe about a foot long or so. You should use the poured insulation as it will do a good job and be permanent for this liner install. If you could get a kit with mostly rigid and a flex coupler for the bend, that might be a good option as smooth pipe performs (draft and clean) very well. If this leaves you wondering, call in a pro installer for an estimate and you will get great input on the problem.
 
Couple questions......

and comments.

1. Interior or exterior chimney?
2. What stove or insert? or range of models?
3. How large is that damper area?

As per your pic, fireplace looks mostly interior. If up to code, that means it does not even need lined! Obviously a liner is best, especially since it will save you have to reparge your smoke chamber to spec, etc.....

As to the top of the chimney, most installers would be relatively comfortable running up to one foot of single wall at the top after the sealing plate, but if you want to do a better job you can surround that with one of my little inventions:
http://www.extendaflue.com

Look at the Proper Toppers- the CC1212 will work in some form (with interior adapter).

I'll wait for the other answers to give suggestions on the liner.
 
Webmaster said:
Couple questions......

and comments.

1. Interior or exterior chimney?
2. What stove or insert? or range of models?
3. How large is that damper area?

As per your pic, fireplace looks mostly interior. If up to code, that means it does not even need lined! Obviously a liner is best, especially since it will save you have to reparge your smoke chamber to spec, etc.....

As to the top of the chimney, most installers would be relatively comfortable running up to one foot of single wall at the top after the sealing plate, but if you want to do a better job you can surround that with one of my little inventions:
http://www.extendaflue.com

Look at the Proper Toppers- the CC1212 will work in some form (with interior adapter).

I'll wait for the other answers to give suggestions on the liner.

Thanks.

The chimney is interior.
I'm planning on an Englander 13 insert.
The damper was 5" deep by about 32" wide but I cut it out to about 7" deep in the middle.

It's my understanding that I don't need insulation or a stainless liner on the tile lined portion but I would like to use a full length liner for additional safety and ease of cleaning.

Kirk
 
Kirk,
I have a corner chimney as well, and had a hell of a time getting my 6" liner down through the twists and turns. My problem was exacerbated by the fact that we had our chimney repaired and relined with a poured masonry liner that ended up being 10" round, but they had to hand carve out the last bit to get down to my fireplace. I had to have them come back out and chisel away some of their poured liner so I could get my ss liner down. I'm not sure what it looks like in your chimney now, but do a lot of research and ask alot of questions here before purchasing anything. Will that stove accept a 5.5" liner?
 
Full liner is best. I would skip the insulation in your case due to fit. Use 5.5" liner is needed, or slightly ovalized 6".
If you want to insulate the portion that goes through the smoke chamber (not usually required, all smoke chambers are unlined with tile - but your chamber looks a little suspect), then pull liner up from bottom...easier to insulate bottom.

Effectively, you would accomplish the same thing by making certain (with spacers, etc.) that your liner did not rest against the rear of the smoke chamber (where ever that is possible.

Alternative is using rigid liner that is hardly more then 6" OD, and slightly ovaling if needed, but this may be tough to connect to for the last 6-8 feet (with flex) at the bottom.

Most flex should be able to twist like that if slightly oval. Check with the vendor if unsure. That pic describes it well.

The usual disclaimers apply (from afar), but I think you can check with the factory guys (point them to this thread - they hang out here) as to whether this is kosher advice.
 
I got some screen caps off my video camera. I think they show the smoke chamber situation a little better.
 

Attachments

  • SS liner and insulation
    Fireplace009.jpg
    38.5 KB · Views: 688
  • SS liner and insulation
    Fireplace010.jpg
    36.8 KB · Views: 702
  • SS liner and insulation
    Fireplace013.jpg
    41.6 KB · Views: 699
  • SS liner and insulation
    Fireplace015.jpg
    40.2 KB · Views: 699
That looks like a pretty good shot to the top.
 
Yeah, I don't think the twist will be any problem.

In an old well-built place like that, the smoke chamber is likely to be more than thick enough, but for a margin of safety I would still suggest insulation if possible from a few inches below the tile to where it is no longer touching the brick. As mentioned, this ideally could be done by pulling the thing up from the bottom.....or, putting it from the top, pulling it down TOO FAR, wrapping and then pulling up some again.

Or, as I mentioned, some sort of stand-off just to keep it from leaning against the rear brick....anything helps.
 
Thanks a bunch guys. This forum has really helped me a great deal.

I think the flue looks worse in real life but I'm now confident that it's do-able. I'm going to go with slightly ovalized 6".

I'll be sure to take pictures of the install.
 
I'd use perlite for insulation. Much cheaper than the commercial products, doesn't hold much water and readily available at your local garden center.
 
Are all liners created equal that are 316 Ti.

Homesaver liners seem very sturdy. How does Foreverflex compare?
 
Liners are a whole subject unto themselves, with dozens of types and grades available. Many of the warranties are useless, especially if they do not include installation - so read them carefully if you care about that.....like "you remove your old liner, send it back, and if we determine it was not abused we will send....", etc.....

Of course, you can hardly expect them to cover expensive installation, and that is why some folks might buy a better liner in the first place. But very few people do. Out of sight, out of mind - good price, easy sale.

So the answer is that liners and liner systems are very different. It does not mean that the cheap ones will fall apart or wear through in your application!

As an example, rigid liner (heat-fab) is 4 to 5 times as thick as the thinner flex. That is a big difference.

Many liners are simply pressed together out of strip of thin metal. Some are actually welded along the entire way!
For instance, look at this page: (scroll down)
http://www.protechinfo.com/ventinox.html

See the welded seams? Again, I am not saying the others will not work - but just that there is a difference when you pay more.
 
Webmaster said:
So the answer is that liners and liner systems are very different. It does not mean that the cheap ones will fall apart or wear through in your application!

I was researching this last night and frankly, It's confusing. Based on the websites, they all seem to be the very best in the known universe. I did find some initial parameters to help me narrow things down a little.

For Flexible liners:
Some are UL listed, some don't mention a UL listing, and some are only tested to UL standards.
Some of the thin walls are .005" and some are .006"
Some can be hand ovaled and some are made ovaled and must stay that way.
Some are closer to the nominal size (ex 6") and others are up to 1/2" wider.
There's a flexible smooth wall that's not good, and a new flexible smooth wall that may be good.
Some dealers have good support including weekend phone support.
Some dealers have really annoying marketing BS on their websites and use multiple associated sites in an attempt to back up their claims of awesomeness.
I haven't formed an opinion of the welded vs stamped liners yet. I suspect that the welded (if welded properly) is going to withstand more installation abuse but, once installed, the stamped may handle heat cycling better over a very long time.
There's also different stainless alloys used but 316TI seems to be the preferred one. ??????

I'm sure there's other go/no-go parameters that would help someone narrow down the list.
 
Well I work for the company Magnaflex and we are a small company in a big industry.. When I say that we do alot of jobs that our customers ask us to do that the big guys say no to.... When it comes to welded flex and crimped flex... well you will get different stories... We sell crimped flex and we've been doing it for years... no offense to the guys that provide welded flex but welds do break. The problems occured from crimped flex are due to the operator of the machine not paying attention. But, the same issue occurs with welded flex if the operator of the machine isn't paying attention and the weld looses the ground then you have a pipe that isn't seamed correctly... and I have seen 300 ft of flex all fall apart because a pipe wasn't welded together correctly..
 
I stuffed the liner in yesterday. Here's what happened:

To recap: It's an 8x12 clay flue with a 45 degree twist near the bottom. The inside of the top tile was 6.5" by 10.?? and 6.25" on the second tile.

I used a 6" foreverflex liner and ovaled it myself to 5 1/8" thick. I used a wooden jig to to oval the liner tube as uniform as possible. Then I added the 1/2" insulation and wire mesh. I made sure the insulation overlapped on the wide side.

I'm short on help especially roof climbing help so my initial plan was to make a crane of sorts to pull the liner 25 feet above the chimney and then drop the liner straight down. I built a mount for an 24' aluminum pole in the second flue. The pole was made from our 16' flag pole and another 8' borrowed from the neighbor. It seemed like a good idea but after I added on that extra 8 feet the pole was just too darn flexible for my liking. It was also too heavy and long for me to mount safely by myself. Scratch that bright idea.

So we make a call for a cherry picker. He's got a 60 foot reach. It took that man longer to setup the truck than it did to drop the liner in place. My wife was supposed to take photos but it happened too fast. I was sweating it the whole time. I was planning on the liner getting stuck at the transition into the area above the smoke chamber. I even marked the 'stuck' point on the insulation cover. Either way, that would have been far enough for me as I wouldn't need the truck after that point. It did fit through though. It slid down easily onto the damper where it sits right now.

Now I have to re-round the liner to fit past the cut out damper but that's not a big deal. It needs to be round on the top and bottom to fit in the stove connector and my chimney extension.

I'm going to frame the insert in granite and make the floor protection with granite. I think I have all the material and tools now. Hopefully that will be tomorrow and Tuesday. hopefully....

I took pictures of what I could. I'll start a new post once everything is installed. I think it will help someone.
 
Status
Not open for further replies.