
Hi all. We ordered a new Mansfield from Preston Trading Post here in CT and it's being delivered Thursday. This stove is replacing an old Nashua that had been installed in the 1970's by the previous owners. Unfortunately, the purchase of the stove has created a host of problems and a ton of projects.
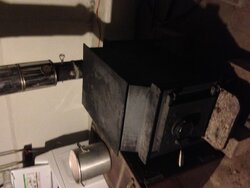
I'm trying to install the stove to the best of my ability and according to specs. First, are a couple of pics of the old Nashua. There was a full brick half wall around the stove in front of the wall paneling but I tore that down when I discovered that they had run wiring under the bricks in the mortar.

.jpeg")

This has turned into an entire gut job and I have rewired the entire room, fixed improper framing, removed mold, insulated with Roxul and installed plywood, hardibacker and tile on the walls and floors. Grouting was finished yesterday. Where I am having a problem is with running the pipe through the wall into an existing masonry chimney that was recently rebuilt and has a good terra cotta flue liner. As you can see there are windows to either side of the chimney.
I plan on using Class A Selkirk Metalbestos through the wall passing through a wall thimble, part number 6T-IWT. The Metalbestos piece in the pic is just for fitting purposes. I will be using a much longer piece. I thought that I had researched this but now am doubting myself. The thimble specs are different from what I was given. If the class A is placed in the wall without the thimble, then the clearances to the nearest 2x4 on either side of the pipe are 2 1/2". Once the thimble is installed it reduces this number to about 1/2" on either side of the thimble.
Is this acceptable? can either side (round or square)of the thimble be used facing the inside of the house? The instructions make it appear that it's designed to be installed from both sides of the house which is not possible because of the masonry chimney. I plan on cutting the mounting ears down a bit and using tap cons and high temp silicone to attach it to the chimney. The interior side will probably be attached with silicone only so I don't ruin any of the masonry work I did drilling holes.
The round side of the thimble is black and the square side appears to be galvanized. The round portion will not cover the entire hole in the wall from the interior so I am hoping to use the square side on the interior and paint it black.
Any help is greatly appreciated. Right now we are burning the old Warner stove in the basement and it's consuming a ton of wood and leaving a six inch deep coal bed. The house is warm but it's wasting wood. THANK YOU .

.JPG")
.JPG")
.JPG")
I'm trying to install the stove to the best of my ability and according to specs. First, are a couple of pics of the old Nashua. There was a full brick half wall around the stove in front of the wall paneling but I tore that down when I discovered that they had run wiring under the bricks in the mortar.
This has turned into an entire gut job and I have rewired the entire room, fixed improper framing, removed mold, insulated with Roxul and installed plywood, hardibacker and tile on the walls and floors. Grouting was finished yesterday. Where I am having a problem is with running the pipe through the wall into an existing masonry chimney that was recently rebuilt and has a good terra cotta flue liner. As you can see there are windows to either side of the chimney.
I plan on using Class A Selkirk Metalbestos through the wall passing through a wall thimble, part number 6T-IWT. The Metalbestos piece in the pic is just for fitting purposes. I will be using a much longer piece. I thought that I had researched this but now am doubting myself. The thimble specs are different from what I was given. If the class A is placed in the wall without the thimble, then the clearances to the nearest 2x4 on either side of the pipe are 2 1/2". Once the thimble is installed it reduces this number to about 1/2" on either side of the thimble.
Is this acceptable? can either side (round or square)of the thimble be used facing the inside of the house? The instructions make it appear that it's designed to be installed from both sides of the house which is not possible because of the masonry chimney. I plan on cutting the mounting ears down a bit and using tap cons and high temp silicone to attach it to the chimney. The interior side will probably be attached with silicone only so I don't ruin any of the masonry work I did drilling holes.
The round side of the thimble is black and the square side appears to be galvanized. The round portion will not cover the entire hole in the wall from the interior so I am hoping to use the square side on the interior and paint it black.
Any help is greatly appreciated. Right now we are burning the old Warner stove in the basement and it's consuming a ton of wood and leaving a six inch deep coal bed. The house is warm but it's wasting wood. THANK YOU .
.JPG")
.JPG")