screwed up my firebox

  • Active since 1995, Hearth.com is THE place on the internet for free information and advice about wood stoves, pellet stoves and other energy saving equipment.

    We strive to provide opinions, articles, discussions and history related to Hearth Products and in a more general sense, energy issues.

    We promote the EFFICIENT, RESPONSIBLE, CLEAN and SAFE use of all fuels, whether renewable or fossil.
Status
Not open for further replies.

overnighter

New Member
Nov 24, 2014
15
NE OHIO
I had a Regency 3100 installed this winter and I had a question about installation. My authorized dealer said they installed many Regency fireplaces. Well, I did upgrade the stainless chimney liner and the installer used the screws from that kit rather than the ones included by Regency. He wasn't aware that the Regency kit included the hardware because most other brands he installed doesn't.
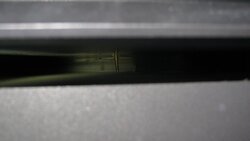
Well, to the point, the Regency hardware screws to install the chimney liner are much shorter than the ones the installer used, approx. an inch. What this means is that the self threading screws were too long and started to thread into the top of my firebox maybe 2-3mm.
What should I do about this? This is my first fireplace insert and I don't know what this could mean long term. I haven't brought this up to the dealer yet. Any insight or suggestions are much appreciated.
 
Are you saying they penetrated the baffle in the top of the firebox?
 
Is this an insert? the 3100 is not i dont really understand what problem you are describing
 
Yes it is an insert.
 
Yes it is an insert.
ahhh i see that now so it is 3100i I doubt that self tappers went into the actual bod of the stove very far at all i doubt it is an issue
 
If they were too much longer than the ones that came with it, as the OP said, they could drill into the the brick baffle sections.
 
they would have to be 2" screws to do that. If i remember correctly there is an outer shell then about 1" space till the top of the firebox which the self tappers would have to drill through(which is unlikely) then at least another inch till the baffle
 
Let's wait to see what the OP says. He said at least an inch longer than the Regency screws. If those are an inch...

But the long and short of it is that if they are screwed into those baffle panels, either the installer or the dealer owe the OP new baffle panels.
 
The regency ones are 1/2" at most
 
It's sounds like the installer secured the liner with long screws that went through the outer convection wall of the stove and slightly pierced the firebox. The firebox is what, 1/4" thick? It's probably not an issue.
In order to have hit the baffle the screws would have had to penetrate the outer wall, stovetop, and then the 1 1/2" of air space above the baffle. I does not sound like this is what happened.
 
  • Like
Reactions: bholler
It's sounds like the installer secured the liner with long screws that went through the outer convection wall of the stove and slightly pierced the firebox. The firebox is what, 1/4" thick? It's probably not an issue.
In order to have hit the baffle the screws would have had to penetrate the outer wall, stovetop, and then the 1 1/2" of air space above the baffle. I does not sound like this is what happened.
Sounds like what happened. I do have some mediocre pictures that might help illustrate the question.
IMG_6179.JPG IMG_6180_1.JPG
 
Last edited by a moderator:
yeah that is not a problem at all
 
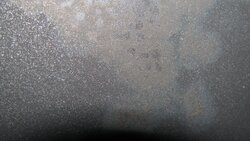
I burned a fire every day since Thanksgiving and have noticed some discoloration near the hot air vents. It seems like minor dimpling in the metal
IMG_6203.JPG IMG_6204.JPG
where the paint didn't adhere from factory. I have some spray touch up paint on the way for some scratches occurred during delivery. Should I try to touch up this area too? I have pics that show the two spots.
 
Last edited by a moderator:
Yes, I would lightly sand the area, then fine steel wool. Clean with alcohol then feather in the touchup.
 
  • Like
Reactions: overnighter
The paint is free but is spray can so I won't be able to feather the color touch up.
sure you can i have done it many times. But if nothing else pull off the door and tape off everthing else and respray the whole front
 
We have the sister unit to yours; we share an owner's manual. This is our third winter with our h2100.

At the end of each of our burn seasons, we repainted the top area of the stove due to cooking on it from power outages, general lightening probably due to the sheer high temps of the stove or whatever may cause paint to fade as it goes over time.

We use Stove Bright but I am mostly posting to alert you to the high toxicity of the paint when you spray (light layer like bholler says, maybe need a second very light layer after the first dries) so I think it's important that you have windows open when you spray the paint and protect the surrounding areas well. I have to spray off the side a bit going back and forth and if not protected, the hearth stone would get hit as well.

I did it after the first burn season wanting the stove to look brand new again and it did :)

It doesn't take much so go light-handed and keep your arm moving as you spray
 
  • Like
Reactions: overnighter
Is the minor pitting or dimpling visible in those pictures normal? I thought that caused the paint to not adhere through the burning season and not the high temperatures. I run a fire up to 650 degrees once a week and average 450-550 degree burns to keep the creosote to a minimum.
It was my impression that high temperature paint has a much higher heat tolerance.
 
Might have been poor surface prep and cleaning before they painted the stove. An oily hand smudge can do this.
 
Last edited:
  • Like
Reactions: overnighter
Might have been poor surface prep an cleaning before they painted the stove. An oily hand smudge can do this.
My first thought was one of the kids touched it and had something sticky on their hands (when the stove was cooled off, or I would've heard about it from the wife). I've tried to wipe it off but the paint is gone. What you say echo's my first impression. From the factory smudging makes much more sense.
 
Status
Not open for further replies.