wildbillx8 said:
tounge & groove is beautiful, but that stone is awsome. it looks difficult to install. never done anything like that before but would like to. how did you get started? 8-/
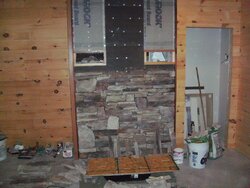
I went on the manufacturer's website, d/l'd the install manual & watched the vidoes, made a list of needed materials & tools, measured for material amount and ordered it. Sat since last summer, and now its going on.
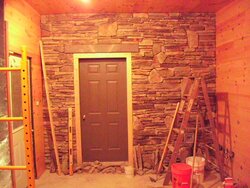
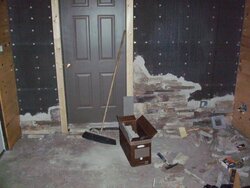
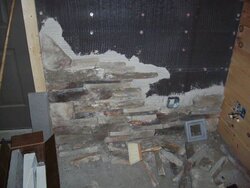
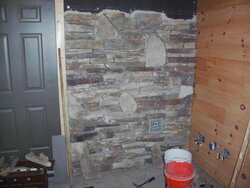
Its not hard, but VERY tedious. I'm a bit on the perfectionist side with it also, but its far from perfect. Just finished one wall this is 12'L x 10'H. Took about 5 weekends LMAO.
Still have a few small pcs to fill in, but I am very pleased with it.
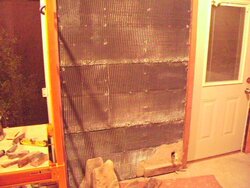
Starting on a 5-1/5" x 10 wall in same room behind where the Summer Heat will set. I also have a 15' x 10' wall in the new bedroom, and also in same room a wall I boxed the prior exterior now interior backside of the chimney to cover. That is about 6' x 10'. Thats 3rd in line, and I want to get it done before I start the Summit up, so the heat doesn't prematurely dry the mortar.
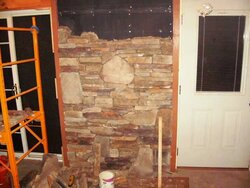
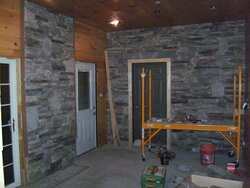
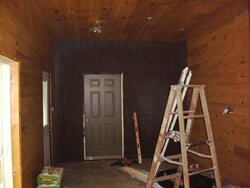
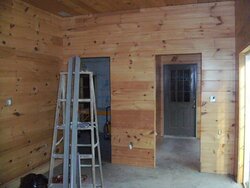
Here is an update photo of the finished wall and the started wall. The photo quality sucks, but gives ya an idea.

") I took a lot of time laying it out and it turns out better if you grab and go... Don't overthunk it :cheese: Looks great!
I took a lot of time laying it out and it turns out better if you grab and go... Don't overthunk it :cheese: Looks great!