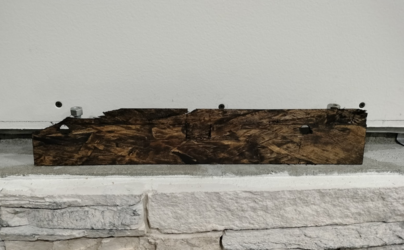
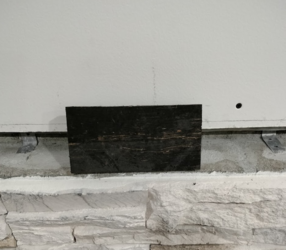
Hearth extension is not supported nor attached?

  • Active since 1995, Hearth.com is THE place on the internet for free information and advice about wood stoves, pellet stoves and other energy saving equipment.

    We strive to provide opinions, articles, discussions and history related to Hearth Products and in a more general sense, energy issues.

    We promote the EFFICIENT, RESPONSIBLE, CLEAN and SAFE use of all fuels, whether renewable or fossil.
@bholler and any other mason out there:
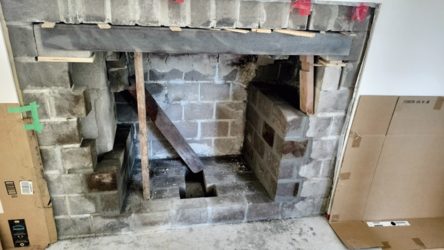
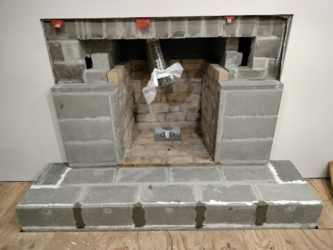
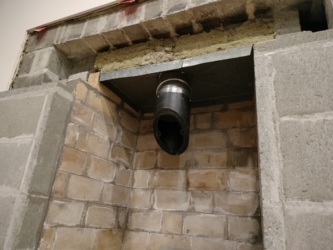
I have a somewhat unconventional question: can firebricks be laid sideways?
Here is a picture of what I mean:
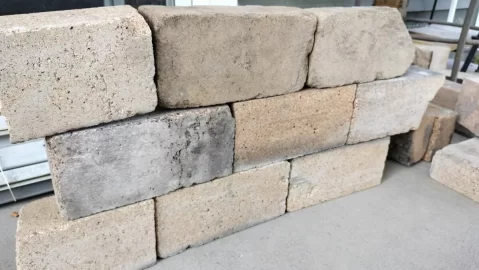
IMG20230731182342.jpg

The code says:

9.22.2.2. Firebrick Liners (https://free.bcpublications.ca/civix/document/id/public/vbbl2014/ep001029.22)​

1) Firebrick liners shall be not less than
a) 50 mm thick for the sides and back, and
b) 25 mm thick for the floor.
2) Firebrick liners shall be laid with high temperature cement mortar conforming to CAN/CGSB-10.3, “Air Setting Refractory Mortar.”
3) Joints between a firebrick liner and the adjacent backing masonry shall be offset.

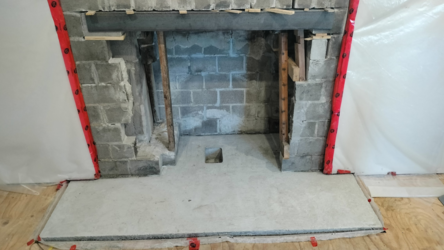
And the brick thickness laid sideways would measure 62mm (2.5").
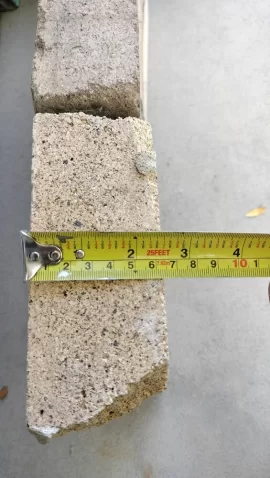
IMG20230731182409.jpg

Am I misreading the code again?

You may ask why I'm hacking like that, and it's to make sure I can install as big insert as I possibly can, and I just laid my eye on this bad boy: https://www.spartherm-america.com/en/product/spartherm-700-in/

I'm not certain I will have enough space if I lay bricks flat.

Thoughts?
 
Last edited:
Removed the rest of firebricks, and rebuilding using cement bricks. Temp support with steel angle.

1704750012602.png1704750286454.png

While at that, replaced steel flat bar for the top row bricks with an angle, walls are finished.

1704749945703.png
 
The fireplace finally arrived.. damaged.
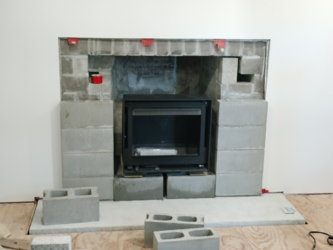
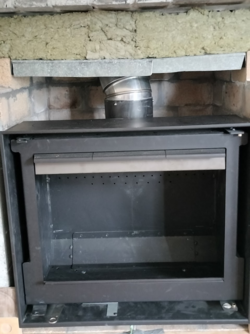
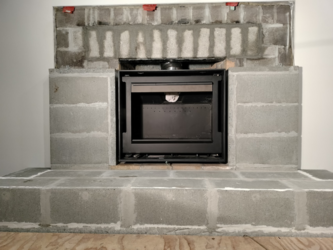
While waiting, building the "face" for the fireplace that will be covered with stone later. Testing the fireplace for the fit.
1704750498485.png

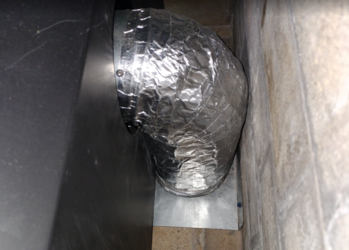
Installed 5" aluminum flex air intake with a butterfly valve. Wrapped in fiberglass, just because. Aluminum doesn't like to be touched by concrete, crumbles in 5 years:
1704750625885.png

Tore my Achilles, my cat is giving me a moral support. Working on the firebox and the chimney is going to be fun
1704752242273.png

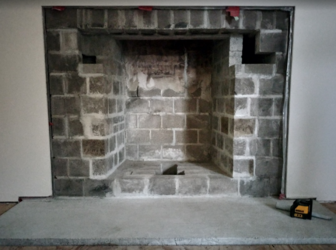
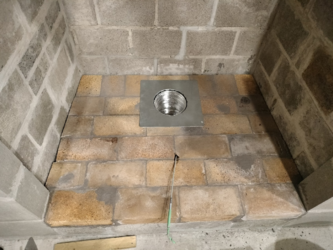
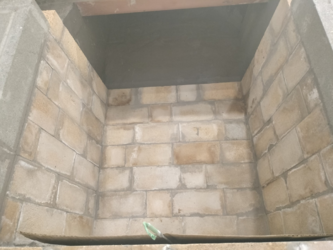
Started putting back firebricks:
1704750767785.png
1704752461652.png


...and the firebox is done. No tapering back wall to the front, neither I'm putting damper, because in BC, Lower Mainland Metro area non-efficient fireplaces are going to be banned in 2025, so not restoring this to initial state ready to be used without an insert. Why bother, if one can't use that anyway. I've put a little insulation behind the back of the wall as well.

The whole smoke chamber was covered with a new layer of refractory cement since I had tones left from the 55lbs bucket I've purchased:
1704750815680.png
 
Last edited:
  • Like
Reactions: kcmclellan
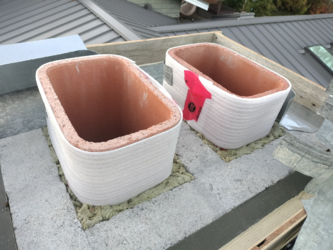
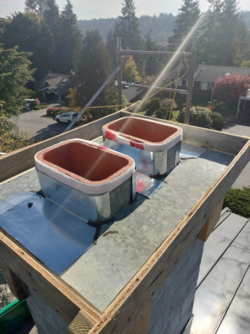
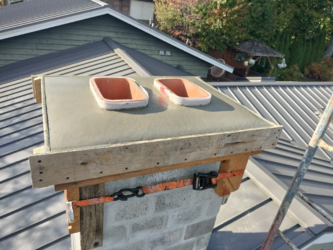
Rebuilt a portion of the chimney that was badly cracked. Replaced flue that was cracked. Poured in concrete cap. Put a mesh, even tough the concrete is reinforced with fiber. I'm using Sakrete PSI 6000, that I had used for hearth extension, since I was quite impressed with results.

1704751191825.png1704751272879.png
1704754291085.png
1704753420507.jpeg
1704751308883.png1704751333933.png
 
Last edited:
  • Like
Reactions: kcmclellan
Looks like you've been slacking up north. :cool: j/k Nicely done. Was the concrete reinforced with fiber? Will the insert get a 6"insulated liner up the clay flue?
 
Looks like you've been slacking up north. :cool: j/k Nicely done. Was the concrete reinforced with fiber? Will the insert get a 6"insulated liner up the clay flue?
Oh, I'm just uploading a bunch, right now, catching up, more is coming :)
Updated the previous note re: cap reinforcement.

Went back home for a month, then the fireplace arrived all mangled, then tore my Achilles, then waited for the 30 dergree liner offset for forever..
It's been eventful. Working in a boot somewhat slows down things.
 
Last edited:
Installed liner. Used Ceramic fiber strips to get a bit of separation between the rigid liner and flue. Slid the liner from the top all the way down to the firebox. I had hacked a slightly oval cone from wood with rope attached to the top end of the rigid liner, so I could put back the rigid liner back.
1704755228579.png

Attached the insulated flex liner at the bottom of the fireplace, and pulled the rigid liner back into the place. That was way easier than anticipated.

BTW, a rigid liner was fits perfectly into a flex liner, so there was no need to use a connector, and I tied both pieces with a constructed contraption out of gear/duct stainless steel clamps. I overlapped the connection by at least 4" because the rigit liner was long enough, and I had some to spare, but 2" would have been sufficient, probably. Stuffed the chimney with rockwool. I know how some of you feel about that, but given the spacing around the rigid liner, that's the best I could do, and we are not allowed to run even an insulated liner without flue in place in BC, Canada.
1704755716092.png
1704754960613.png
1704755854376.png

Then high heat silicone under the plate at the top of the chimney, support skirt, and cap. All sealed with high heat silicone.
1704755822654.png
1704756422550.png


I'm not the biggest fan that the last 8" of the liner is not insulated. I left the liner opened/not stuffed with cloth by mistake one night, and I noticed that the inside of the liner portion that was above the cap was all wet, meaning that the moist warm air from inside was condensing on that portion of the liner.
I assume the same will happen with smoke, creating creosote, thus I will need to address that later.
 
Raised the hearth, used 15cm cement blocks, the ends were closed with pieces of 10cm blocks cut along, thin set and screwed to the block using Tapcon (would have been easier to use pavers or cement board, but oh well).
The surface ended up being super even/level/etc, and am quite pleased with the result.
1704756825974.png

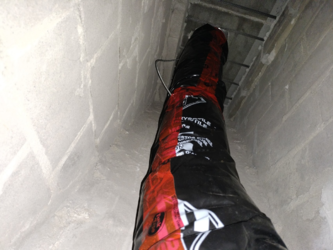
Insulated the smoke chamber, and closed with old duct - that thing was sitting outside for 10 years without any sign of rust!
1704757004480.png
1704756953837.png


I haven't caulked with silicone, there is an insane amount of rockwool in there, and I expect no draft/leaking will occur. Or am I missing something?
1704757048545.png 1704757129191.png

Behind the fireplace, air intake. That one in particular was "fun" to get lined all up. Wrapped in a bit of insulation, hopefully will prevent condensation, ie cooled down pipe in a hot environment tends to do so:
1704759689000.png

With all in place, finished fireplace rough-in. Soldiers, take a line formation!
1704757190851.png
 
Last edited:
Raised the hearth, used 15cm cement blocks, the ends were closed with pieces of 10cm blocks cut along, thin set and screwed to the block using Tapcon (would have been easier to use pavers or cement board, but oh well).
The surface ended up being super even/level/etc, and am quite pleased with the result.
View attachment 322338

Insulated the smoke chamber, and closed with old duct - that thing was sitting outside for 10 years without any sign of rust!
View attachment 322342View attachment 322341

I haven't caulked with silicone, there is an insane amount of rockwool in there, and I expect no draft/leaking will occur. Or am I missing something?
View attachment 322343 View attachment 322345

Behind the fireplace, air intake. That one in particular was "fun" to get lined all up. Wrapped in a bit of insulation, hopefully will prevent condensation, ie cooled down pipe in a hot environment tends to do so:
View attachment 322349

With all in place, finished fireplace rough-in. Soldiers, take a line formation!
View attachment 322346
Tomas, you are a master-class DIY'er! I admire & salute your determination and perseverance, but mostly your technical skills & execution. Bravo! 😊
 
  • Like
Reactions: begreen and Ashful
Indeed, this job has gone from 'oh boy' to 'oh wow'. Expecting to see fire in the belly of that beauty soon.
 
Wow! I am newer to this site and just found this thread today. BRAVO!! Truly amazing job. Excited to see finishing pictures and a fire in that stove soon!
 
The plan is to have the fire going on Friday/ this weekend (outside is going to dip to an ungodly -10C or so), before I put veneer stone.

With this efficient insert, I'm afraid we are going to see quite a different amount of heat coming back to the room, instead of through the chimney, and the location of the mantle is something that worries me. The code says the mantle (actually, combustibles) should be at minimum of 12"+how much it's sticking from the surface of the fireplace.

Considering that the face is going to be finished with rough veneer stone, ~2", and we want to have ~6" deep mantel, the mantel would be sticking by ~1-2" from veneer stone at 16" from the fireplace.

I'm going to have a prototype test burn having the worst case scenario: no veneer stone, sticking 7" instead of 6" has a lip to catch more heat (will be most likely solid piece of walnut (?) ), will run the fireplace for at least 4 hours, or until the temp on the mantel surface reaches an equilibrium.

Anyone is taking bets on what's the max temperature I'm going to measure on the mantel?
I'll take measurements with kitchen thermometer / laser thermometer, as well, will take thermal pictures, I'm quite curious how it's going to look on thermal camera.

1704935920618.png
1704935951511.png
1704935990157.png
 
Last edited:
Peak temp after 4 hrs will be interesting, but the final results after the veneer is on will be more telling. Sounds like it will be ok. The bigger concern is how much heat exposure over a long period of time. That is when pyrolysis can show up as it gradually lowers the kindling point.
 
Peak temp after 4 hrs will be interesting, but the final results after the veneer is on will be more telling. Sounds like it will be ok. The bigger concern is how much heat exposure over a long period of time. That is when pyrolysis can show up as it gradually lowers the kindling point.
I was all over pyrolysis today. As long as I keep under +60C, pyrolysis shouldn't be happening, as far as I understand. Quite an interesting subject, there are quite few papers regarding that matter.

There are different stages, in which different things are happening. +76C or so when things are starting to happen. So, keeping under +60C would be my target. The question is, what I'm going to do if it goes over that arbitrary limit that I set.
 
More progress. Air intake is done now.
IMG20240110215558.jpg


Yeah, I know. It looks ugly. Previous owner painted bricks, which is quite bad thing, according masons. Future problem.

Finished the face, threaded pins are there for installing the mantel:
IMG20240110214452.jpg

A little brag:
IMG20240110214331.jpg
IMG20240110214409.jpg
 
I was all over pyrolysis today. As long as I keep under +60C, pyrolysis shouldn't be happening, as far as I understand. Quite an interesting subject, there are quite few papers regarding that matter.

There are different stages, in which different things are happening. +76C or so when things are starting to happen. So, keeping under +60C would be my target. The question is, what I'm going to do if it goes over that arbitrary limit that I set.
I stared a separate thread on pyrolysis, so as to not derail your thread on the hearth extension, as I'm referencing an oil-fired boiler in my response:

 
  • Like
Reactions: TomasB
So, I had couple fires already, and am pretty happy with hot it all turned out.

On Friday, we started late, and only had the fire going only for couple hours.
In those 2 hours we managed to get the mantel temperature up to +56C/133F. Bricks above the fireplace were heated from +17C/62F to +31C/88F. The hearth, right in front of fireplace was +40C/104F at the, and ceiling right above the fireplace was +25C/77F.
Unexpected for me was the ceiling part, because it was very localized.

Some thermal imaging, with timestamps at the top:
1705260384635.jpeg
1705260486322.jpeg
1705260536010.jpeg
1705260649974.jpeg


The ceiling above the fireplace (yes, the camera can be used as a stud finder :) ) and the chimney:
1705260789454.jpeg
1705260688144.jpeg


Next morning, the bricks above the insert were still warm:

1705260940571.jpeg


On Saturday, we had the fire going 6+ hours. Since the fireplaces smells initially (they even mention that in the manuals, that it will smell for couple burns), I wanted to get over with the smell as fast as possible, so I cranked it well. The max temperature on the mantel I've seen was +75C/167F.
Good thing is that it's not the fire one would normally have. So, when That +75C was true max. Because I had the fireplace running for long duration, and I've seen couple times reaching that high, and as soon as I would put the fire under the control, the mantel temp would go down, meaning, I was pushing the limits. Even when it was +75, I could hold my hand just fine on the wood with no pain, but it was hot'ish. BTW, the way I measured with kitchen thermometer, where the end of it was sticking through the bottom that hacked mantel:
1705261733722.jpeg


So, while +75C being absolute max I was able to push to, the temp on the mantel I measured was +55 when fire would go down, and I had only coals left, and jumping to +65C when I would put more wood, then settling down to +60C range with normal pleasant fire. Interestingly, while water at +60C can scold you in 5 seconds, +60 wood is just warm to the touch.

We had no visible smoke coming out of the chimney, so that is good, I guess? Outside temp is around -10C. One of those rare cold days we are going through.
1705261928942.jpeg


After the first day, I was pretty amazed how clean was the inside of the box, no visible soot, and look how it looks on the other side of the top shelf! Fascinating!
1705262223936.jpeg
1705262254644.jpeg


I'm quite happy with control of the air I have, the affect is very noticeable. When fully open, I don't really even need to open the door to let more air in, and I can see fire burning at rapid pace. and I can adjust to the point where the fire looks in slow motion. Pretty neat.

1705262544128.jpeg


Adjusting fresh air affect when having small/big fire:


Last edited:
Veneering time. Template and laying stones on ground fist:
1706597751158.png
1706597779586.png


We picked veneer with too short returns, so taking extra time and extending them without straight lines. I bet something that your mason wouldn't do:
1706597876606.png
1706597919951.png
1706597989877.png


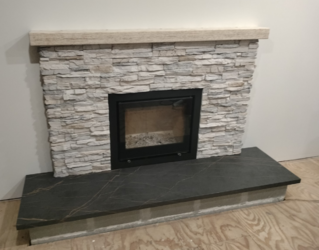
And it's done:
1706598072326.png
1706598092069.png

1706598137299.png
 
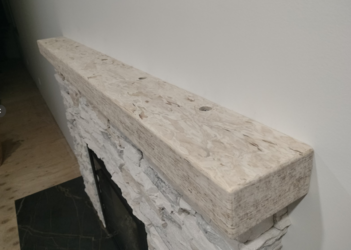
Putting a temporary mantel out of some unexpected material.
Before/After showing some love with belt sander:

1706598376638.png
1706598390591.png


Using a cut-off piece to prototype:
1706598430504.png


We found that slimming only by 1/2 might make a huge difference in how it looks. Ended up practicing my flattening slabs skills, that will come pretty handy when I make some dinning table, went from 3.5" -> 3"

Morale: do experiment before committing.

Semi-final of temporary mantel version. Plugs are yet to be made and cover those nut holes. Still needs to be stained and sealed:
1706598696476.png
1706598768679.png
1706598800373.png

If anyone has experience working with stains, and knows that will end up dark'ish brown (not dark gray or almost black) please let me know.
I experimented with some stain that borrowed from my neighbor, dark walnut, I think. Basically, this is what I'm trying to avoid:
1706599312320.png1706599334875.png
 
I've always chosen all stain colors by buying the smallest available cans of every color that looks remotely close to the target color, and then testing all of them on a scrap of the exact wood from which the project is made. Once I narrow it down to the final few, I varnish those to confirm. There's just no substitute for actual tests on actual material, as the stains all present themselves differently on different woods/materials.

Note that most stains are a mix of dye, pigment, and finish. Different woods take up the dye component differently, which is why there's so much variability of the same stain on different woods. The pigment component mostly sits on top, so that does not change as much with wood species/sample. The finish may be thinned to different degrees, or absent altogether, which has some bearing on how the pigment sits or dominates over the dye component.
 
Yes, I stain the same way. Try samples on the bottom or back where it won't be seen after installation.

Looking good TomasB, all it needs is FIRE!
 
I've always chosen all stain colors by buying the smallest available cans of every color that looks remotely close to the target color, and then testing all of them on a scrap of the exact wood from which the project is made. Once I narrow it down to the final few, I varnish those to confirm. There's just no substitute for actual tests on actual material, as the stains all present themselves differently on different woods/materials.

Note that most stains are a mix of dye, pigment, and finish. Different woods take up the dye component differently, which is why there's so much variability of the same stain on different woods. The pigment component mostly sits on top, so that does not change as much with wood species/sample. The finish may be thinned to different degrees, or absent altogether, which has some bearing on how the pigment sits or dominates over the dye component.

I saw Varathane has 4Oz with applicators. I guess I could try those. Except that Rona doesn't carry those, and not sure where to buy those locally. Anyone knows, please do chime. I might actually contact Varathane itself, to see what they may suggest.
Otherwise, buying several small cans to throw away is something that I have hard time justifying easily.

I wish they would be selling presoaked napkins. Just enough to try so that we could buy a correct product.
 
Minwax stains come in small cans. That's what I have used. Take some time on their website where they show the stain on a variety of woods. You may end up only needing only a few tries or if you are lucky you may hit it on the first try.
 
Minwax stains come in small cans. That's what I have used. Take some time on their website where they show the stain on a variety of woods. You may end up only needing only a few tries or if you are lucky you may hit it on the first try.
Things a bit more pricey up here in the North.

I'll ask around in wood working forums.

Edit: I think touch up markers will give me the answer I'm looking for, or at least will help to narrow down the color tone.
 
Last edited: