
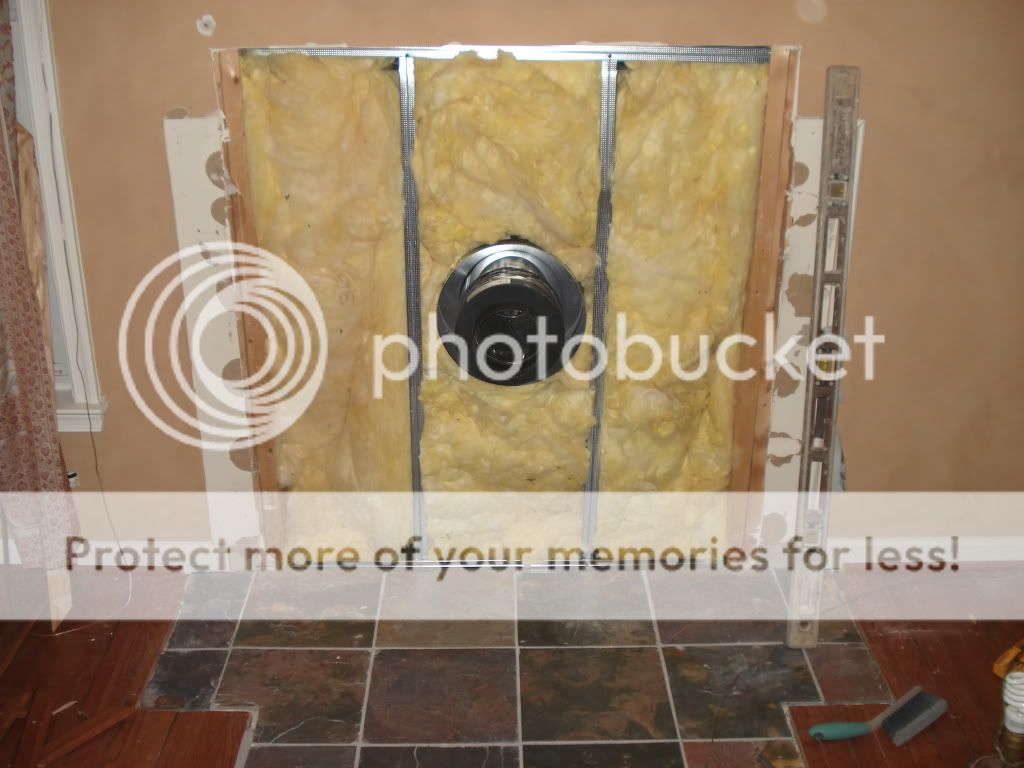
Is this installation correct so far???
- Thread starter othello
- Start date
-
Active since 1995, Hearth.com is THE place on the internet for free information and advice about wood stoves, pellet stoves and other energy saving equipment.
We strive to provide opinions, articles, discussions and history related to Hearth Products and in a more general sense, energy issues.
We promote the EFFICIENT, RESPONSIBLE, CLEAN and SAFE use of all fuels, whether renewable or fossil.
You are using an out of date browser. It may not display this or other websites correctly.
You should upgrade or use an alternative browser.
You should upgrade or use an alternative browser.
- Status
- Not open for further replies.

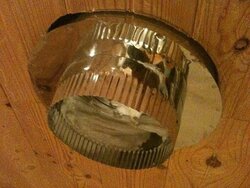
It looks to me like a class a thimble.
As I understand it, the thimble needs to go through the wall and into the living space a minimum of 6" which allows you to use double wall venting pipe to make the connection to the stove.
As I understand it, the thimble needs to go through the wall and into the living space a minimum of 6" which allows you to use double wall venting pipe to make the connection to the stove.
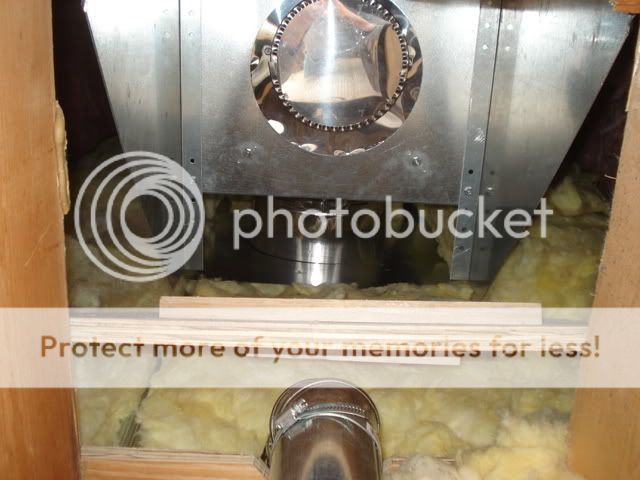
I'm thinking the installer will also need to cut away that wood paneling. Class A pipe needs to be a min of 2" away from combustibles.
Can't say that looks kosher. Clearance issues abound here. Can you also post a shot of the other side of that thimble? What type of connector pipe is to be installed, double or single-wall?
What's missing is the firestop. See the large black donut looking item in the pic below? For through-the-wall applications you typically insert the class A pipe through the stop. It ensures that you have the necessary 2" clearance. That install, as is, isn't safe.

I've got the same chimney set up (metal fab).
That set up doesn't look right at all. The first picture you posted....It looks a lot like the clean out portion of my tee. Here's a picture of mine:
It's somewhat blocked by the support bracket but again, what you're showing in your first post looks to me like the clean out access.
I'm uploading a pic of my setup inside. I'll post it in a few min.
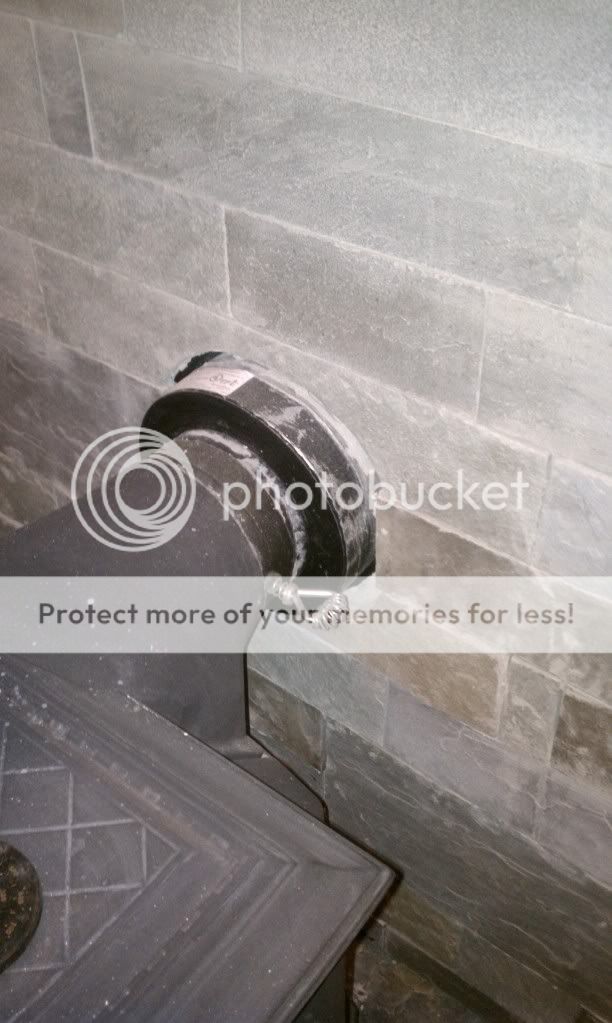
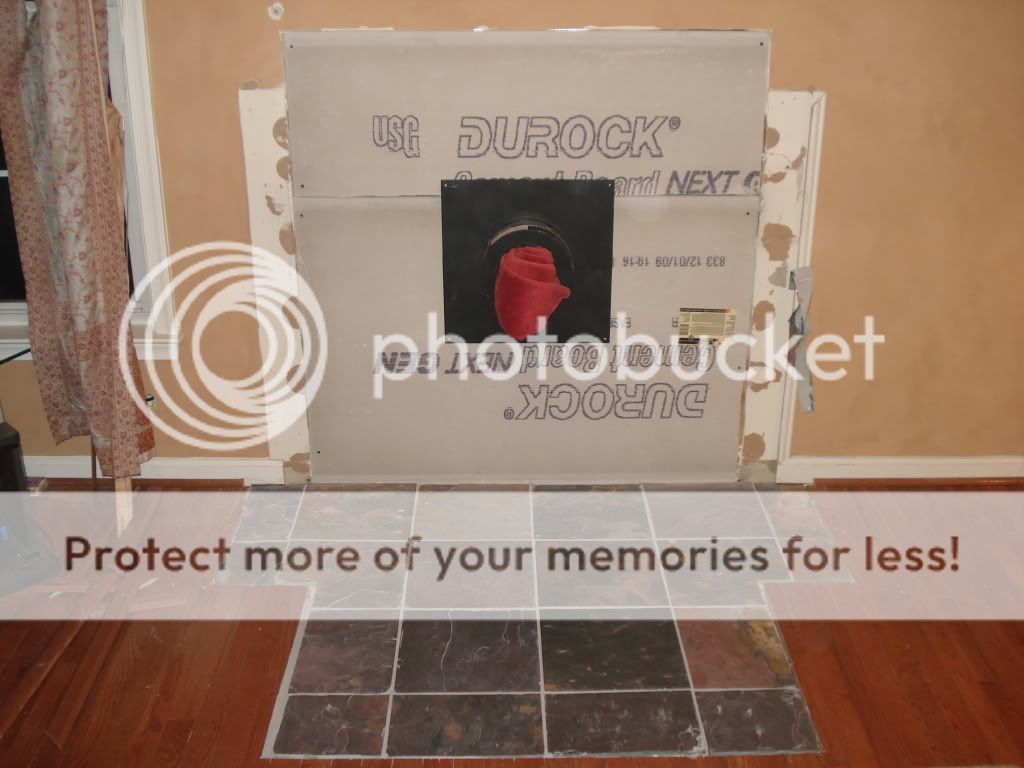
In the first photo I posted you can see the square firestop which the Class A passes through into the room. A finishing collar(black in photo above) should then be attached to the class A in the room which is what the stove pipe connects to.
The only thing I can tell you is that Class A pipe (which is what I see above) MUST not be within 2" of anything combustible. That large donut looking item in the first picture I posted is what the class a pipe should pass through when going out the wall. It ensures you have that 2" space.
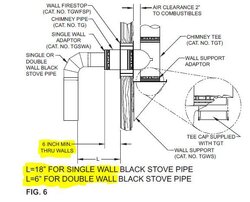
The other critical item is the connection pipe. I noted earlier that the class A pipe should extend a min of 6" into the stove room. That's because the min clearance for double wall stove black stove pipe is 6", it's 18" for single wall. When I refer to stove pipe I'm talking about the pipe used inside the house to connect the stove to the class A.
If you can stop payment on the check do it. This install, as is, is NOT safe.
Are you sure that is class A going though the wall? It looks more like an insulated thimble, but I don't recognize the product. Can someone provide specifics about what is installed so far here?
I sympathize with your situation. You put the money up and have paid for a quality chimney system.
I don't mean to pour it on, but where did you find the installers? This is very basic stuff....
I don't mean to pour it on, but where did you find the installers? This is very basic stuff....
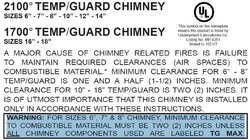
Is this a Metal-Fab Inc Temp Guard set up? If so, here is the manual, which states 6" to 8" pipe requires 1/2" CTC, 10" to 12" requires 2" CTC.
http://www.mtlfab.com/media/L944.pdf
First page in the box.
Installers might not be off. You guys are too quick to pick the installers apart.
Oops I stand corrected, looks like 1-1/2" IF all the components are listed as TG Max. They make it a lil confusing with different figures.
http://www.mtlfab.com/media/L944.pdf
First page in the box.
Installers might not be off. You guys are too quick to pick the installers apart.
Oops I stand corrected, looks like 1-1/2" IF all the components are listed as TG Max. They make it a lil confusing with different figures.
HogMan....
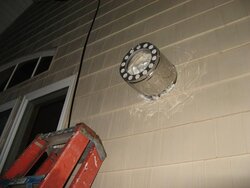
Look at the first and last pics the OP put up. That's class A pipe directly against the wood paneling and outside wall sheathing.
Look at the first and last pics the OP put up. That's class A pipe directly against the wood paneling and outside wall sheathing.
Actually, I think 6 - 8" requires 1.5 inches, as on the first page.
I see combustibles contacting the class A pipe, but the install is not finished yet. So who knows at this point.
I see combustibles contacting the class A pipe, but the install is not finished yet. So who knows at this point.
I agree, but rather than alarming the person, I suggest having them download the manual for the product, then show the installer what it says, If the installer then balks at doing it per the specs, then send the installer packing.
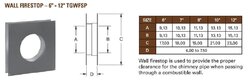
Yes, I think Hog has identified it correctly, thanks. It is Metal-fab pipe, but Hog that is 1.5" CTC, not .5" and that is only for TG MAX piping otherwise it is 2". It appears to be missing the wall fire stop for passing through a combustible wall. That appears to be part# 6" TGWFSP. Caveat: I am unfamiliar with this company's products and could be wrong. I don't want to overreact for sure, but it looks like the installer isn't up to speed either and that is not a good sign.
It also looks very much like code is not being followed for single wall clearance to combustibles on the interior. The class A penetration length is too short. Single wall needs to be 18" from combustibles in all directions. If double wall, then it is reduced to 6". Though Metal-fab appears to offer a metal shielding sleeve to resolve this issue, so I am unclear about their required penetration. Will research further.
It also looks very much like code is not being followed for single wall clearance to combustibles on the interior. The class A penetration length is too short. Single wall needs to be 18" from combustibles in all directions. If double wall, then it is reduced to 6". Though Metal-fab appears to offer a metal shielding sleeve to resolve this issue, so I am unclear about their required penetration. Will research further.
Attachments

The OP is looking for some guidance/opinions on the the work that has been done. I think it's fair to say, given the info that we have, that there are some major concerns. Lack of the firestop, apparent lack of clearance Class A ect.....
The other major issue is how the stove pipe is to be connected. I don't see how the OP is going to be able to connect even double wall and maintain 6" to the interior paneling.
The other major issue is how the stove pipe is to be connected. I don't see how the OP is going to be able to connect even double wall and maintain 6" to the interior paneling.
OK, this is getting clearer as I have a chance to go over the installation instructions. Nothing special here. The class A needs 2" CTC which is provided by the wall stop. The class A needs to extend 6" into the interior space. They do not have a long enough length of class A penetrating the wall. They are missing the wall stop to assure proper 2" clearances. The single-wall adapter is too close to the wall and doesn't look like a Metal-fab part (SINGLE WALL ADAPTOR(CAT. NO. TGSWA)).
Attachments
Thanks everyone for all your input Your responses and concern was amazing. After reading all your replies, there was no doubt in our minds that this was not going to pass any inspection by the insurance company and the township We asked our workmen to leave. They left the materials they had brought and later, we made a list of what was usable and what we need to purchase to finish the work with the help of another company.
I'll stay watching this site for all the wealth of knowledge which is here.
I'll stay watching this site for all the wealth of knowledge which is here.
I think you made the right call. Good luck with the next crew. This is not rocket science. There's ample documentation for the right way to do an installation. These docs will make passing inspection easy, as long as they are honored.
Hope you'll stick around. We'll be here long after the sales dept and installers leave. What stove are you going with? Do you have a good supply of nicely seasoned wood?
Hope you'll stick around. We'll be here long after the sales dept and installers leave. What stove are you going with? Do you have a good supply of nicely seasoned wood?
- Status
- Not open for further replies.
Similar threads
- Replies
- 0
- Views
- 1K
- Replies
- 5
- Views
- 1K
- Replies
- 13
- Views
- 888
- Replies
- 7
- Views
- 814