I'm very pleased with my new purchase so I thought I would share.
(I also told someone I would post pictures of replacing a propane insert with a pellet stove)
")
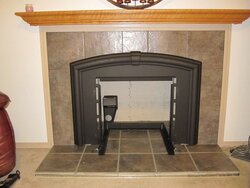
Before
")
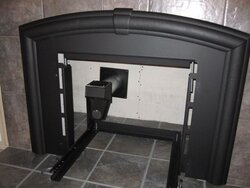
Propane Insert Removed
")
")
Pellet Stove inserted with exhaust piping (using existing exhaust hole)
")
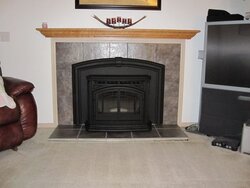
Finished!
")
BURNING!
")
Looking good!
I'm thrilled with the install. The guys did quite a bit of work to get my old gas insert out without removing the granite (which had apparently been built around the insert after it was installed). I was very glad they also put extra work in to use the existing vent hole. They had told me they were going to run straight out, but the installer decided to do it because it would look better not having the extra big hole.
Of course it was 70 degrees here in Maryland today, but I will be very glad to have this when it gets cold.
(I also told someone I would post pictures of replacing a propane insert with a pellet stove)
Before
Propane Insert Removed
Pellet Stove inserted with exhaust piping (using existing exhaust hole)
Finished!
BURNING!
Looking good!
I'm thrilled with the install. The guys did quite a bit of work to get my old gas insert out without removing the granite (which had apparently been built around the insert after it was installed). I was very glad they also put extra work in to use the existing vent hole. They had told me they were going to run straight out, but the installer decided to do it because it would look better not having the extra big hole.
Of course it was 70 degrees here in Maryland today, but I will be very glad to have this when it gets cold.
")