Hello fellow homebuilders/renovators,
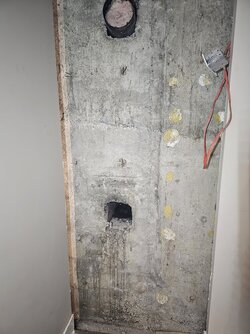
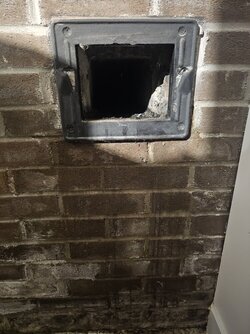
I recently had to repair some foundation cracks in my home, which required the removal of a 10-foot brick wall in the basement. As a result, I need to rebuild the wall and, more importantly, reinstall the chimney conduit properly. I have two chimneys in my house—one on the ground floor and the other in the basement.
The chimney in the basement is a bit unique, as it consists of a square 6x6 hole formed and poured into the foundation. The original setup involved sliding a round 6-inch metal pipe into the brick wall. Now, after the foundation repairs, I want to rebuild the wall without necessarily reconstructing the entire brick structure.
I am seeking guidance on how to properly install the chimney conduit, and I would like to make the setup energy-efficient, considering that I may not use the basement chimney in the short term. Here are a few specific questions I have:
Chimney Conduit Installation: Should I use a wall thimble for the chimney conduit installation? What are the best practices for ensuring a secure and durable connection without compromising safety?
Sealing and Insulation: What recommendations do you have for sealing and insulating the chimney conduit to prevent any future water infiltration or air leaks? I want to ensure energy efficiency and protect against potential issues in the long run.
Future Use Considerations: While I may not use the basement chimney immediately, I want to build it right for potential future use or for the next owner. Are there any specific design elements or precautions I should take to make it easier for someone to use the chimney down the line?
If anyone has experience with similar situations or has expertise in chimney installations, I would greatly appreciate your insights. Additionally, if you have any pictures or examples of similar projects, they would be immensely helpful.
Thank you in advance for your time and assistance. I look forward to hearing from the knowledgeable members of this community.


