Refurbing intrepid ii 1303, no secondary air... anything. (now with pictures!)

  • Active since 1995, Hearth.com is THE place on the internet for free information and advice about wood stoves, pellet stoves and other energy saving equipment.

    We strive to provide opinions, articles, discussions and history related to Hearth Products and in a more general sense, energy issues.

    We promote the EFFICIENT, RESPONSIBLE, CLEAN and SAFE use of all fuels, whether renewable or fossil.
Status
Not open for further replies.

Ithacan

New Member
Feb 16, 2011
15
Upstate Ny
Hello all,

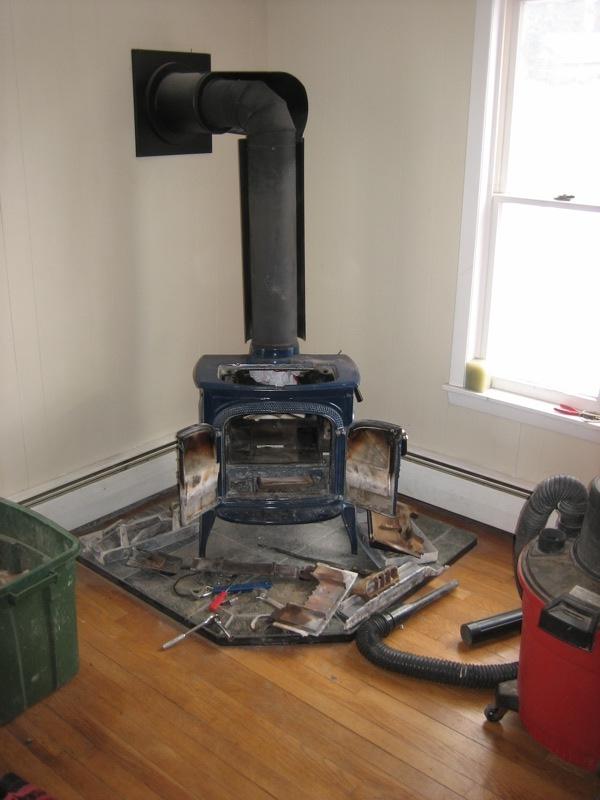
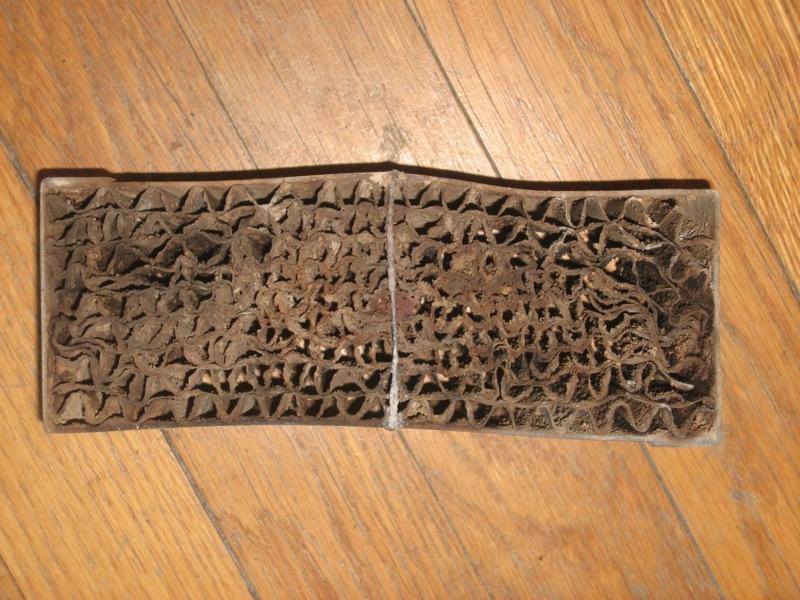
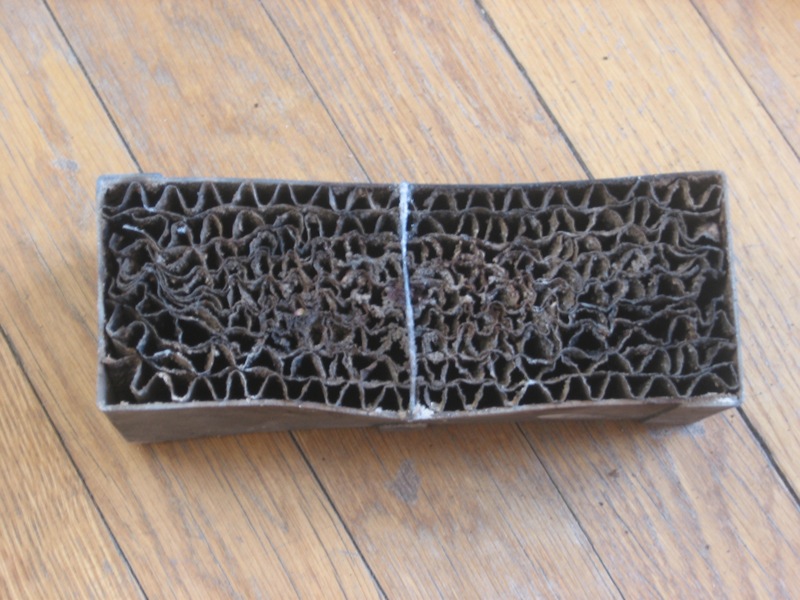
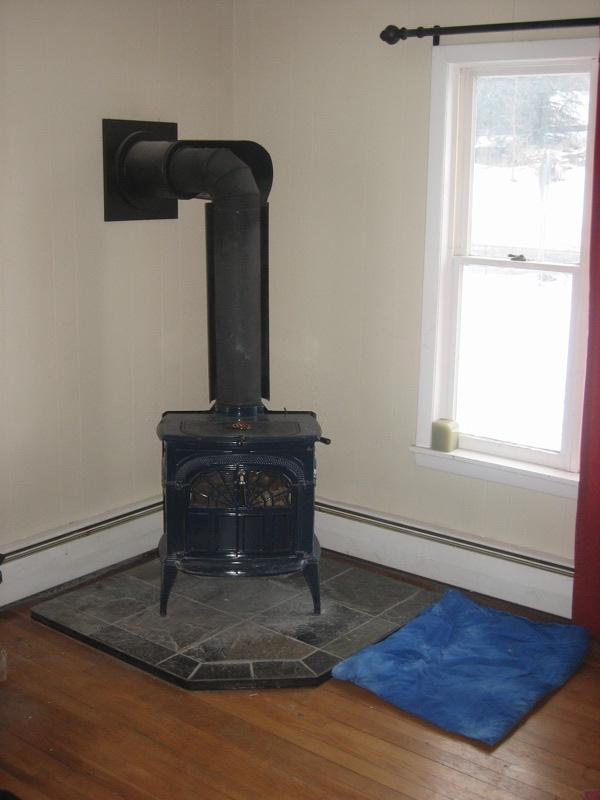
We have been having airflow problems with the stove when it's "closed" (catalytic), so with this warm spell up here in central NY, I spent today taking apart the 1303 intrepid at my girlfriends house (a stove bought refurbished by a reputable local dealer in 2008, before we knew each other). I was taking it apart to install a new seal kit we bought today and check on the cat. Despite finding that the cat was not only clogged, but rather warped and that the refractory chamber was cracked and broke into three pieces on top of the two doors. We have since ordered a new cat and refractory chamber.

Here's the rub though:

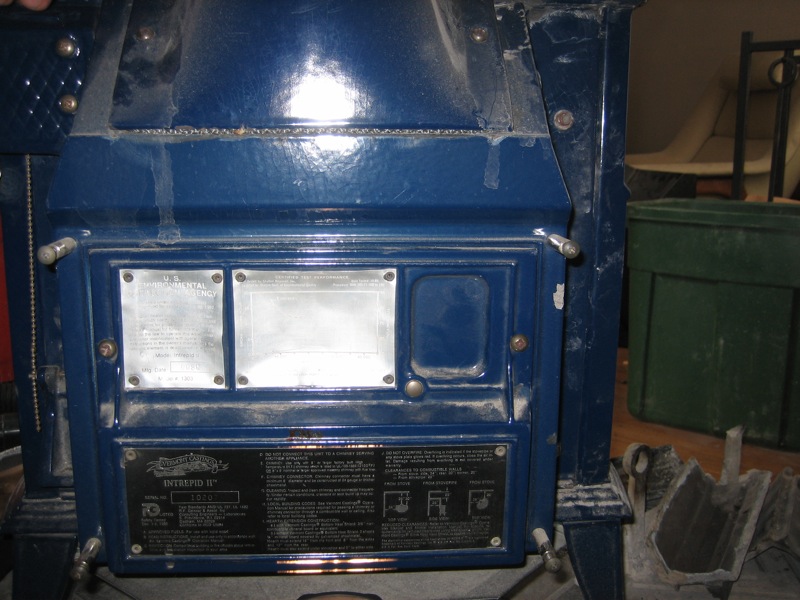
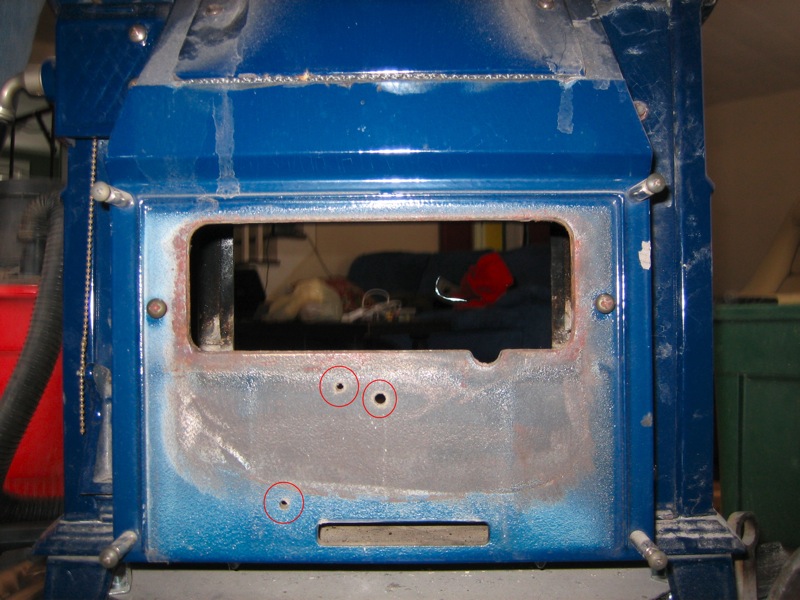
After taking most of the stove apart (can post pics in the morning, no camera here) I found that there is not a single part of the secondary air system. Just an open slot under the back plate which the stove/EPA info is riveted to.


We've already spent $350 on this thing today, and would prefer to just leave it, but the question presents itself:

How many hassles are we looking at by not having a secondary air system, and just leaving an open slot there?

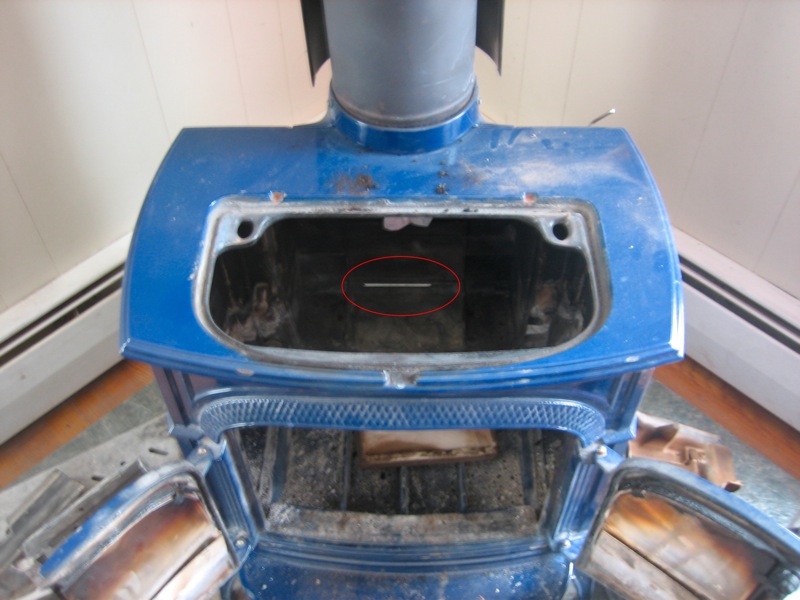
The opening in the back flows into a slot formed at the base of the refractory chamber by the two ribs it sits on lifting it off of the stove floor. It's a little tough to visualize what happens after it clears the refractory chamber.

What does the secondary air inlet actually do? Keep ash off the cat/r. chamber? Found a crapton of fine ash in there today.

OH, and I have a hunch that the refractory chamber isn't necessarily the one for the 1303 (it has access doors on both the front and back of the refractory chamber. (again, can post pics tomorrow).


Edit: I'm getting the info about the secondary air stuff from here. I know that this is the model #1990, but the item numbers for parts number 27-32 cross and this schematic is a lot clearer.

Edit2: Could I just buy the flap for $15.25 + shipping and wedge it shut? That's gotta be better than it being open all the time.
 
Just going to kick this up to the top for the 9-5ers.

Really simplified:

Bought a refurbished stove
been running it for years
just noticed there's no secondary air system (just an open slot)
No recourse to blame dealer
Cash is tight
leave it or fix it?

Thanks!
 
i can shed a little light on the probe, i have a 1303 as well and have pretty much had it apart and back together couple of times, the secondary air slot is designed to be covered with a shutter controlled by a probe and link to shutter, it is open at low cat temps and closes as cat temp gets hot, my shutter would be full closed around 1200 deg cat temp. my refractory is in good shape so never had to replace it. i would think cat would run hot if slot was open all the time. If your planning on keeping the stove i would replace probe and shutter.. my cat was clogged once with ash and i had low draft and smoke smell in house with cat engaged, cleaned it and never had another problem...
 
I still can't believe the dealer didn't either notice it was missing or cover it up.

Pictures as promised

a view from the top, looking at the slot as I noticed it.
GTCyt.jpg


The back of the stove, and the cover I removed:
NEKOM.jpg


With the cover off. I presume the 3 circled holes are the mounting points for the secondary air stuff:
jDmbu.jpg


Does anyone know what the little "indent" in the opening for cat access on the back of the stove is for? there is a corresponding plug in the cover.


And a general look at the level of disassembly we've dealt with in the last day (It'll look like this until I get that refractory and cat):
uQ0le.jpg
 
The indent and chrome button are access for a digital cat temp probe, i ran one on my intrepid for a long time... give temps just downstream of cat when engaged..
 
I'm settling in to regasket this beast, got my wire brush and everything. Would anything be gained by scrubbing off some of the soot in the general firebox?

Strikes me as a losing proposition, as after one fire it'll just discolor again, but I came here for help and to learn.
 
jetmech said:
i can shed a little light on the probe, i have a 1303 as well and have pretty much had it apart and back together couple of times, the secondary air slot is designed to be covered with a shutter controlled by a probe and link to shutter, it is open at low cat temps and closes as cat temp gets hot, my shutter would be full closed around 1200 deg cat temp. my refractory is in good shape so never had to replace it. i would think cat would run hot if slot was open all the time. If your planning on keeping the stove i would replace probe and shutter.. my cat was clogged once with ash and i had low draft and smoke smell in house with cat engaged, cleaned it and never had another problem...

I'm pretty sure I read yesterday (can't find it now) that the secondary air flap opens at really high, potentially damaging temperatures. Can you confirm this? If this is true, it does lend some credence to just taking it out altogether.

Do I have it right that air flows through the throat/clamshell in the fire box, DOWN through the cat and then up the two lateral boxes on the bottom sides of the refractory chamber up the chimney?

While I'm at it, check out what I saw then I inspected the cat :gulp:-

ZYxBb.jpg


The flash seems to make it look more clogged than it is-
JDMjN.jpg
 
That cat looks like someone sat on it. How did the cells get so crushed?
 
I think while its apart like that, you should give everything a good cleaning. You can attach a piece of plastic tubing to a shop vac hose and get in all of the little cracks and crevices. There are various air passages that should be clear for the stove to run well. The best way is to blow it out all of the passages with compressed air, but inside that is a messy proposition.

That's a steel cat and it looks fairly warped from use.

I have a Defiant Encore, but it looks to be of similar construction. Yes, exhaust gasses flow down through the cat and out the sides of the refractory. I'm going to say yes for the secondary air equipment. I think you're going to need that to help regulate the air flow when the cat is in operation. It might not run that well without it. You're basically rebuilding the secondary combustion section of the stove, so you might as well do it right the first time.
 
homebrewz said:
I think while its apart like that, you should give everything a good cleaning. You can attach a piece of plastic tubing to a shop vac hose and get in all of the little cracks and crevices. There are various air passages that should be clear for the stove to run well. The best way is to blow it out all of the passages with compressed air, but inside that is a messy proposition.

That's a steel cat and it looks fairly warped from use.

I have a Defiant Encore, but it looks to be of similar construction. Yes, exhaust gasses flow down through the cat and out the sides of the refractory. I'm going to say yes for the secondary air equipment. I think you're going to need that to help regulate the air flow when the cat is in operation. It might not run that well without it. You're basically rebuilding the secondary combustion section of the stove, so you might as well do it right the first time.

Yeah, it's more a function not having a single part of the secondary air system and thinking that someone removed it for a reason. I'm having a bear of a time understanding why someone would remove all if it in the first place.

going back to this picture-
jDmbu.jpg


I assume the thermostatic probe goes in the rightmost hole, and the other two are for mounting screws. Does the probe pierce the refractory chamber at all? Piecing my old refractory chamber back together, I can see that, despite the backside access panel, there was no hole in there for the probe to, well, probe.

could someone out there with an Intrepid ii, especially now that the weather's kind of nice in the northeast today, take a picture of the back of their stove and the secondary air assembly? I think I'm going to go ahead and order it, but it's pretty tough to picture how it goes together from the exploded parts diagram.

E: think I've figured out how the secondary air system works, as the thermostatic probe moves due to heat, it lifts the link which pivots the flap around its upper left corner. for some reason, I was picturing the flap pulling off of the back of the stove, not sliding along it.
 
It looks a little different than the Defiant Encore which I am used to. However, some things are similar.

Here is what I know..
The temperature probe for the secondary air intake does pierce the refractory. There will probably not be a pre-drilled hole for this.
The secondary air shutter does slide up and down as controlled by a bi-metal spring which responds to the temperature in the refractory.

Its possible someone removed it because it had stopped functioning properly. After time the probe and spring can become corroded and eventually these parts just wear out.
Also, sometimes the air shutter gets caught in a draft just right and it makes a heck of a noise as it vibrates back and forth in its housing. That may be another reason it was just removed all together.
 
homebrewz said:
It looks a little different than the Defiant Encore which I am used to. However, some things are similar.

Here is what I know..
The temperature probe for the secondary air intake does pierce the refractory. There will probably not be a pre-drilled hole for this.
The secondary air shutter does slide up and down as controlled by a bi-metal spring which responds to the temperature in the refractory.

Its possible someone removed it because it had stopped functioning properly. After time the probe and spring can become corroded and eventually these parts just wear out.
Also, sometimes the air shutter gets caught in a draft just right and it makes a heck of a noise as it vibrates back and forth in its housing. That may be another reason it was just removed all together.

This is very helpful, thanks!

Aside, i see you're a beer guy, in the east of central NY. Did you make it over to Belgium comes to Cooperstown a couple years back? Great party...

Also: I have a gasket/seal kit for this, should I do it now (giving it time to set) or install the seals when I reassemble it all when the parts come in a couple of days?
 
For some parts, like the doors, you could probably re-gasket them now if you wanted, but I would just do the gaskets when you're getting ready to do the reassembly. That way the gaskets can be pressed into place as the cement cures. The only problem is if there is a place that has gotten too much cement and it oozes out around the gasket causing a door to stick, etc. Careful application of the cement will cure that problem. Remember to try and clean most of the fly ash accumulation in the passageways of the stove while its apart. It will help a lot with its operation.

This month I celebrate 15 years of homebrewing. I went to the first 3 Belgium Comes to Cooperstown festivals (or BCC as they call it around the brewery). After the third one, they made it more of an exclusive event by doubling the price and limiting ticket sales. Understandably, this has annoyed some of the locals. This was also somewhere around the time the brewery was sold and went from local hands to Mortgat Duvel, a very large corporation. I understand tickets for that event now sell out on the day they go on sale. I went back as a volunteer one year. Still had a great time, but that fest has grown by leaps and bounds.
 
homebrewz said:
For some parts, like the doors, you could probably re-gasket them now if you wanted, but I would just do the gaskets when you're getting ready to do the reassembly. That way the gaskets can be pressed into place as the cement cures. The only problem is if there is a place that has gotten too much cement and it oozes out around the gasket causing a door to stick, etc. Careful application of the cement will cure that problem. Remember to try and clean most of the fly ash accumulation in the passageways of the stove while its apart. It will help a lot with its operation.

This month I celebrate 15 years of homebrewing. I went to the first 3 Belgium Comes to Cooperstown festivals (or BCC as they call it around the brewery). After the third one, they made it more of an exclusive event by doubling the price and limiting ticket sales. Understandably, this has annoyed some of the locals. This was also somewhere around the time the brewery was sold and went from local hands to Mortgat Duvel, a very large corporation. I understand tickets for that event now sell out on the day they go on sale. I went back as a volunteer one year. Still had a great time, but that fest has grown by leaps and bounds.

Oh, it's all damn clean. I think I'm going to hold off on the gasket rebuild then. I have a steady hand from all the years I worked as a tile mason, I should be fine keeping the cement even.

Can't say I've ever caught the homebrew bug, but I did work at the local brewery for a spell, and have been working for a cidery on the wine trail here for years. I was at BCC in '07, but have been a regular working at the brew fest here every year since it started. not huge on beer fests, but they're a good use of an afternoon from time to time.
 
Welp, y'all have talked me into it, ordered the secondary air stuff. didn't spring for the screws or the felt washer, figured I'd source those for MUCH less than $7-12 a pop.
 
Try a forum search for "Intrepid II". There's been quite a few threads about different issues with that stove.

As a side note, that catalyst is why I'm reluctant to use an all metal cat. As much as the metal band around a ceramic cat can eventually warp, the all-metal cat in the picture seems just as bad or worse.
The band on my ceramic cat bowed out only on the ends...that one there seems warped in multiple directions.

Don't forget to check your glass gaskets. Make sure the glass isn't loose...the retaining clips should be snug (don't overtighten). Good luck.

PS. The 1303 cat is accessed from the back(later models changed it to access from inside firebox). I believe the refractory chamber is sold without the rectangular refractory piece you place over opening after you slide the cat inside. Save the piece from your old box to reuse. The second large opening in the refractory box on the other side obviously aligns the throat hood/exhaust intake from the firebox.
 
Just an update.

After putting it all together, it's amazing how much more heat this things puts out! Still haven't done anything about the secondary air (still open), but I think I'll take a piece of the old refractory chamber and block it off tomorrow. It's open when cold and closes when warmed up, right?

I haven't gotten the stove past 550 with the wood we've got at the moment (harvested from standing dead about three weeks ago), but even with that you can certainly keep things warm.

One thing about the Cat "lighting off", is the cat lighting off that the rumble I hear when the stove approaches 500 with the bypass open? tough to tell otherwise as I can't see the thing during operation.

Thanks everyone!
-Dan.

E: and the gasket job was surprisingly easy, if any of you are holding off, just go for it.
 
After putting together a mental picture of what the secondary air flap does (open when cold, closed when hot), I've decided to wedge a piece of my old refractory chamber behind the back plate and block it closed for now.

Seems to working better than before I blocked it off. I must have not totally covered it though, because when I close the primary air, it looks like there is still some air getting in. Perhaps it's the spot that Ann from KY had trouble with, I'll have to look more into it.

Have to say, it was a total PITA to get the bypass assembly back in once I tightened up the upper fireback using the acorn nut covered my the thermostat housing. Could be lose now that the stove has heat cycled a couple times.

Looks MUCH happier now!

From this-
uQ0le.jpg


To this-
yRchG.jpg
 
Status
Not open for further replies.