Chimney Flue Extender?

  • Active since 1995, Hearth.com is THE place on the internet for free information and advice about wood stoves, pellet stoves and other energy saving equipment.

    We strive to provide opinions, articles, discussions and history related to Hearth Products and in a more general sense, energy issues.

    We promote the EFFICIENT, RESPONSIBLE, CLEAN and SAFE use of all fuels, whether renewable or fossil.

velocity1

Member
Dec 5, 2021
95
Connecticut
HI All,
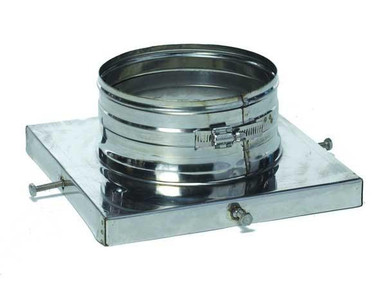
Im looking to extend my chimney another 18-24"s above my ridgeline. The chimney company that did my wood stove install said they could do it for another $750 but this seems like an easy diy for way less. My question is they had mentioned they would add on a 24" class a pipe as an extension. Is that really needed, i was thinking about ordering this:

Its just a simple 18" long stainless steel single wall pipe. Should i be concerned the 18" isn't insulated? Pic attached for current set up that needs to be extended

1.jpg
 
Yes, that would work. The exposed pipe will be cooler and therefore will cool down flue gases quicker in that section. A class A pipe extension will stay warmer.
 
Yes, that would work. The exposed pipe will be cooler and therefore will cool down flue gases quicker in that section. A class A pipe extension will stay warmer.
Thanks! Since Im already working with a shorter chimney any benefit with the insulated pipe even with it just being only 2 feet exposed?
 
It could help, depending on the flue temps. If the flue temps are only 300º a couple of feet above the stove during the early stages of the burn then creosote could form in the cold section.

Is the liner in the chimney insulated? If not, the lack of insulation will further cool down the flue gases.
 
My stove pipe only goes up about 2.5' from stove then 90 degrees through wall. I would say flute temps with my IR gun are in that 300 range if i recall by the 90 degree but will have to double check. They didnt use an insulated liner but did stuff down insulation around the liner

1.jpg
 
Alright so follow up question is Im going to also upgrade my top plate on my flue to this:

If I decide to extend my chimney by the 2 feet using a class a chimney pipe does anyone know how to connect that to this top plate and then connect the other end to a vacu stack? I know if I was just solely swapping out my current cap with a vacu stack they have a top plate specific to that cap. Adding in a class a pipe and the forever flex top plate im coming up short finding what parts are needed to make the connection. I found a class a connector to single wall stove pipe but not sure if that could work connecting it to the top plate?
If you are extending with class a you need a transition anchor plate to go from your liner to class a. Then you need the cap that is designed for your chimney system
 
If you are extending with class a you need a transition anchor plate to go from your liner to class a. Then you need the cap that is designed for your chimney system
Ah ok so the anchor plate I posted there's no way to make it work? For the transition anchor plate you refer to do I have to drill that into the 8x13 flute?
 
Ah ok so the anchor plate I posted there's no way to make it work? For the transition anchor plate you refer to do I have to drill that into the 8x13 flute?
No you take the clay flue tile down flush and anchor to the crown of the chimney.
 
No you take the clay flue tile down flush and anchor to the crown of the chimney.
Ahhh damn ok not really what im looking to do at this time (cutting down the tile) so I think Ill stick to the extension pipe I originally posted in this thread, the single wall. Thanks for the info as always!
 
Alright so had some warmer weather this weekend and was able to install the the 2 foot extension along with the better top plate. While I was installing it I realized I didn't think about extending the liner as well which makes me ask the question should I? Currently the liner stops about flush with the top plate. I see that they sell a male to male connector where if i wanted to i can add another 2 feet of liner so it goes towards the cap. If I don't extend the liner the 2 feet am I risking condensation forming in the 2 feet of the extension and dripping down behind the liner and going down into the chimney?

1.jpg
 
Hey, I'm looking to do the same thing. How did your installation work for you? I'm replacing my failed cheap liner and want to extend the pipe to increase the draft. So far this is the best option I found.
 
The op's last post was almost a year ago so you might not get an answer.

I am a bit confused by his last post, not sure why he is talking about extending the liner in addition to what he already added, sounds like he means to add it inside the extension which doesn't make sense.
 
Last edited:
What i meant by the liner was at the time the liner stopped at the top of the terra cotta flue tile. I should had extender the liner up the inside of the 2 foot extension. Would of had less condensation build up inside the extension and leak out at the bottom of the base plate.

But that was then and that whole set up made no difference for draft. I ended up extending off the chimney cap with 6' of class a chimney pipe. That worked MUCH better for my draft issue, resolved it.
 
  • Like
Reactions: bigealta
What i meant by the liner was at the time the liner stopped at the top of the terra cotta flue tile. I should had extender the liner up the inside of the 2 foot extension. Would of had less condensation build up inside the extension and leak out at the bottom of the base plate.

But that was then and that whole set up made no difference for draft. I ended up extending off the chimney cap with 6' of class a chimney pipe. That worked MUCH better for my draft issue, resolved it.
Thanks for the replay. That exact thing I'm contemplating. Adding an uninsulated 2 ft of extender or going with class A pipe. How did you install the pipe? I understand it's more labor and material involved.
 
Thanks for the replay. That exact thing I'm contemplating. Adding an uninsulated 2 ft of extender or going with class A pipe. How did you install the pipe? I understand it's more labor and material involved.
I had a chimney company do the install with the class a chimney pipe but they did a crap job and didn't do it the way it should have been done. Basically instead of cutting off my terra cotta flue tile flush that was sticking out of the chimney and bolting down a class a adapter plate, they ended up screwing together the class a pipe to my liner. They then poured concrete inside of the flue tile to lock everything in together and keep the pipe from moving. They made it much more difficult to do and Ill end up needing to take it all off at some point down the road and do it right with the class a adapter top plate. That bolts down to your crown and then it secures your liner within the top plate. You then install your class a pipe onto the top plate. You need to make sure you are using the same companies top plate and chimney pipe as they are specific to each other. Attaching a pic of my set up for a visual. thanks

IMG_9171.jpg
 
  • Wow
Reactions: begreen
I had a chimney company do the install with the class a chimney pipe but they did a crap job and didn't do it the way it should have been done. Basically instead of cutting off my terra cotta flue tile flush that was sticking out of the chimney and bolting down a class a adapter plate, they ended up screwing together the class a pipe to my liner. They then poured concrete inside of the flue tile to lock everything in together and keep the pipe from moving. They made it much more difficult to do and Ill end up needing to take it all off at some point down the road and do it right with the class a adapter top plate. That bolts down to your crown and then it secures your liner within the top plate. You then install your class a pipe onto the top plate. You need to make sure you are using the same companies top plate and chimney pipe as they are specific to each other. Attaching a pic of my set up for a visual. thanks

View attachment 324180
Lousy install, voided the chimney warranty, and they never braced the pipe. How long before water collects in the flue now that there is a dam there and busts the clay liner?
 
Lousy install, voided the chimney warranty, and they never braced the pipe. How long before water collects in the flue now that there is a dam there and busts the clay liner?
I custom made a rain cap to go over the flue and caulked it so it’s water tight. Don’t have a more recent photo. As for bracing the pipe hard to explain without me drawing it out but that pipe is going nowhere…..for now. Just about a foot of the pipe is locked in there with concrete as well as it’s sitting on a concrete pad underneath it, I check it once in a while to see how it’s holding up also. But again yeah a chit job and i’ll eventually tear it all off and do it right with an anchored top plate.