Englander NC30 Install Kickoff

  • Active since 1995, Hearth.com is THE place on the internet for free information and advice about wood stoves, pellet stoves and other energy saving equipment.

    We strive to provide opinions, articles, discussions and history related to Hearth Products and in a more general sense, energy issues.

    We promote the EFFICIENT, RESPONSIBLE, CLEAN and SAFE use of all fuels, whether renewable or fossil.
Status
Not open for further replies.

GatorDL55

Member
Dec 9, 2009
116
Broadview Hts, OH
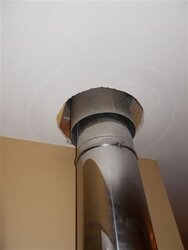
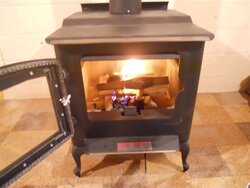
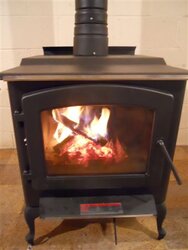
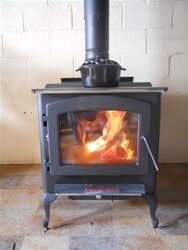
New to the forum but have been reading and educating myself on here for the past month. A lot of good insight here that would otherwise have not been available. I have my stove (which I got a hella deal on at Lowes https://www.hearth.com/econtent/index.php/forums/viewthread/47405/#544009 ), single wall pipe, double wall chimney, and installation kit (includes things like ceiling support, insulation shield, flashing, cap, etc).

The stove is going in my basement which renovation should be completed this winter. I'm going to get my hearth all set up first and get the stove operable. I'll then work around it finishing off the basement.

My only holdup right now is the fact that there is 12 inches of snow on my roof. Here in Cleveland OH it doesn't look like we'll have a warm up anytime soon with all of this cold air coming from Canada. Unless someone else has ideas or experience installing a chimney on a roof that is snow covered, my hands are basically tied at this point.

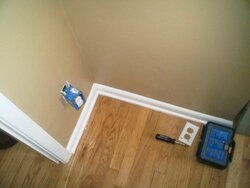
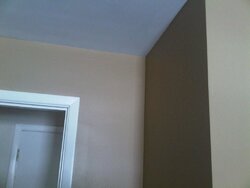
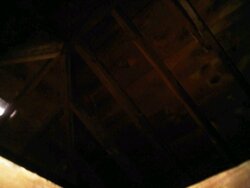
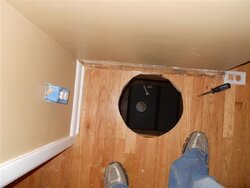
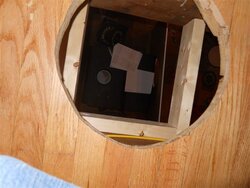
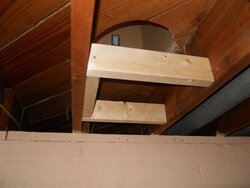
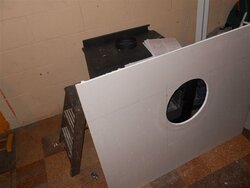
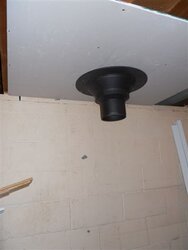
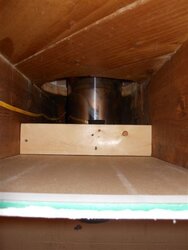
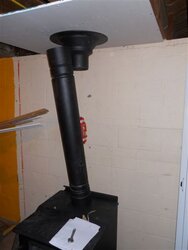
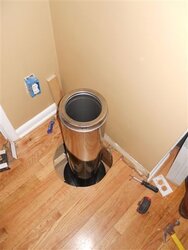
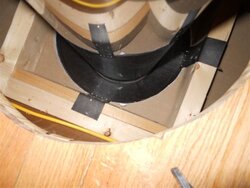
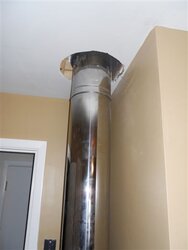
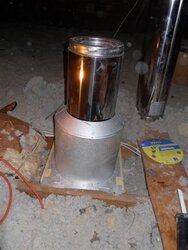
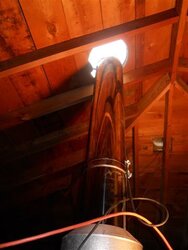
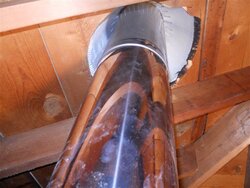
Install is pretty straight forward. The stove is in the basement and the chimney will run through the first floor, into the attic and out the roof. I'm going to frame a little bulkhead in the room I use for my office for the chimney to pass through. I can run straight up from the stove and out the top of the roof -- the only issue would be that the chimney is in the middle of the roof on the front of the house. I have thought about using an offset in the attic to allow the chimney to be placed on the back of the house to alleviate some of the eye sore. Any one else run into a situation like this?

Finally, I think that I am going to do the install myself but I did find a local guy that does chimney installations (apparently that's all he does). He wants to charge $300 to install the chimney. What are your thoughts on the route I should go? I mean, I'm pretty handy and can tackle all other home improvement projects. I am torn because it would be nice to have him come in and do it so I don't have to but at the end of the day, 300 bucks is 300 bucks.
 
I installed my own last march. I had snow on the roof, and i think the snow helped to keep me from slideing off. The install went very well. Its all about planing. You have to plan for obsticles like floor/ ceiling truses and maybe even wires. Its not as easy as it sounds sitting at your computer. If you can go straight up that is best. What ever you plan it may be a good idea to draw it out in high detail and have someone look at it to catch anything you may have missed or give ideas.
 
How tricky will your chimney install be?

In my place, the "attic" is merely the space between all the roof trusses. I had about 40" of height to work with, and because it was a vaulted ceiling below, everything was at an angle. I spent a few hours up there folded in half up there doing the basic framing and mounting the ceiling box, getting the pipe in, getting the supports in place, and preparing where the hole in the roof would be cut. I also had a pair of offset elbows to get into position properly.

For $300... I'd have been inclined to let some other poor sap crawl up there and roll around in the fiberglass insulation.

If your place is different, and you have easier access, more room to work, and no offsets... it might be worth just doing your self.

-SF
 
He only wants three hundred to do it? I don't see a question here. :)
 
Send him up here: Quote I got was $2,000 for install (no liner/cap or insulation or blockoff plate included).

Shari
 
GatorDL55 said:
He wants to charge $300 to install the chimney. What are your thoughts on the route I should go?

After paying $2,000 for one install and $1,600 for the other I REALLY don't see the problem. But, I will be doing my own install for my next stove, so I understand the need to save money.
 
$300 is for him to come and install. I supply the materials.

Here's what it looks like -

The firstpicture is the floor above where the chimney will pass through. The screw driver is about the center where it will come through. The outlet on the wall is being served by the romex wire below (in the next picture). I'll have to move the outlet and switch because where it is now will be framed in the bulkhead.

The second picture is the basement looking up. The sticker in the picture is where the chimney is going to pass up. Block wall behind the stove so I don't have to worry about the large clearances. The only thing that concerns me is the wooden top plate -- that's a combustible. The romex wire should be outside of the 2 inch clearance but i can move if necessary.


The third picture is the ceiling. Right on the inside of the wall on the right is an access to the crawlspace. There is a fair amount of room up there. I can walk bent over at the waist.

The last picture is the crawl space. There is blown cellulose insulation in the attic. I wouldn't need too much of an offset to have the chimney come out the back. I was thinking for simplicity sake, just have it come out the front and I can paint it later so it's not bright silver.
 

Attachments

  • IMG00041-20100105-1426.jpg
    IMG00041-20100105-1426.jpg
    63.9 KB · Views: 586
  • IMG00032-20100105-1423.jpg
    IMG00032-20100105-1423.jpg
    66.1 KB · Views: 553
  • IMG00033-20100105-1423.jpg
    IMG00033-20100105-1423.jpg
    53.1 KB · Views: 542
  • IMG00037-20100105-1424.jpg
    IMG00037-20100105-1424.jpg
    38.4 KB · Views: 563
For $300, if you can swing it, I'd get it installed. I paid $750 (2-story installation). I would also do the offset and vent it out the back if you can. A one-story house down the street from me has the pipe coming through the roof in front and, frankly, it just looks kind of silly to have this big silver tube sticking up out of the front of the roof.
 
fredarm said:
For $300, if you can swing it, I'd get it installed. I paid $750 (2-story installation). I would also do the offset and vent it out the back if you can. A one-story house down the street from me has the pipe coming through the roof in front and, frankly, it just looks kind of silly to have this big silver tube sticking up out of the front of the roof.

Thanks for the reply. I can swing the 300 but can think of 100 other things that I would rather spend it on. Any idea where I can get a 15 or 30 degree offset kit for a supervent chimney? I got the chimney at lowes and they don't stock the offset kit. I'm in Cleveland Oh.
 
When I installed mine, I used SuperVent. Lowes and Menards are the only two US vendors for that Selkirk line of chimney parts. At the time, both Lowes and Menards carried the 15 degree kits in stock, and both had to special order the 30 degree kit for me.

Too bad it turned out I needed the 30 degree kit!!

-SF
 
An offset may look nice, but i sure would hate to clean one. Its enough to brush out a straight chimney, could'nt imagine pushing a brush throgh a couple off sets! I never have cleaned one with an offset, maybe its easy! someone must know...
 
SlyFerret said:
When I installed mine, I used SuperVent. Lowes and Menards are the only two US vendors for that Selkirk line of chimney parts. At the time, both Lowes and Menards carried the 15 degree kits in stock, and both had to special order the 30 degree kit for me.

Too bad it turned out I needed the 30 degree kit!!

-SF

Yeah - i just just reading your other post where you were trying to find the 30 offset. Did you end up finding one?
 
If he knows what he is doing $300 is a deal, your house insurance may require a licensed contractor and if he is then go for it.
 
GatorDL55 said:
SlyFerret said:
When I installed mine, I used SuperVent. Lowes and Menards are the only two US vendors for that Selkirk line of chimney parts. At the time, both Lowes and Menards carried the 15 degree kits in stock, and both had to special order the 30 degree kit for me.

Too bad it turned out I needed the 30 degree kit!!

-SF

Yeah - i just just reading your other post where you were trying to find the 30 offset. Did you end up finding one?

Yup! I had to special order it. Took somewhere between 2 and 3 weeks to arrive. Then I just had to find a good weather day to get everything in.

-SF
 
Here are some pictures of the progress I made tonight. Finally got a stopping point in other projects I'm working on to work on installing the stove. The only obstacle so far is the extendable double wall stove pipe is too long even with it collapsed the whole way. I think I might be able to shorten it tomorrow with a band saw.
 

Attachments

  • DSCN0366.jpg
    DSCN0366.jpg
    34.7 KB · Views: 367
  • DSCN0367.jpg
    DSCN0367.jpg
    42.5 KB · Views: 389
  • DSCN0368.jpg
    DSCN0368.jpg
    33.4 KB · Views: 382
  • DSCN0369.jpg
    DSCN0369.jpg
    29 KB · Views: 373
  • DSCN0370.jpg
    DSCN0370.jpg
    13 KB · Views: 374
  • DSCN0372.jpg
    DSCN0372.jpg
    19.2 KB · Views: 399
  • DSCN0374.jpg
    DSCN0374.jpg
    17.6 KB · Views: 385
  • DSCN0375.jpg
    DSCN0375.jpg
    22.5 KB · Views: 369
I finished up the install on Friday night. I'll post the rest of the pics that I took throughout the install. I wanted to put up a video I took tonight with my phone. The secondaries were really taking off.

 
Sweet! Glad to hear you got it put into service!

Great looking video, by the way. Impressive, actually, considering it's from your phone!

-SF
 
Here are some pictures from the installation. It wasn't actually that bad. I think I psyched myself out reading posts on here for the last 2 months. I gained a lot of valuable knowledge through the members on here but also heard a lot of horror stories. I have about 8 hours into the installation total.

The part the I was dreading the most was actually one of the easiest -- the roof. I wanted to get everything in before the big snow storm came through on Friday. I cut the hole in the roof and poked my head out just as it was starting to snow. Had to hustle up on the roof because the longer I was up there, the more snow that was laying on the roof. By the time I was done, the roof was completely covered in snow.

Have been burning all weekend and the heat in the house has only kicked on a few times (maybe like 4). I have a bit more work to do in the basement -- I'll make a nice hearth and put stone on the wall. Right now it's just sitting on a concrete floor covered with asbestos tile and against a block wall so I don't have an combustibles to worry about around the stove, per se. I maintained the 8 inch clearance to the wall with the DSP just because there is a wood plate on top of the block wall the the rafters sit on. I will also be framing in the chimney pipe tonight where it passes through the room above.

Snapped some pictures of the install to share with everyone because I have heard many times -- "Pictures needed or it did not occur".

Question - got a stove top temperature gauge and it consistently runs around 525 degrees. Is this pretty standard of what I should be getting out of the NC 30?
 

Attachments

  • DSCN0377.jpg
    DSCN0377.jpg
    40.4 KB · Views: 283
  • DSCN0381.jpg
    DSCN0381.jpg
    14.3 KB · Views: 289
  • DSCN0382.jpg
    DSCN0382.jpg
    29.2 KB · Views: 307
  • DSCN0384.jpg
    DSCN0384.jpg
    24.5 KB · Views: 295
  • DSCN0385.jpg
    DSCN0385.jpg
    46.7 KB · Views: 277
  • DSCN0386.jpg
    DSCN0386.jpg
    11.2 KB · Views: 287
More pictures of the install.
 

Attachments

  • DSCN0388.jpg
    DSCN0388.jpg
    36.1 KB · Views: 296
  • DSCN0393.jpg
    DSCN0393.jpg
    21.4 KB · Views: 288
  • DSCN0397.jpg
    DSCN0397.jpg
    23.7 KB · Views: 265
SlyFerret said:
Sweet! Glad to hear you got it put into service!

Great looking video, by the way. Impressive, actually, considering it's from your phone!

-SF

Thanks for the note. Ended up doing it myself because the guy I was going to use got a new phone and I couldn't get a hold of him.

The video was taken on my Blackberry Bold 9700. It's the new one that uses a touch pad instead of a trackball. It's a really great phone and the camera on it is really good for a phone.
 
Status
Not open for further replies.