Improving my draft

  • Active since 1995, Hearth.com is THE place on the internet for free information and advice about wood stoves, pellet stoves and other energy saving equipment.

    We strive to provide opinions, articles, discussions and history related to Hearth Products and in a more general sense, energy issues.

    We promote the EFFICIENT, RESPONSIBLE, CLEAN and SAFE use of all fuels, whether renewable or fossil.
  • Hope everyone has a wonderful and warm Thanksgiving!
  • Super Cedar firestarters 30% discount Use code Hearth2024 Click here

Wrad

New Member
Feb 3, 2018
7
TN
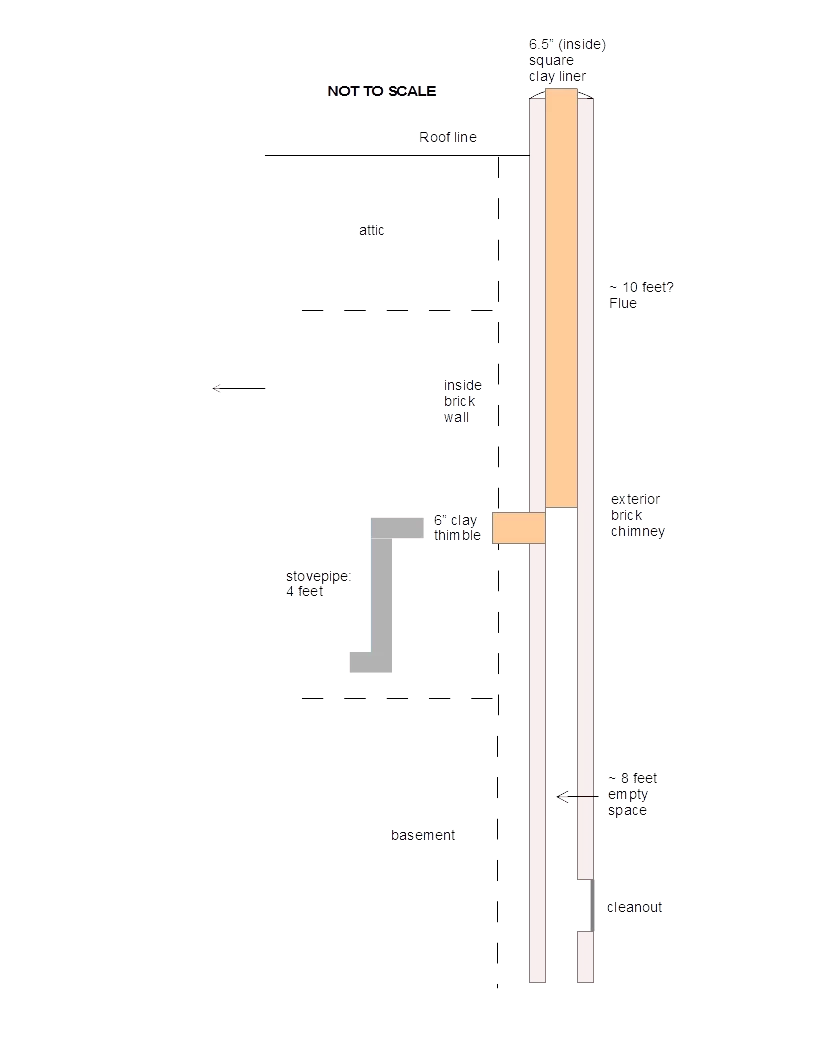
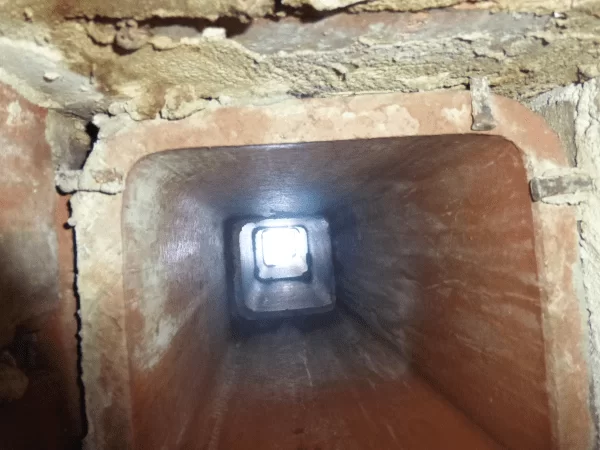
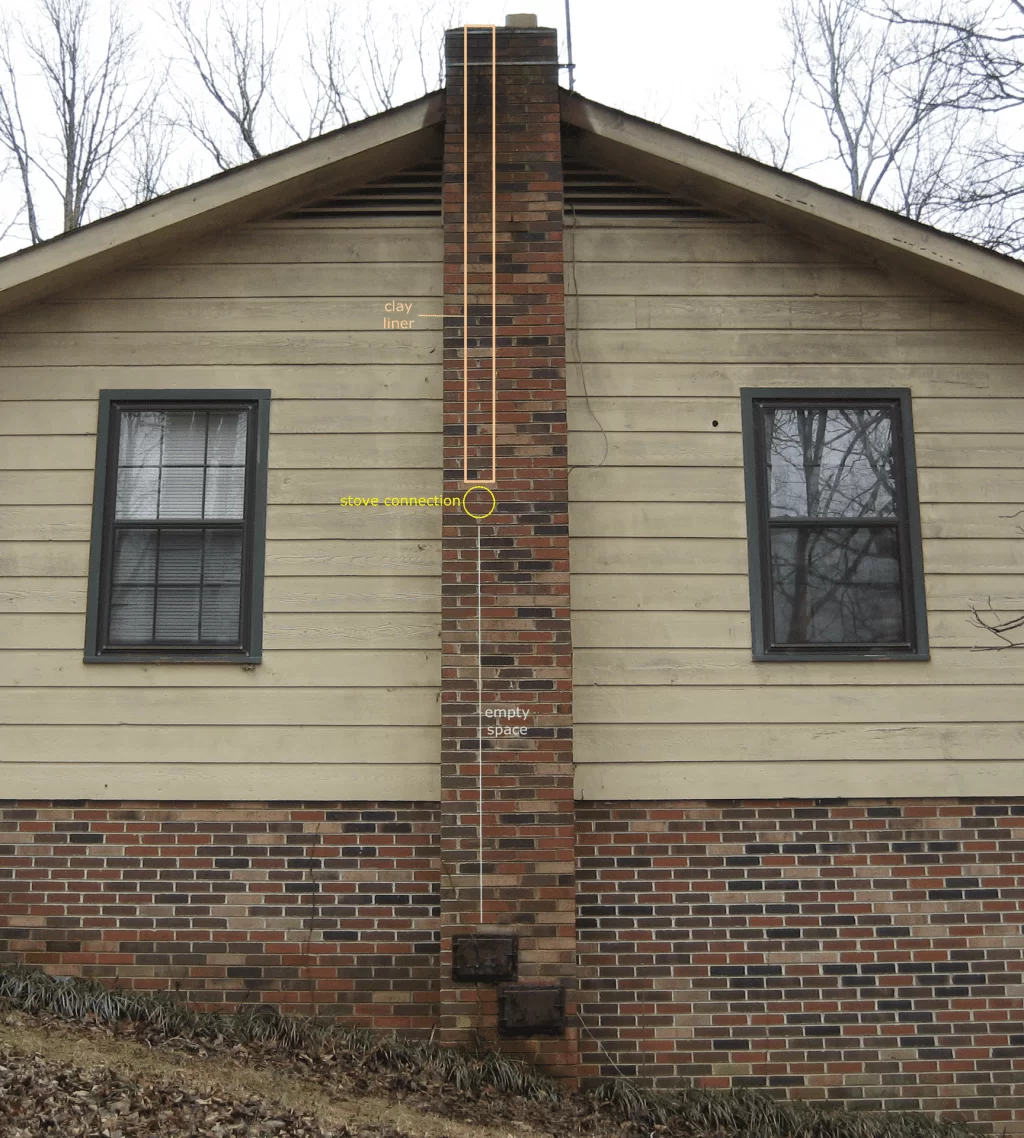
I'm hoping to make a marginal, cheap improvement to my masonry chimney draft. Please see the attached diagram and pics; vertical distances are rough estimates.
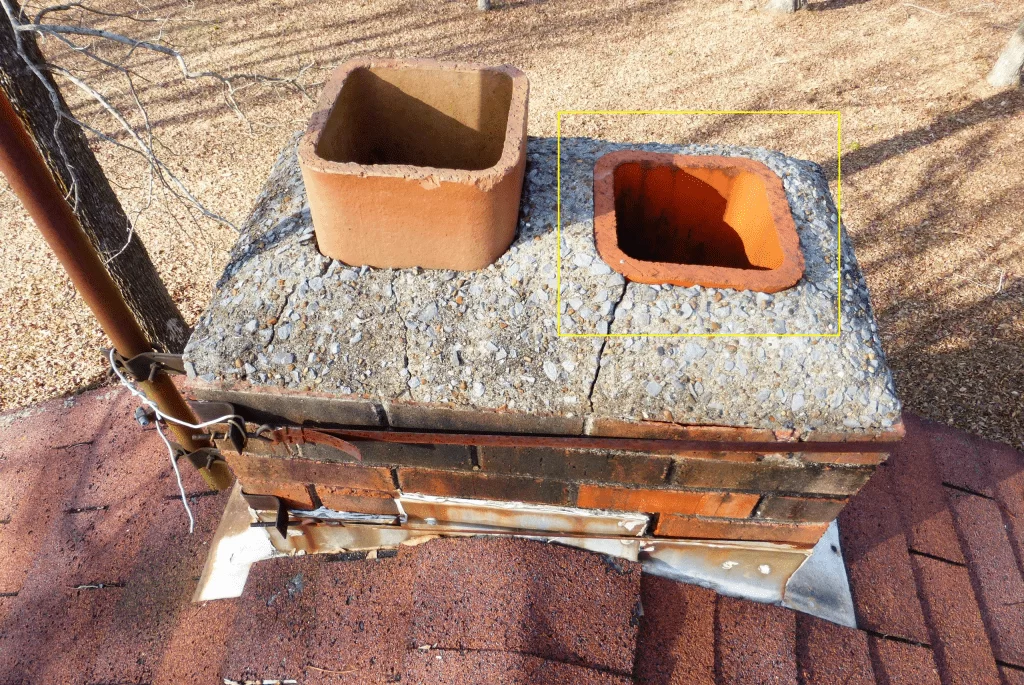
This is an exterior chimney with two flues, 6.5" (inside diameter) clay liners, and no caps. I'm using the flue for the upper (main) floor. The flue liner is clean and with no obvious leaks. I have blocked the unused (taller) flue to prevent it from sucking down. I'm using single-wall stovepipe inside.
There is about 8 feet of empty space in the chimney below the stove connection, and the metal cleanout door at the bottom is not perfectly sealed.
Would plugging up the empty chimney space (right below the clay thimble) make much of a difference? What material or device would be safest to use for that?

Would some kind of flue extension help, and if so, how much additional length would actually make a difference?. How about devices such as Vacu-Stack, turbines, wind-directional caps, etc.?

The liner for the flue I'm using is flush with the mortar on top of the chimney, so any cap or other device will have to be inserted into the liner or used with an adapter.
From what I gather, a complete chimney insert kit solves most problems, but I'd like to rule out cheaper solutions before doing that.
 

Attachments

  • [Hearth.com] Improving my draft
    chimney.webp
    22.6 KB · Views: 125
I'm hoping to make a marginal, cheap improvement to my masonry chimney draft. Please see the attached diagram and pics; vertical distances are rough estimates.
This is an exterior chimney with two flues, 6.5" (inside diameter) clay liners, and no caps. I'm using the flue for the upper (main) floor. The flue liner is clean and with no obvious leaks. I have blocked the unused (taller) flue to prevent it from sucking down. I'm using single-wall stovepipe inside.
There is about 8 feet of empty space in the chimney below the stove connection, and the metal cleanout door at the bottom is not perfectly sealed.
Would plugging up the empty chimney space (right below the clay thimble) make much of a difference? What material or device would be safest to use for that?

Would some kind of flue extension help, and if so, how much additional length would actually make a difference?. How about devices such as Vacu-Stack, turbines, wind-directional caps, etc.?

The liner for the flue I'm using is flush with the mortar on top of the chimney, so any cap or other device will have to be inserted into the liner or used with an adapter.
From what I gather, a complete chimney insert kit solves most problems, but I'd like to rule out cheaper solutions before doing that.
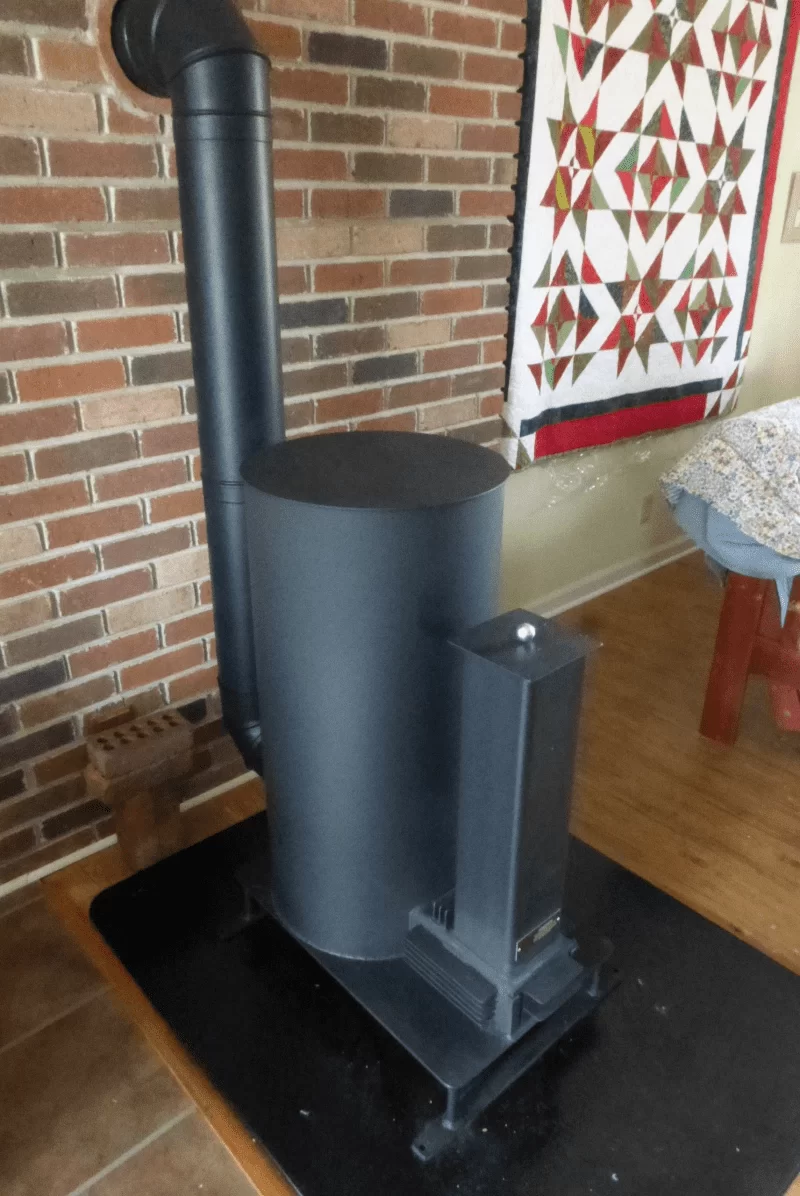
The chimney should be lined the clay liner does not come down past the crock which means it does not meet code at all. Yes filling that empty space may help but it still wont be safe. Your chimney is also pretty short what flue height rewuirements does that rocket stove have?
 
The chimney should be lined the clay liner does not come down past the crock which means it does not meet code at all. Yes filling that empty space may help but it still wont be safe. Your chimney is also pretty short what flue height rewuirements does that rocket stove have?
The manufacturer said the total length should be at least 12 feet.
 
The manufacturer said the total length should be at least 12 feet.
Then you should be ok with height when you add in the pipe but a little short when you subtract for the elbows. Add in the oversized flue no insulation and the bad area at the crock and you dont have enough draft.
 
You could try switching out the 90 for 2 45s and filling below the crock it might work ok but an insulated liner is the answer
 
  • Like
Reactions: semipro
I am really curious to see how this works for you. The concept of a rmh is very interesting. And i could see how it could work well. I just have a problem with some of the fanatics and their disinformation on the subject.
 
You could try switching out the 90 for 2 45s and filling below the crock it might work ok but an insulated liner is the answer
Thanks for your suggestions. There's one thing I don't understand about installing a new liner: I can only get one arm inside the clay thimble, so how could I attach the liner (or its T connector?) to the stovepipe?

We have very warm weather here at the moment, so I am not doing any burning. I will report back when there is anything to report. Meanwhile, I've ordered some neoprene gasket material for the cleanout door. My draft is actually not too bad, but I'd like to get about 200F additional temp.
 
The liner tee section is in two parts. The body is in the chimney, then the snout is attached through the thimble.
(broken link removed to https://www.rockfordchimneysupply.com/blog-2/How-to-Install-a-Chimney-Liner-Tee-Connector/)
 
I'll sell you a 25' Homesaver Pro (not Ultra Pro) liner for two hunnert bux. ==c Where in TN are you? It's about 2:15 to Nashville from here..
 
I am really curious to see how this works for you. The concept of a rmh is very interesting. And i could see how it could work well. I just have a problem with some of the fanatics and their disinformation on the subject.
I inserted a sheet of 1/8" neoprene behind the cleanout door to act as a gasket and seal it. This seems to have made an improvement. I've been able to get the "cooking" surface as high as 675F, while most of the time it stays around 450. The chimney exhaust remains smokeless as long as the wood is burning hot. I'm using a mix of good kindling, lumber scraps, and old sticks from the yard.