
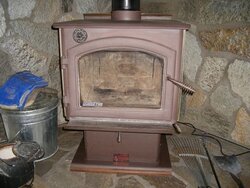
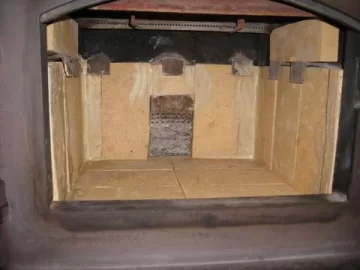
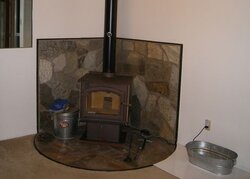
Never one to let well enough alone, I am looking at the firebox of my 1987 Quadrafire 3000 to see if there is anything I should do to it before launching the burn season. It has worked great us for the 7 seasons we have had the place, with the last season being the best, after I learned how to run it effectively from info on this forum. I am now looking to optimize it for this coming year.
From what I have learned here, it seems having a "hotter" firebox helps get and keep secondary combustion going on a non-cat early EPA stove like this one. To that end, I have these questions:
Firebrick Question:
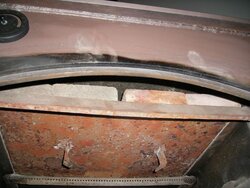
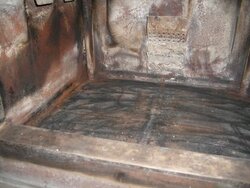
I am contemplating replacing the fire brick; several are cracked and most look to be "worn" a little thinner from many years of fiery splits being slammed into them.
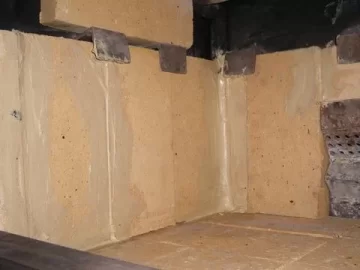
In looking around inside the firebox, I wonder if installing firebrick the rest of the way up the sides of the stove would be a good idea or not. My thoughts are that it would force the heat out the front, more, than radiating out the steel sides. The stove is in a corner, so heat radiating out the sides does more to heat the exterior walls than the heat forced out the front that seems to heat us more.
Question: Is extending the brick up another three or so inches inside the firebox sidewalls a good or bad idea, or at best a waste of time?
Baffle Questions:
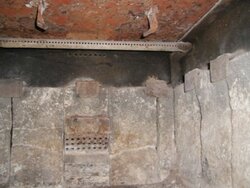
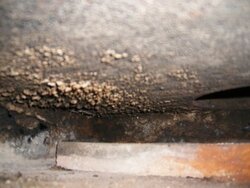
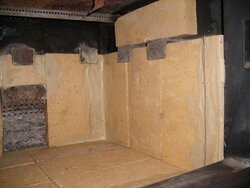
The baffle is a flat steel plate sitting on a couple of pieces of angle iron. It's about 3/8" thick and goes back to the back wall of the firebox. There are (8) firebricks sitting on the top of the baffle that cover most of the upper surface of the baffle. Not sure if this was original or not, since the stove came with the house.
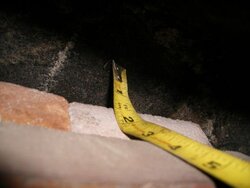
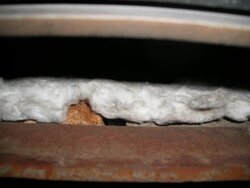
There is now about 1 1/2" of space between the top of the bricks and the actual top of the inside of the stove. I read in a QF3100 manual that I downloaded (closest I could find to mine) that there should be a Kaowool blanket that sits on top of the baffle. I do not see any fire bricks mentioned in this manual, on top of the baffle area. Maybe they had not bred the special fireproof Kao sheep back in 1987 to harvest Kaowool from, so they used bricks instead of the Kaowool?
Questions:
1: Should the fire bricks sitting on top of the baffle stay, or be replaced with a Kaowool blanket? Or maybe a fiberboard?
2: If the fire bricks stay, should I put a Kaowool blanket on top of them? How much clearance should I have from the top of the Kaowool blanket to the inside top of the stove? (i.e. how thick of a piece of Kaowool should I think about for the 1 1/2" space that is there now, if I leave the bricks?
Thanks for taking a look at this post. Mods, if this belongs in The Gear, please feel free to move it.
From what I have learned here, it seems having a "hotter" firebox helps get and keep secondary combustion going on a non-cat early EPA stove like this one. To that end, I have these questions:
Firebrick Question:
I am contemplating replacing the fire brick; several are cracked and most look to be "worn" a little thinner from many years of fiery splits being slammed into them.
In looking around inside the firebox, I wonder if installing firebrick the rest of the way up the sides of the stove would be a good idea or not. My thoughts are that it would force the heat out the front, more, than radiating out the steel sides. The stove is in a corner, so heat radiating out the sides does more to heat the exterior walls than the heat forced out the front that seems to heat us more.
Question: Is extending the brick up another three or so inches inside the firebox sidewalls a good or bad idea, or at best a waste of time?
Baffle Questions:
The baffle is a flat steel plate sitting on a couple of pieces of angle iron. It's about 3/8" thick and goes back to the back wall of the firebox. There are (8) firebricks sitting on the top of the baffle that cover most of the upper surface of the baffle. Not sure if this was original or not, since the stove came with the house.
There is now about 1 1/2" of space between the top of the bricks and the actual top of the inside of the stove. I read in a QF3100 manual that I downloaded (closest I could find to mine) that there should be a Kaowool blanket that sits on top of the baffle. I do not see any fire bricks mentioned in this manual, on top of the baffle area. Maybe they had not bred the special fireproof Kao sheep back in 1987 to harvest Kaowool from, so they used bricks instead of the Kaowool?
Questions:
1: Should the fire bricks sitting on top of the baffle stay, or be replaced with a Kaowool blanket? Or maybe a fiberboard?
2: If the fire bricks stay, should I put a Kaowool blanket on top of them? How much clearance should I have from the top of the Kaowool blanket to the inside top of the stove? (i.e. how thick of a piece of Kaowool should I think about for the 1 1/2" space that is there now, if I leave the bricks?
Thanks for taking a look at this post. Mods, if this belongs in The Gear, please feel free to move it.

") . . . I'm guessing due to the lighting or flash.
. . . I'm guessing due to the lighting or flash.