1st post, 1st wood stove, DIY install...yikes

  • Active since 1995, Hearth.com is THE place on the internet for free information and advice about wood stoves, pellet stoves and other energy saving equipment.

    We strive to provide opinions, articles, discussions and history related to Hearth Products and in a more general sense, energy issues.

    We promote the EFFICIENT, RESPONSIBLE, CLEAN and SAFE use of all fuels, whether renewable or fossil.
Status
Not open for further replies.
webby3650 said:
Are you sure there isn't something out of place above the baffle? Some Jotuls use a ceramic wool blanket in the baffle, if this one has it make sure it isn't somehow restricting the flow. Even with a 10' flue, a small stove like this shouldn't be smoking out of the pipe joints. I think you might have a bigger problem here.

I was thinking the same thing. I can believe the night and day difference between before and after the sweeping.

It's a Jotul Nordic QT.
No cat. it just has a top plate. 8/1 on the pdf.
http://www.jotul.com/FileArchive/Technical Documentation/Wood Stoves/Jøtul F 100 Nordic QT/Exploded_view_F_100_P02_060706.pdf

Only thing I could think of is the thermometer if I collapsed the inner pipe, I made is kinda tight when I drilled it out.
Once its cools down I'll drop the plate down and check it with a mirror.... Before a I drop another $200 and climb up and on the roof.
 
You could also use a piece of stove pipe as a test before dropping the bucks on class A, although I can't see what else could be the problem. By the way, a storm collar is part of the attic insulation shield with some other brands, dura-tech includes one, we add one to other brands we use.
 
Could it be the house is very tight? Trying cracking a window .. and save yourself some time... Before your next fire just start a piece of newspaper that will tell.u if its drafting or not
 
Well after 5-12hr days of work I finally got to climb up on the roof.

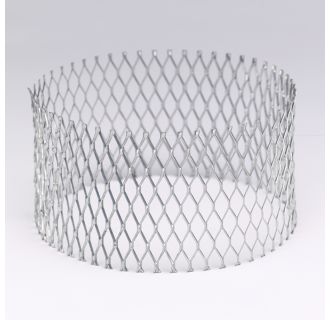
The Spark arrestor was 1/2 clogged. I took the thing out and did a news paper burn. After the paper started going I could open the door all the way and no smoke just a raging fire.
A newspaper burn really does simulate a raging fire, and it nice it that is goes out in less then a minute. It was the perfect test.

I just did a small fire which is still going now, went through all the draft position and again no leak.
Almost wanted to burn the $4 a gallon oil bill I got last week I was so happy.


I'm pretty sure the sweeping from the bottom up caused the problem. I guess I will just climb the roof from now on. Friend of mind does it bottom up on his 2 stoves and takes the stove pipe outside and that's the directions I followed that got me here.


Another mistake I made was I put the stove pipe adap. inside the ceiling support. I attached it outside and filled the gap as you can see in the above 3rd photo's... dumb a$$.
That will have to be fixed another day. According to the website instructions it should be the chimney sits inside the support box and the adap. get screw/turned into place inside the room. Makes sense now....

Follow-up

Is a spark arrestor required in a chimney cap? I still have it I just need to re-install it.
sp_spark.jpg

If its code related I'm in NY.
 
SushiStalker said:
...Is a spark arrestor required in a chimney cap?...

Depends on where you live. Where I live spark arrestors are required because of the danger of wildfire. Other places they're not required. You need to check with your local authority to find out. Rick
 
You can replace the screen with a screen that has larger openings.
If it is clogging that fast, your fuel is not dry enough, or your not burning hot enough.
Most of us go all season without needing to clean. Lat few seasons my screen was 90% clean also.
First season, I cleaned it every month or two. Was not a purdy sight.
 
This is interesting, the cap you showed above has mesh, I have installed several of the Super-vent flues and I never noticed any mesh. Did you or someone add the mesh?
 
SS,
I just installed a supervent chimney myself. Per my printed instructions with the kit and also their website pdf instruction book, the stove pipe adapter is installed to the first section of the chimney before it is lowered into the ceiling support. It is NOT installed on the lower side of the ceiling support. You did it right the 1st time.

I'm also skeptical that you need more chimney height. Mine came out the same height as yours with the exception of about 6 inches added by a 15 degree offset kit. Warm weather and high winds definitely can affect your draft. In warm weather you may need to fire a bit hotter to begin with to get the draft established. In high winds, you may need to open a window on the windward side of your home. Wind from different directions may affect draft differently depending on where the inherent leaks in your home happen to be.

BTW, how old is your home? The roof construction appears to be that of an older home, but, wow, is it ever clean! Or do you regularly vacuum and dust your unfinished attic?
 
roundoak16 said:
SS,
I just installed a supervent chimney myself. Per my printed instructions with the kit and also their website pdf instruction book, the stove pipe adapter is installed to the first section of the chimney before it is lowered into the ceiling support. It is NOT installed on the lower side of the ceiling support. You did it right the 1st time.

I'm also skeptical that you need more chimney height. Mine came out the same height as yours with the exception of about 6 inches added by a 15 degree offset kit. Warm weather and high winds definitely can affect your draft. In warm weather you may need to fire a bit hotter to begin with to get the draft established. In high winds, you may need to open a window on the windward side of your home. Wind from different directions may affect draft differently depending on where the inherent leaks in your home happen to be.

BTW, how old is your home? The roof construction appears to be that of an older home, but, wow, is it ever clean! Or do you regularly vacuum and dust your unfinished attic?
Did you us the round support of the cathedral ceiling support box? I think with Supervent, it makes a difference.
 
webby3650 said:
roundoak16 said:
SS,
I just installed a supervent chimney myself. Per my printed instructions with the kit and also their website pdf instruction book, the stove pipe adapter is installed to the first section of the chimney before it is lowered into the ceiling support. It is NOT installed on the lower side of the ceiling support. You did it right the 1st time.

I'm also skeptical that you need more chimney height. Mine came out the same height as yours with the exception of about 6 inches added by a 15 degree offset kit. Warm weather and high winds definitely can affect your draft. In warm weather you may need to fire a bit hotter to begin with to get the draft established. In high winds, you may need to open a window on the windward side of your home. Wind from different directions may affect draft differently depending on where the inherent leaks in your home happen to be.

BTW, how old is your home? The roof construction appears to be that of an older home, but, wow, is it ever clean! Or do you regularly vacuum and dust your unfinished attic?
Did you us the round support of the cathedral ceiling support box? I think with the Supervent round ceiling support, the adapter goes in the box, with the cathedral box the adapter locks into the female end of the pipe..
 
webby3650 said:
webby3650 said:
roundoak16 said:
SS,
I just installed a supervent chimney myself. Per my printed instructions with the kit and also their website pdf instruction book, the stove pipe adapter is installed to the first section of the chimney before it is lowered into the ceiling support. It is NOT installed on the lower side of the ceiling support. You did it right the 1st time.

I'm also skeptical that you need more chimney height. Mine came out the same height as yours with the exception of about 6 inches added by a 15 degree offset kit. Warm weather and high winds definitely can affect your draft. In warm weather you may need to fire a bit hotter to begin with to get the draft established. In high winds, you may need to open a window on the windward side of your home. Wind from different directions may affect draft differently depending on where the inherent leaks in your home happen to be.

BTW, how old is your home? The roof construction appears to be that of an older home, but, wow, is it ever clean! Or do you regularly vacuum and dust your unfinished attic?
Did you us the round support of the cathedral ceiling support box? I think with the Supervent round ceiling support, the adapter goes in the box, with the cathedral box the adapter locks into the female end of the pipe..

You are correct webby. My installation is same as the OPs installation. I realize that what is missing in his installation is the trim ring that fits between the ceiling and the ceiling support. Maybe it wasn't included in his kit for some reason.
 
roundoak16 said:
webby3650 said:
webby3650 said:
roundoak16 said:
SS,
I just installed a supervent chimney myself. Per my printed instructions with the kit and also their website pdf instruction book, the stove pipe adapter is installed to the first section of the chimney before it is lowered into the ceiling support. It is NOT installed on the lower side of the ceiling support. You did it right the 1st time.

I'm also skeptical that you need more chimney height. Mine came out the same height as yours with the exception of about 6 inches added by a 15 degree offset kit. Warm weather and high winds definitely can affect your draft. In warm weather you may need to fire a bit hotter to begin with to get the draft established. In high winds, you may need to open a window on the windward side of your home. Wind from different directions may affect draft differently depending on where the inherent leaks in your home happen to be.

BTW, how old is your home? The roof construction appears to be that of an older home, but, wow, is it ever clean! Or do you regularly vacuum and dust your unfinished attic?
Did you us the round support of the cathedral ceiling support box? I think with the Supervent round ceiling support, the adapter goes in the box, with the cathedral box the adapter locks into the female end of the pipe..

You are correct webby. My installation is same as the OPs installation. I realize that what is missing in his installation is the trim ring that fits between the ceiling and the ceiling support. Maybe it wasn't included in his kit for some reason.

It's not a cathedral support, its just the standard ceiling support.
I left of the trim off because I cut a exact fit circle. And I didnt like the look of the trim.

There maybe a conflict between the paper and online install. I would make more sense to keep the adaptor connection in the room for replacement. Why remove 10's of feet of class A to change an adaptor? Think about if it was between floors and enclosed it would never happen.

Checkout the website installation guide on the left
http://www.selkirkcorp.com/supervent/
you can skip ahead to installation and assy,.
http://www.selkirkcorp.com/Flash-Installation-Guide/english/supervent/supervent.swf


House is from the 20's it from the Camp Upton
http://en.wikipedia.org/wiki/Camp_Upton


FYI Stove is running great, burns quick but it's perfect fit for me.
I can run it all day when I'm off and at home just need to feed it everyonce and awhile.
Or with a small load I can get 2-3 hrs total burn, and feel safe leaving the place with just the embers going.


700-800 deg. in the flue is easy.
Had it up to 1000 once, but I usual knock down the dampner to get around 700-800 on my short burns.
All day burn I look for biggest twisted peice of wood I can fit and knock down the dampner just above what will produce just secondary's
[/quote]

Interesting. Selkirk has conflicting information in their instruction manuals. See the PDF version here:

http://www.selkirkcorp.com/WorkArea/showcontent.aspx?id=7472

that indicates the adapter is installed above the ceiling support. I wonder if they've changed the design as my kit was not like the kit shown in the flash version of the instructions. I bought mine at Menard's and the insulation shield and cap were not included and were sold separately.

Glad to hear you are enjoying the stove.
 
roundoak16 said:
It's not a cathedral support, its just the standard ceiling support.
I left of the trim off because I cut a exact fit circle. And I didnt like the look of the trim.

There maybe a conflict between the paper and online install. I would make more sense to keep the adaptor connection in the room for replacement. Why remove 10's of feet of class A to change an adaptor? Think about if it was between floors and enclosed it would never happen.

Checkout the website installation guide on the left
http://www.selkirkcorp.com/supervent/
you can skip ahead to installation and assy,.
http://www.selkirkcorp.com/Flash-Installation-Guide/english/supervent/supervent.swf


House is from the 20's it from the Camp Upton
http://en.wikipedia.org/wiki/Camp_Upton


FYI Stove is running great, burns quick but it's perfect fit for me.
I can run it all day when I'm off and at home just need to feed it everyonce and awhile.
Or with a small load I can get 2-3 hrs total burn, and feel safe leaving the place with just the embers going.


700-800 deg. in the flue is easy.
Had it up to 1000 once, but I usual knock down the dampner to get around 700-800 on my short burns.
All day burn I look for biggest twisted peice of wood I can fit and knock down the dampner just above what will produce just secondary's

Interesting. Selkirk has conflicting information in their instruction manuals. See the PDF version here:

http://www.selkirkcorp.com/WorkArea/showcontent.aspx?id=7472

that indicates the adapter is installed above the ceiling support. I wonder if they've changed the design as my kit was not like the kit shown in the flash version of the instructions. I bought mine at Menard's and the insulation shield and cap were not included and were sold separately.

Glad to hear you are enjoying the stove.[/quote]

Yep, the video is the old version. The new screws in the first section of Class A and then you set it in the ceiling support box.
 
If you have such a significant build up after a month or two then you are burning too cool. How long does it take for you to have the smoke stop coming out the stack after you light the fire; it should not be too long. If it is more than a little while, there is not enough air gettin in and therefore not a hot enough burn. That will clog everything.
I am on my second year with no crap clogging the screen on my cap and just a cup of ash in the liner.
You have to burn that sucker hotter, so it sounds.
And, it does sound like you shoudl add about 3-4 feet to the stack too.
 
Sounds like you found and resolved the blockage issue but there still is the obvious underlying problem related to quality of wood being burned that should be addressed.

Have your friend that provides wood bring as much as you can store and get it CSSing for future years of burning. The more the better and you cannot have too much wood, ever. Two - three years ahead on wood seems to be the best and, again, more is better. In the mean time you have to do what you have to do so continue to burn HOT as you seem to be doing and that will help some but also check and clean your chimney often!! I would suggest every two weeks until you get a feel for what is going on up there. My reasoning is that you said you had only burned for a month and the first push of the brush completely clogged the cap. To me that sounds like a lot of crud in a short time. Removing the spark arestor has eliminated the flow restriction but not the reason for the build-up in the first place. If nothing else has changed, ie. quality of wood, burn rate/temp, etc.. you are still growing creasote at an alarming rate inside your chimney.

I am burning with old technology(VC Defiant) and did a 2,4,6 week clean out to see what was going on up there. I am now comfortable with 6 weeks between cleaning as it has not been too bad. Especially with the temps finally at a point where I can really keep the stove hot. Point is - better safe than sorry when dealing with fire as everyone will point out here. There should be no problem with cleaning from the bottom with your set up.

I also use my binos to check out the cap from time to time just to make sure there is no heavy build up going on. Another thing I do that has mixed opinions here is throw a scoop of Rutlands creasote remover in every week on a hot bed of coals and let it rip for a bit. It seems to keep everything in my chimney dry. I have less black and shiny(BAD) and more brown and dusty at clean out time. Just a suggestion as it is cheap enough to provide me a little peace of mind and the pipe seems to get cleaner when I am using it. This is by no means an alternative to scheduled maintenance/cleaning, it just turns bad to better in relation to chimney fire hazards.

The three most important things I have learned here in this first season of burning are:
1. quality of wood is paramount
2. Keep her clean
3. Burn her hot
 
My chimney , I dont use a cap at all, my view is when you have this thin metal cover sticking above the flue, by the time the smoke gets up out of the flue it isnt gonna be hot enough to heat that flue cap very well. So its inherently going to be an issue of when its really cold out that cap is going to be cold enough that any smoke at all you get out of the flue is gonna want to condensate onto the cap. Then if you have a screen like that the cooling condensation will most likely glog it. I put my cap back on for the summer then take it back off. Now my chimney is masonry clay lined , you guys that have insulated flues all the way up the exhaust may stay extra warm even at the top so the cold metal cap isnt an issue. But I dont really have an issue with not having it on there either. My flue is rather tall going from the basement to 3 foot above my roof ,its at least 25 foot tall maybe even 26 or 27, thats lots of length in a masonry flue to cool the exhaust down.
 
Huntindog1 said:
I dont use a cap at all....I dont really have an issue with not having it on there.
A potential problem with not having a cap is that water can get inside the chimney and possibly crack the tile liner if it freezes. Probably not a huge chance of that happening but if you have an exterior chimney like mine...
 
good thing I burn mine 24/7
 
Huntindog1 said:
My chimney , I dont use a cap at all, my view is when you have this thin metal cover sticking above the flue, by the time the smoke gets up out of the flue it isnt gonna be hot enough to heat that flue cap very well. So its inherently going to be an issue of when its really cold out that cap is going to be cold enough that any smoke at all you get out of the flue is gonna want to condensate onto the cap. Then if you have a screen like that the cooling condensation will most likely glog it. I put my cap back on for the summer then take it back off. Now my chimney is masonry clay lined , you guys that have insulated flues all the way up the exhaust may stay extra warm even at the top so the cold metal cap isnt an issue. But I dont really have an issue with not having it on there either. My flue is rather tall going from the basement to 3 foot above my roof ,its at least 25 foot tall maybe even 26 or 27, thats lots of length in a masonry flue to cool the exhaust down.
The only time I see a clogged cap, is when the operator is burning very wet wood, or never lets stove run hot. With an EPA stove, that cap won't cause any problems, you might see some problems in the future from all that rain running down the flue.
 
Status
Not open for further replies.