
Hi everyone. I'm a new member, but longtime reader of the forum. I currently use a All Nighter "Big Moe" wood stove as the primary heat source in the house and what started as a simple fire brick replacement ended up being more than I planned for. I apologize ahead of time for the long post.
So, a little background. I bought the house about 5 years ago and it had the stove in the basement. It shares a single flue masonry chimney with a oil burning furnace. I know this is not allowed nowadays, but it was pretty common up here in New England when the house was built in 1988. I initially used the furnace and the wood stove only occasionally, but I moved to pretty much using the All Nighter as the primary heat source after the first winter. I rarely use the furnace at all now...maybe once or twice a year if we are going away for an extended period for a family visit or just to run it once a year to keep it in working order. I clean the chimney yearly myself.
Anyway, the stove has been good to me and I sometimes wonder if they put the stove in the cellar when the foundation was done and then built the house around it because there is no way they got that beast down the bulkhead stairs. I burn anywhere from 4-6 cord a season.
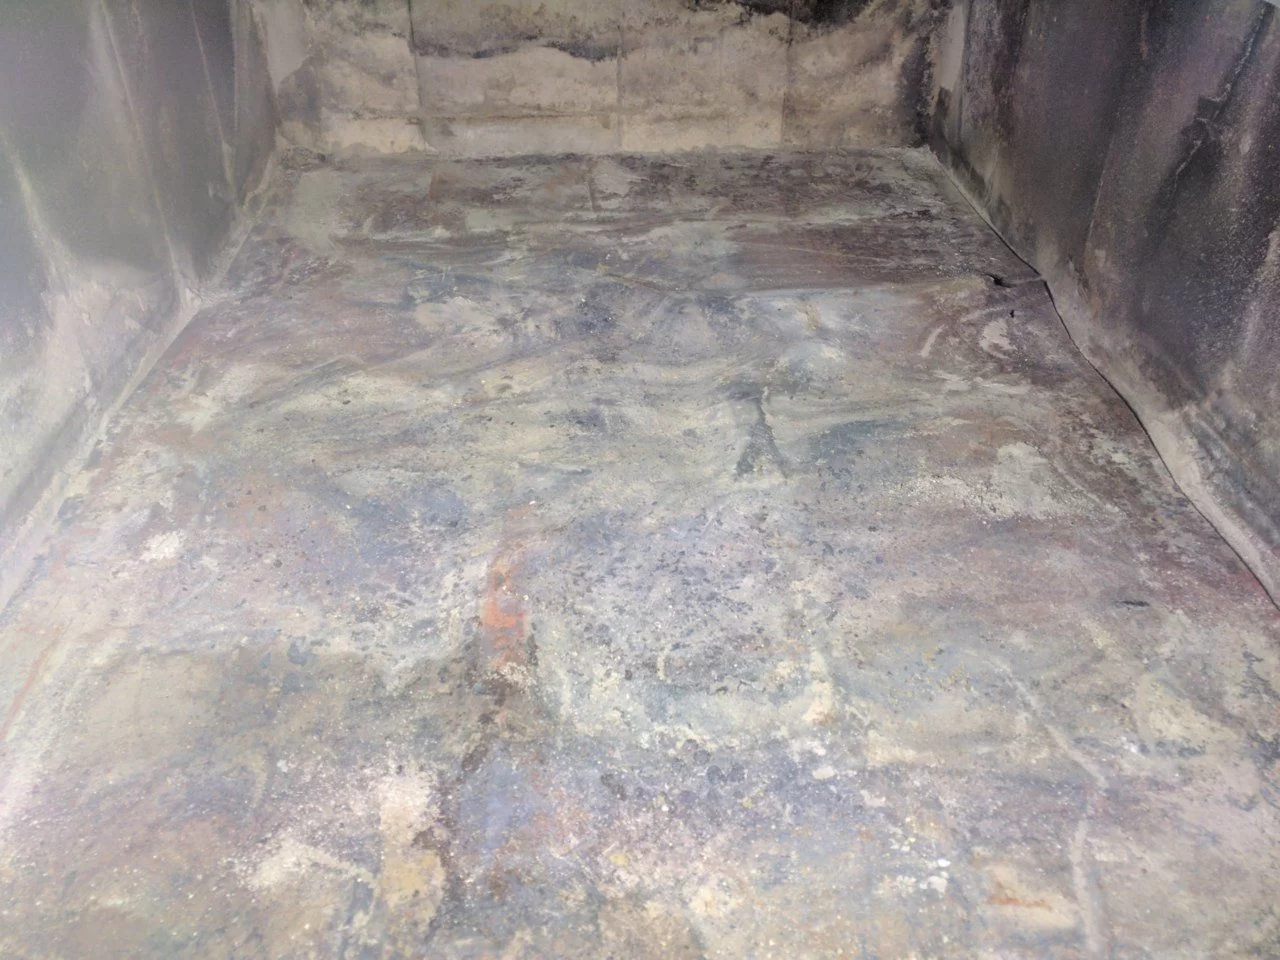
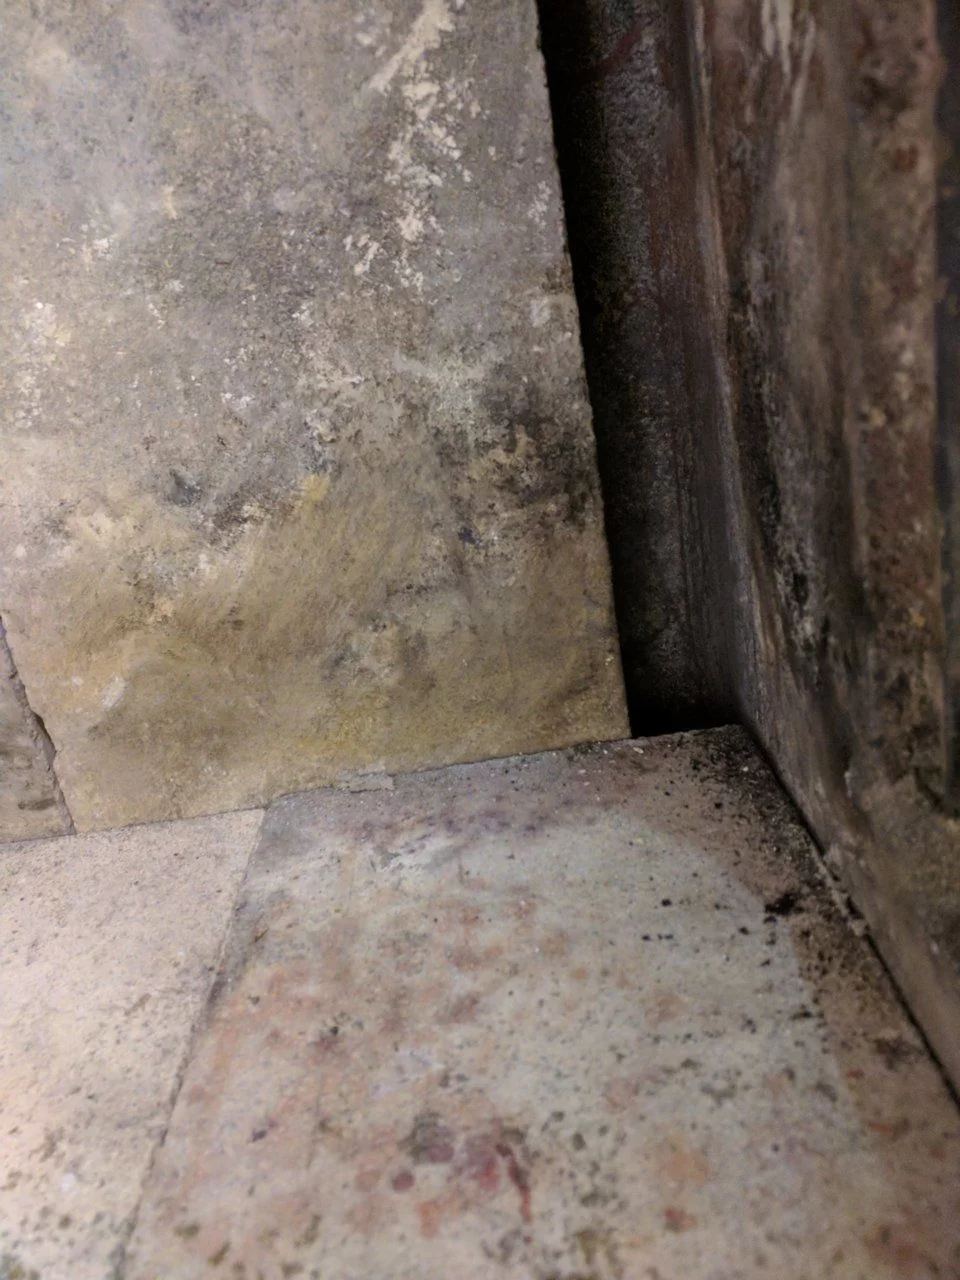
So, on to my rehab questions. As I said in the beginning, a simple fire brick replacement job turned into way more than I planned. I think the previous owners didn't really treat the stove well, and when I first moved in it looked like all kinds of crap had been burned in it. There were larger areas in the front floor of the firebox that were really just randomly broken pieces of fire brick and the remaining area was just filled with ash. The floor of the firebox was also not flat, which I assumed was mainly due to the ash having worked it's way down and under the fire brick pieces over time. So, ahead of this winter, I decided to finally clean the whole thing out and change out any broken brick and rehab the firebox for many more years of heat.
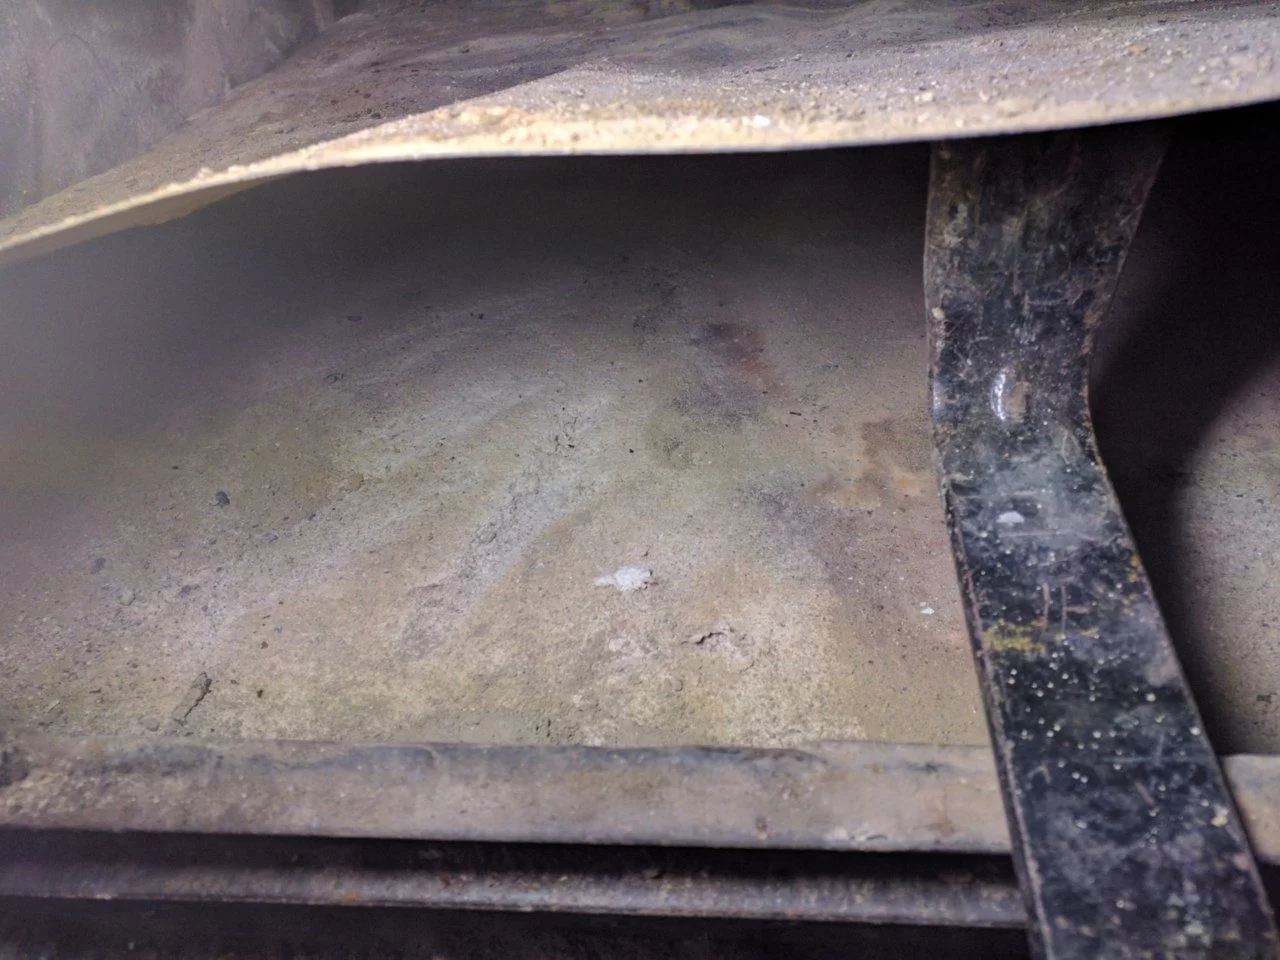
I picked up about half a dozen on your standard fire bricks from the local Lowe's and proceeded to start clearing out all the pieces and broken brick, and vacuuming out the ash with a shop vac (with fine dust bag). Once I got the floor bricks out and things cleaned up, I realized there was a piece of sheet metal under all the bricks, and it was in rough shape. It was all warped and wavy, and all the lumps were filled underneath with ash. I was sort of confused as to why this 1/4" plate steel stove had some sheet metal inside, but I realized it would have to come out and be replaced or any new bricks wouldn't sit flat. So I got to pulling the remaining bricks out from the sides and back, and was getting ready to kind of wrench the piece of metal out since it was so hard and brittle, and I realized there was something else underneath it besides ash. I immediately stopped using the shop vac at this point because it was some sort of mat, and it almost certainly had to be asbestos.
So, at this point I was pretty freaked out because I had not planned on messing with asbestos in my lifetime. I did some research on here and other places on the internet and found this was likely in there to keep the floor of the stove cool if it was on a combustible surface since it sat so low. I called and spoke to the Dept of Environmental services for the state and a asbestos clean up company and they both said my best bet was probably to just leave it alone or I could have it removed for not a small amount of money. I don't need it because the stove is sitting on the concrete basement floor, in the middle of the basement, and it would not matter if the bottom of the stove got super hot. However, I decided to just leave it there, get the old sheet metal out, replace it with new metal and new bricks, and forget I ever saw it. I took the advice I was given and sprayed the mat with lots of water before I took out the sheet metal and the draft of the chimney was working in my favor as well. So I got the old sheet metal out which had to have been put in before the stove was welded together because there was no way a new ~32" x 20" piece of sheet metal was fitting through the door without being bent up pretty good first. The existing sheet metal looked to be 22 gauge, and I had planned on using heavier 16 gauge, in three overlapping pieces, but what I needed was not available locally, so I settled on 22 gauge. I got the new sheet metal in there, and used a mix of new bricks and the old bricks that weren't broken as the stove used a couple of different non standard sizes.
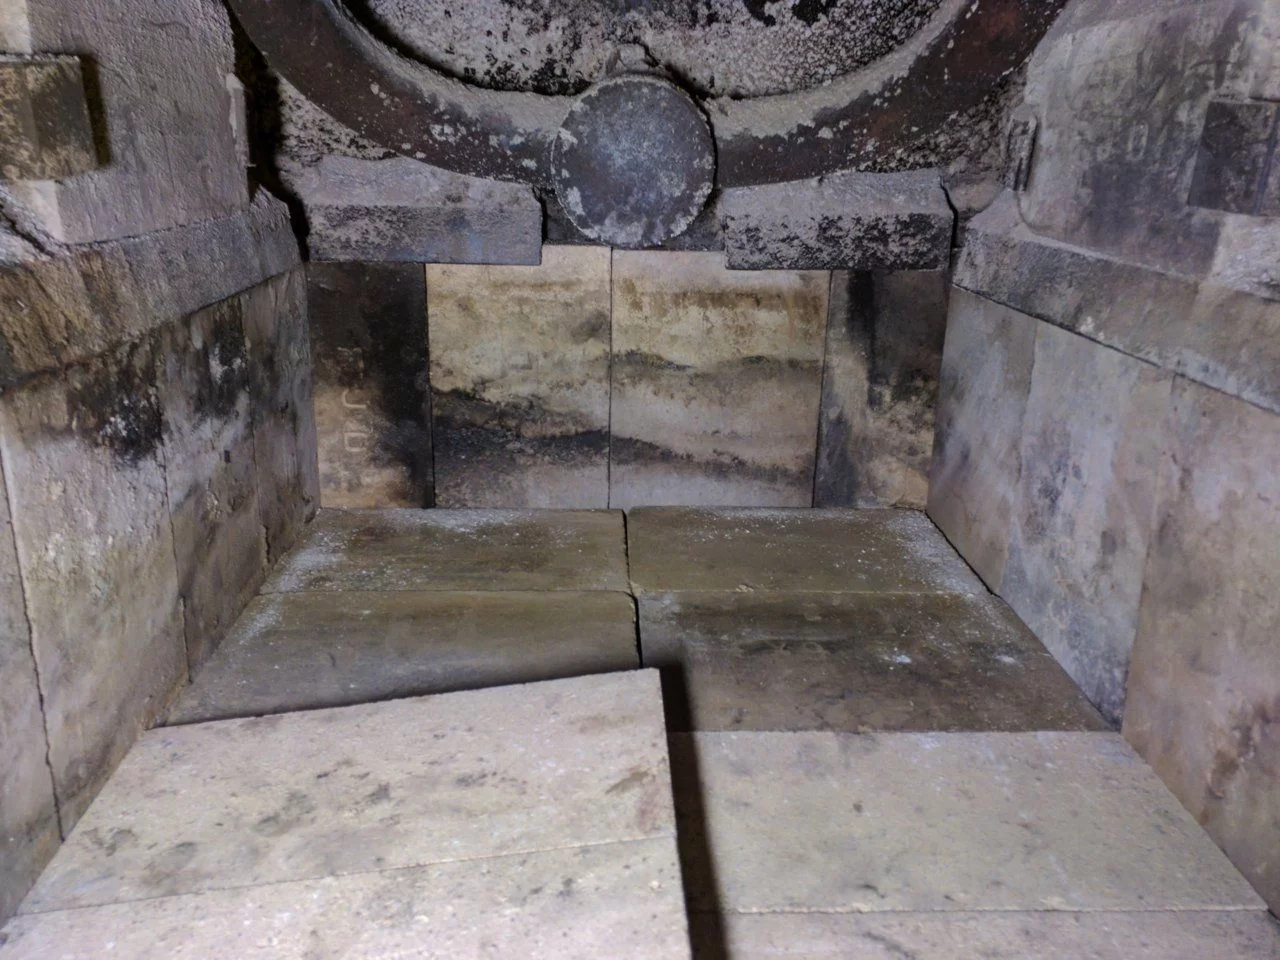
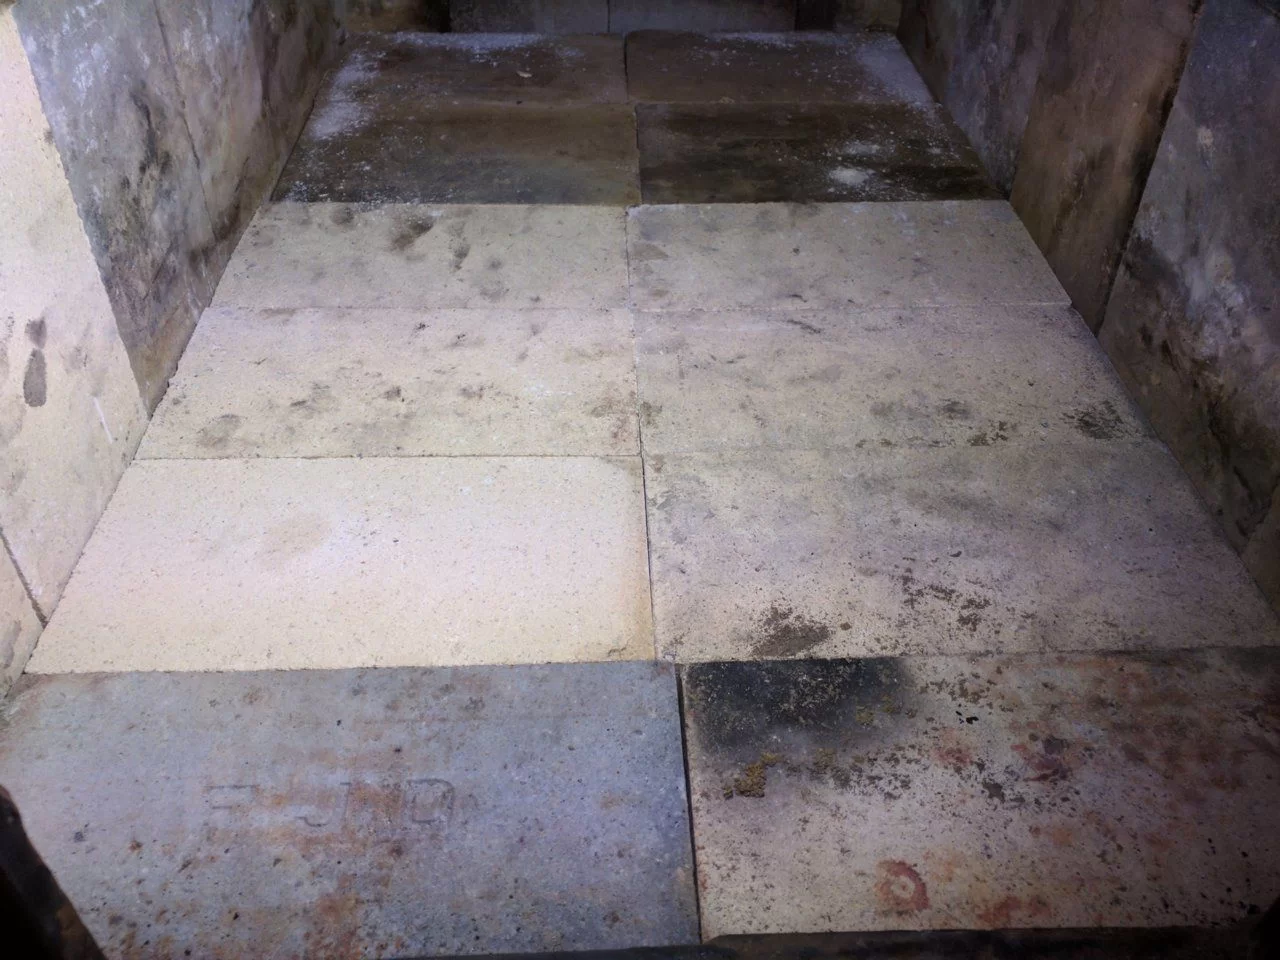
So, I think I'm good to go now for many more years, but I have a couple of remaining questions. First, the bricks on the side walls sit flush all the way to the back wall fire bricks, but where they would meet the front wall, there is a gap in the front corners where there is no brick. On one side, this gap is only about 1/4"-1/2"...not a big deal I'm sure, but the other side is close to 3/4" to close to an 1" or so. It's actually just a little narrower than a standard firebrick. I could cut a small sliver of brick, but I feel like that area is not going to be super hot or need protection. Should I worry about the gap and try to cut a sliver of fire brick to fit in there?
My second question is in regards to a blower. The stove has the tubes running through the firebox, and a port in the back for a blower motor. I've looked at all the old All Nighter brochures out there from years ago, and they all show the tubes running down along the floor of the firebox by the sides. They also show the port on the lower right or left. My tubes run from the back, center of the stove...about halfway up from the bottom up the stove, up to the vents on the front. They are about ~10" to a foot off the floor of the firebox. I found a blower that should work, and can use some exhaust flex pipe to connect to the rear port, but I'm not sure how I'd connect to the blower motor on the other end. The outlet on the blower is ~2", circular, and has four bolt holes. It looks to be a blower meant for another brand of wood stove, England's stove where it bolts to the back of the stove. Any ideas for mounting the blower or just sit it on the floor?
Sorry for the long post and I'm grateful for any help anyone can give.
So, a little background. I bought the house about 5 years ago and it had the stove in the basement. It shares a single flue masonry chimney with a oil burning furnace. I know this is not allowed nowadays, but it was pretty common up here in New England when the house was built in 1988. I initially used the furnace and the wood stove only occasionally, but I moved to pretty much using the All Nighter as the primary heat source after the first winter. I rarely use the furnace at all now...maybe once or twice a year if we are going away for an extended period for a family visit or just to run it once a year to keep it in working order. I clean the chimney yearly myself.
Anyway, the stove has been good to me and I sometimes wonder if they put the stove in the cellar when the foundation was done and then built the house around it because there is no way they got that beast down the bulkhead stairs. I burn anywhere from 4-6 cord a season.
So, on to my rehab questions. As I said in the beginning, a simple fire brick replacement job turned into way more than I planned. I think the previous owners didn't really treat the stove well, and when I first moved in it looked like all kinds of crap had been burned in it. There were larger areas in the front floor of the firebox that were really just randomly broken pieces of fire brick and the remaining area was just filled with ash. The floor of the firebox was also not flat, which I assumed was mainly due to the ash having worked it's way down and under the fire brick pieces over time. So, ahead of this winter, I decided to finally clean the whole thing out and change out any broken brick and rehab the firebox for many more years of heat.
I picked up about half a dozen on your standard fire bricks from the local Lowe's and proceeded to start clearing out all the pieces and broken brick, and vacuuming out the ash with a shop vac (with fine dust bag). Once I got the floor bricks out and things cleaned up, I realized there was a piece of sheet metal under all the bricks, and it was in rough shape. It was all warped and wavy, and all the lumps were filled underneath with ash. I was sort of confused as to why this 1/4" plate steel stove had some sheet metal inside, but I realized it would have to come out and be replaced or any new bricks wouldn't sit flat. So I got to pulling the remaining bricks out from the sides and back, and was getting ready to kind of wrench the piece of metal out since it was so hard and brittle, and I realized there was something else underneath it besides ash. I immediately stopped using the shop vac at this point because it was some sort of mat, and it almost certainly had to be asbestos.
So, at this point I was pretty freaked out because I had not planned on messing with asbestos in my lifetime. I did some research on here and other places on the internet and found this was likely in there to keep the floor of the stove cool if it was on a combustible surface since it sat so low. I called and spoke to the Dept of Environmental services for the state and a asbestos clean up company and they both said my best bet was probably to just leave it alone or I could have it removed for not a small amount of money. I don't need it because the stove is sitting on the concrete basement floor, in the middle of the basement, and it would not matter if the bottom of the stove got super hot. However, I decided to just leave it there, get the old sheet metal out, replace it with new metal and new bricks, and forget I ever saw it. I took the advice I was given and sprayed the mat with lots of water before I took out the sheet metal and the draft of the chimney was working in my favor as well. So I got the old sheet metal out which had to have been put in before the stove was welded together because there was no way a new ~32" x 20" piece of sheet metal was fitting through the door without being bent up pretty good first. The existing sheet metal looked to be 22 gauge, and I had planned on using heavier 16 gauge, in three overlapping pieces, but what I needed was not available locally, so I settled on 22 gauge. I got the new sheet metal in there, and used a mix of new bricks and the old bricks that weren't broken as the stove used a couple of different non standard sizes.
So, I think I'm good to go now for many more years, but I have a couple of remaining questions. First, the bricks on the side walls sit flush all the way to the back wall fire bricks, but where they would meet the front wall, there is a gap in the front corners where there is no brick. On one side, this gap is only about 1/4"-1/2"...not a big deal I'm sure, but the other side is close to 3/4" to close to an 1" or so. It's actually just a little narrower than a standard firebrick. I could cut a small sliver of brick, but I feel like that area is not going to be super hot or need protection. Should I worry about the gap and try to cut a sliver of fire brick to fit in there?
My second question is in regards to a blower. The stove has the tubes running through the firebox, and a port in the back for a blower motor. I've looked at all the old All Nighter brochures out there from years ago, and they all show the tubes running down along the floor of the firebox by the sides. They also show the port on the lower right or left. My tubes run from the back, center of the stove...about halfway up from the bottom up the stove, up to the vents on the front. They are about ~10" to a foot off the floor of the firebox. I found a blower that should work, and can use some exhaust flex pipe to connect to the rear port, but I'm not sure how I'd connect to the blower motor on the other end. The outlet on the blower is ~2", circular, and has four bolt holes. It looks to be a blower meant for another brand of wood stove, England's stove where it bolts to the back of the stove. Any ideas for mounting the blower or just sit it on the floor?
Sorry for the long post and I'm grateful for any help anyone can give.
![[Hearth.com] All Nighter Rehab Questions...](/talk/proxy.php?image=https%3A%2F%2Fuploads.tapatalk-cdn.com%2F20171106%2F17161f43a1a99bb75a7e842b4835a7ef.jpg&hash=e56f8b80c7884f101260259269fa453a "[Hearth.com] All Nighter Rehab Questions...")
![[Hearth.com] All Nighter Rehab Questions...](https://www.hearth.com/talk/data/attachments/215/215594-a9786ffc58fbe68a5d0c747b1e618534.jpg?hash=ThpRGpivkG "[Hearth.com] All Nighter Rehab Questions...")
![[Hearth.com] All Nighter Rehab Questions...](https://www.hearth.com/talk/data/attachments/215/215598-7f8f11ae2f24e50da82ca154b09c0379.jpg?hash=4-Q8HJl4FP "[Hearth.com] All Nighter Rehab Questions...")
![[Hearth.com] All Nighter Rehab Questions...](https://www.hearth.com/talk/data/attachments/215/215599-acace0ae0c27025b46ce72ecc7793d58.jpg?hash=4b60dJExlp "[Hearth.com] All Nighter Rehab Questions...")
![[Hearth.com] All Nighter Rehab Questions...](https://www.hearth.com/talk/data/attachments/215/215606-b74b474cdc1527ded8352c04a38577f3.jpg?hash=H6maI0yHEj "[Hearth.com] All Nighter Rehab Questions...")

![[Hearth.com] All Nighter Rehab Questions...](https://www.hearth.com/talk/data/attachments/215/215607-3fa7955a8a05ecd223cf01fa1be8eba7.jpg?hash=Bz775JY_dY "[Hearth.com] All Nighter Rehab Questions...")
![[Hearth.com] All Nighter Rehab Questions...](https://www.hearth.com/talk/data/attachments/215/215608-1172d6e41ca2d152e5a95988c8796f31.jpg?hash=LB2VLclNLQ "[Hearth.com] All Nighter Rehab Questions...")
")
![[Hearth.com] All Nighter Rehab Questions...](https://www.hearth.com/talk/data/attachments/312/312330-f2d1ceb81e39d8fb2ae7dd108bb24d29.jpg?hash=1xf_rAjWhF "[Hearth.com] All Nighter Rehab Questions...")
![[Hearth.com] All Nighter Rehab Questions...](https://www.hearth.com/talk/data/attachments/312/312331-ada7d4182550b6e661b27baeb5721025.jpg?hash=SPyE-UkJW4 "[Hearth.com] All Nighter Rehab Questions...")
![[Hearth.com] All Nighter Rehab Questions...](https://www.hearth.com/talk/data/attachments/312/312332-3a435037a705cec89dec7cd91346f871.jpg?hash=VlJ5hdtVXk "[Hearth.com] All Nighter Rehab Questions...")
![[Hearth.com] All Nighter Rehab Questions...](https://www.hearth.com/talk/data/attachments/312/312333-570ddb0b3774a1f48b1163d979fdfaf0.jpg?hash=c-cG8hdqAH "[Hearth.com] All Nighter Rehab Questions...")