
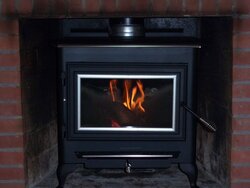
Finally got my NC-13 installed and running. My BIL came over on Sunday and we put it all together. I ran a 15ft flex liner from Chimney Liner Depot. As a last minute purchase I bought the insulation kit also. Installation went pretty smooth. Stuffing the insulated liner down a 13x8 chimney is a heap of fun. I had to cut some of the damper pieces off so the pipe could get by. I also had to put a 90* elbow in, to make it to the top of the stove. All in all I am very happy. The stove kept the house at a steady 68* last night burning small splits of 3 year old oak. The pieces were cut to 25" so I had to cut them up a little so they were small. Our thermostat is at the back of the house away from the stove so the living room had to be warmer. Plus we had a window open for the curing smell.
The heat was set to 64* and it kicked on at 2:30am. I had been burning since 4:00 pm till 9:30 was the last piece of wood. The glass is clean and my bricks are turning tan again in some spots. Burn tubes are silver and the fiber board is white.
Thanks for everyone's help,
Anthony
The heat was set to 64* and it kicked on at 2:30am. I had been burning since 4:00 pm till 9:30 was the last piece of wood. The glass is clean and my bricks are turning tan again in some spots. Burn tubes are silver and the fiber board is white.
Thanks for everyone's help,
Anthony
")
 I had a good fire going anyway, but I was surprised at the quick catch and the strong flame. Might be some sort of Oak, or Ash, I dunno. Liked the "quick catch" part though.