
At the end of 2018 I purchased a Pleasant Hearth WS-2417 woodstove. That installation and subsequent learning process is described here:
 www.hearth.com
Several issues have been on the list to address including rebuilding the outside air intake so that it was sealed from the living space and slowing down the incoming air. My current setup drafts very hard and as a result we burn through a burn cycle in a matter of hours. This was fixed by installing baffles but I could still feel cool air migrating toward the stove. I figured if I could seal the stove intake air off from the house I would be able to control the air and preheat it at the same time.
A few weeks ago I started designing and building the new intake for the stove. I installed it and ran several test runs even though the temperatures here were still warm - I did not want to find any surprises during the heating season. I will detail the build and testing results in this thread over the next week or so as I find time to post.
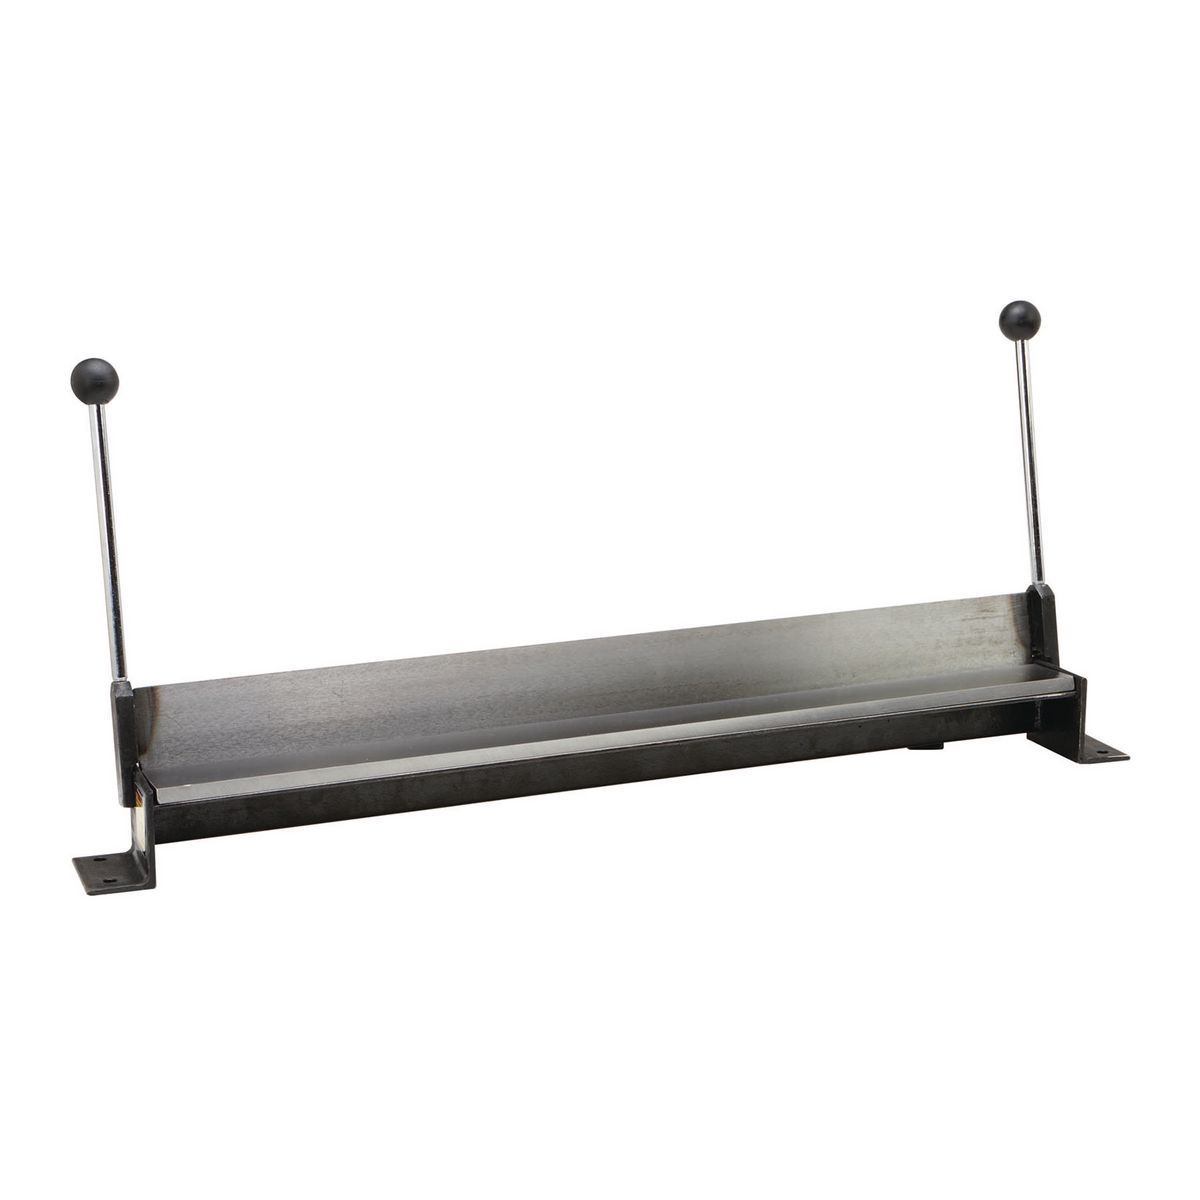
Pulling the stove and getting ready to take measurements for the intake box.
![[Hearth.com] Pleasant Hearth WS 2417 Outside Air Intake Build](https://www.hearth.com/talk/data/attachments/264/264735-d952be9c2f6586a9127bbe2d2a6e6b8c.jpg?hash=cvnDg-etvu "[Hearth.com] Pleasant Hearth WS 2417 Outside Air Intake Build")
Pleasant Hearth WS-2417 install/challenges/questions/observations
A little background: I purchased a Pleasant Hearth WS-2417 about two weeks ago from Menards on sale. It is my first EPA stove and I am a moderately experienced wood stove operator. It is installed in my fireplace and connected to an insulated flexible stainless steel liner. I installed the...
Several issues have been on the list to address including rebuilding the outside air intake so that it was sealed from the living space and slowing down the incoming air. My current setup drafts very hard and as a result we burn through a burn cycle in a matter of hours. This was fixed by installing baffles but I could still feel cool air migrating toward the stove. I figured if I could seal the stove intake air off from the house I would be able to control the air and preheat it at the same time.
A few weeks ago I started designing and building the new intake for the stove. I installed it and ran several test runs even though the temperatures here were still warm - I did not want to find any surprises during the heating season. I will detail the build and testing results in this thread over the next week or so as I find time to post.
Pulling the stove and getting ready to take measurements for the intake box.
Last edited:
![[Hearth.com] Pleasant Hearth WS 2417 Outside Air Intake Build](https://www.hearth.com/talk/data/attachments/264/264819-5dfec1111bb6296f9c8a72ea53a9405f.jpg?hash=aFazGzYhyE "[Hearth.com] Pleasant Hearth WS 2417 Outside Air Intake Build")
![[Hearth.com] Pleasant Hearth WS 2417 Outside Air Intake Build](https://www.hearth.com/talk/data/attachments/264/264820-b3b12ee96662093bcbc80d754f986deb.jpg?hash=HGpWOhazAF "[Hearth.com] Pleasant Hearth WS 2417 Outside Air Intake Build")
![[Hearth.com] Pleasant Hearth WS 2417 Outside Air Intake Build](https://www.hearth.com/talk/data/attachments/264/264822-ec60ad8637e5908996adf16ce98a1fd4.jpg?hash=GCFVbEHKh- "[Hearth.com] Pleasant Hearth WS 2417 Outside Air Intake Build")
![[Hearth.com] Pleasant Hearth WS 2417 Outside Air Intake Build](https://www.hearth.com/talk/data/attachments/264/264821-3016b41c14f5a51dc74d4c42dd3c4c3b.jpg?hash=5uGbrPAPQU "[Hearth.com] Pleasant Hearth WS 2417 Outside Air Intake Build")
![[Hearth.com] Pleasant Hearth WS 2417 Outside Air Intake Build](https://www.hearth.com/talk/data/attachments/264/264823-5179d5e0f3b0c2f5b947d3813fb93705.jpg?hash=gSjajrhotq "[Hearth.com] Pleasant Hearth WS 2417 Outside Air Intake Build")
![[Hearth.com] Pleasant Hearth WS 2417 Outside Air Intake Build](https://www.hearth.com/talk/data/attachments/264/264824-89d6e87bc80e0af6d96edf9a0b602490.jpg?hash=0u6FviCOYH "[Hearth.com] Pleasant Hearth WS 2417 Outside Air Intake Build")
![[Hearth.com] Pleasant Hearth WS 2417 Outside Air Intake Build](https://www.hearth.com/talk/data/attachments/264/264825-dd75a4b24095d43f7bb976a910e5009a.jpg?hash=oa6WMYv_u0 "[Hearth.com] Pleasant Hearth WS 2417 Outside Air Intake Build")
![[Hearth.com] Pleasant Hearth WS 2417 Outside Air Intake Build](https://www.hearth.com/talk/data/attachments/264/264826-2deceb57dfd5c3082be0c093dec67c26.jpg?hash=4BR03gfQB8 "[Hearth.com] Pleasant Hearth WS 2417 Outside Air Intake Build")
![[Hearth.com] Pleasant Hearth WS 2417 Outside Air Intake Build](https://www.hearth.com/talk/data/attachments/264/264827-0109b6f1ee3488628d12d4b175043a0a.jpg?hash=iDUlMHEv-s "[Hearth.com] Pleasant Hearth WS 2417 Outside Air Intake Build")
![[Hearth.com] Pleasant Hearth WS 2417 Outside Air Intake Build](https://www.hearth.com/talk/data/attachments/264/264828-24d4b2fe8802d0ee527c17d8e0217fa1.jpg?hash=uXutglxuEQ "[Hearth.com] Pleasant Hearth WS 2417 Outside Air Intake Build")
![[Hearth.com] Pleasant Hearth WS 2417 Outside Air Intake Build](https://www.hearth.com/talk/data/attachments/264/264829-19ead549a2cf88e801c9442a8fb723a1.jpg?hash=BXD2RFA83H "[Hearth.com] Pleasant Hearth WS 2417 Outside Air Intake Build")
![[Hearth.com] Pleasant Hearth WS 2417 Outside Air Intake Build](https://www.hearth.com/talk/data/attachments/264/264830-03714197899477a6d70d4430fc37dc8e.jpg?hash=jU4QrLCSDz "[Hearth.com] Pleasant Hearth WS 2417 Outside Air Intake Build")
![[Hearth.com] Pleasant Hearth WS 2417 Outside Air Intake Build](https://www.hearth.com/talk/data/attachments/264/264831-97fdf5ad3b6f33d659c63e7b93a11c0a.jpg?hash=MPkpCed0G0 "[Hearth.com] Pleasant Hearth WS 2417 Outside Air Intake Build")
![[Hearth.com] Pleasant Hearth WS 2417 Outside Air Intake Build](https://www.hearth.com/talk/data/attachments/264/264832-5ad33664dafde9e04aba7a68639bfc34.jpg?hash=vzqKe79uYp "[Hearth.com] Pleasant Hearth WS 2417 Outside Air Intake Build")
![[Hearth.com] Pleasant Hearth WS 2417 Outside Air Intake Build](https://www.hearth.com/talk/data/attachments/264/264833-99ac7ed7507ead8d4d270d15109991d0.jpg?hash=MeqnnfMnRP "[Hearth.com] Pleasant Hearth WS 2417 Outside Air Intake Build")
![[Hearth.com] Pleasant Hearth WS 2417 Outside Air Intake Build](https://www.hearth.com/talk/data/attachments/264/264834-859b3c39dc9f602a485d3987fba570cd.jpg?hash=KPZzEGjNHL "[Hearth.com] Pleasant Hearth WS 2417 Outside Air Intake Build")
![[Hearth.com] Pleasant Hearth WS 2417 Outside Air Intake Build](https://www.hearth.com/talk/data/attachments/264/264835-9f7c3efa4dc8fa9cf87aa70ac9283a84.jpg?hash=laCC2Gic8z "[Hearth.com] Pleasant Hearth WS 2417 Outside Air Intake Build")
![[Hearth.com] Pleasant Hearth WS 2417 Outside Air Intake Build](https://www.hearth.com/talk/data/attachments/264/264836-385d252680e53ed3470fc30f6c8b1187.jpg?hash=oRfnYBtiZf "[Hearth.com] Pleasant Hearth WS 2417 Outside Air Intake Build")
![[Hearth.com] Pleasant Hearth WS 2417 Outside Air Intake Build](https://www.hearth.com/talk/data/attachments/264/264837-55d6d933c6a1b332b8be2ac508ad293a.jpg?hash=LQRnmVqVs4 "[Hearth.com] Pleasant Hearth WS 2417 Outside Air Intake Build")
![[Hearth.com] Pleasant Hearth WS 2417 Outside Air Intake Build](https://www.hearth.com/talk/data/attachments/264/264838-7071c99c044c283e23d70a84c6991d47.jpg?hash=tVrrybG02_ "[Hearth.com] Pleasant Hearth WS 2417 Outside Air Intake Build")
![[Hearth.com] Pleasant Hearth WS 2417 Outside Air Intake Build](https://www.hearth.com/talk/data/attachments/264/264840-2e0543e8aeb855d00f473959e711ec7e.jpg?hash=VRAP6kGyrF "[Hearth.com] Pleasant Hearth WS 2417 Outside Air Intake Build")
![[Hearth.com] Pleasant Hearth WS 2417 Outside Air Intake Build](https://www.hearth.com/talk/data/attachments/264/264839-127b01765932a32771e814eb434c7b72.jpg?hash=jiPSfUVm8G "[Hearth.com] Pleasant Hearth WS 2417 Outside Air Intake Build")
![[Hearth.com] Pleasant Hearth WS 2417 Outside Air Intake Build](https://www.hearth.com/talk/data/attachments/264/264842-1c88001277d2bf201e075bf9164e677e.jpg?hash=GeijmFtOpg "[Hearth.com] Pleasant Hearth WS 2417 Outside Air Intake Build")
![[Hearth.com] Pleasant Hearth WS 2417 Outside Air Intake Build](https://www.hearth.com/talk/data/attachments/264/264844-36f507e70f2504313f7d4c71ebbc7abd.jpg?hash=fkOxbDPDCl "[Hearth.com] Pleasant Hearth WS 2417 Outside Air Intake Build")
![[Hearth.com] Pleasant Hearth WS 2417 Outside Air Intake Build](https://www.hearth.com/talk/data/attachments/264/264843-5e409e6a977af10324fdda0945e49ce6.jpg?hash=nODZIIfSNS "[Hearth.com] Pleasant Hearth WS 2417 Outside Air Intake Build")
![[Hearth.com] Pleasant Hearth WS 2417 Outside Air Intake Build](https://www.hearth.com/talk/data/attachments/264/264845-9fceb272126e7e6ed44411ee4809baab.jpg?hash=DcIjyCY7VM "[Hearth.com] Pleasant Hearth WS 2417 Outside Air Intake Build")
![[Hearth.com] Pleasant Hearth WS 2417 Outside Air Intake Build](https://www.hearth.com/talk/data/attachments/264/264846-f4fb41990901d2d010a2d034309b6e14.jpg?hash=lZIvwviZP1 "[Hearth.com] Pleasant Hearth WS 2417 Outside Air Intake Build")
![[Hearth.com] Pleasant Hearth WS 2417 Outside Air Intake Build](https://www.hearth.com/talk/data/attachments/264/264847-8325f0ddf814c7f5f2252bcefa04f007.jpg?hash=NmbjGjUnvw "[Hearth.com] Pleasant Hearth WS 2417 Outside Air Intake Build")
![[Hearth.com] Pleasant Hearth WS 2417 Outside Air Intake Build](https://www.hearth.com/talk/data/attachments/264/264848-9c7f83b377437a622917d717bf9d2f74.jpg?hash=bNTrInLeTY "[Hearth.com] Pleasant Hearth WS 2417 Outside Air Intake Build")
![[Hearth.com] Pleasant Hearth WS 2417 Outside Air Intake Build](https://www.hearth.com/talk/data/attachments/264/264850-e5d5aabc7a33d2d8d010908bbd5e778c.jpg?hash=d5H-lNzC3Q "[Hearth.com] Pleasant Hearth WS 2417 Outside Air Intake Build")
![[Hearth.com] Pleasant Hearth WS 2417 Outside Air Intake Build](https://www.hearth.com/talk/data/attachments/264/264849-4fa514ef96c67ee3e54b15d3c9f9fe04.jpg?hash=yNq6hqNUv0 "[Hearth.com] Pleasant Hearth WS 2417 Outside Air Intake Build")
![[Hearth.com] Pleasant Hearth WS 2417 Outside Air Intake Build](https://www.hearth.com/talk/data/attachments/264/264853-23a2e5e290d3e507a4077ce41fec26ec.jpg?hash=P7AyMz1kEg "[Hearth.com] Pleasant Hearth WS 2417 Outside Air Intake Build")
![[Hearth.com] Pleasant Hearth WS 2417 Outside Air Intake Build](https://www.hearth.com/talk/data/attachments/264/264854-698ab30732604901a9ceca5d66269134.jpg?hash=84JKnqbrqU "[Hearth.com] Pleasant Hearth WS 2417 Outside Air Intake Build")
![[Hearth.com] Pleasant Hearth WS 2417 Outside Air Intake Build](https://www.hearth.com/talk/data/attachments/264/264855-f50f75376cba30e7d64d9c085c9c7d35.jpg?hash=JMO2j7vFkE "[Hearth.com] Pleasant Hearth WS 2417 Outside Air Intake Build")
![[Hearth.com] Pleasant Hearth WS 2417 Outside Air Intake Build](/talk/data/attachments/264/264852-43dcabebc5c98aa82a0b50e88fc304a1.jpg?hash=avoPdIFsLQ)
![[Hearth.com] Pleasant Hearth WS 2417 Outside Air Intake Build](/talk/data/attachments/264/264851-07052021a0298d1863661a1cffa4c39e.jpg?hash=rw6CfeXc_S)
![[Hearth.com] Pleasant Hearth WS 2417 Outside Air Intake Build](https://www.hearth.com/talk/data/attachments/264/264858-e7404252be1a90901eb9103fb2aeb361.jpg?hash=8Y42c67RIZ "[Hearth.com] Pleasant Hearth WS 2417 Outside Air Intake Build")
![[Hearth.com] Pleasant Hearth WS 2417 Outside Air Intake Build](https://www.hearth.com/talk/data/attachments/264/264856-0eae3042f7e6ddc3f8eb751f6533d5c4.jpg?hash=tMNwaqoTu5 "[Hearth.com] Pleasant Hearth WS 2417 Outside Air Intake Build")
![[Hearth.com] Pleasant Hearth WS 2417 Outside Air Intake Build](https://www.hearth.com/talk/data/attachments/264/264857-1f1d005641ad58cd632131878fb3f128.jpg?hash=LgG8wtrwYI "[Hearth.com] Pleasant Hearth WS 2417 Outside Air Intake Build")
![[Hearth.com] Pleasant Hearth WS 2417 Outside Air Intake Build](https://www.hearth.com/talk/data/attachments/264/264862-7a44cc6730d56fcabee2430d3d2296b8.jpg?hash=jbFd0CLxeB "[Hearth.com] Pleasant Hearth WS 2417 Outside Air Intake Build")
![[Hearth.com] Pleasant Hearth WS 2417 Outside Air Intake Build](https://www.hearth.com/talk/data/attachments/264/264876-15759033bcbd3eee3ff440de6281cb37.jpg?hash=7yt4LaO3G- "[Hearth.com] Pleasant Hearth WS 2417 Outside Air Intake Build")
![[Hearth.com] Pleasant Hearth WS 2417 Outside Air Intake Build](https://www.hearth.com/talk/data/attachments/264/264874-f277a14c7e025778d503fd4c2c3d8d0e.jpg?hash=rIISU_tsLT "[Hearth.com] Pleasant Hearth WS 2417 Outside Air Intake Build")
![[Hearth.com] Pleasant Hearth WS 2417 Outside Air Intake Build](https://www.hearth.com/talk/data/attachments/264/264868-e6a6d45e67562faf658d2cb146138274.jpg?hash=3jfiEvmTo1 "[Hearth.com] Pleasant Hearth WS 2417 Outside Air Intake Build")
![[Hearth.com] Pleasant Hearth WS 2417 Outside Air Intake Build](https://www.hearth.com/talk/data/attachments/264/264869-c8d73c7a2192e85e255a32f95c84f8da.jpg?hash=tlWojrwFzP "[Hearth.com] Pleasant Hearth WS 2417 Outside Air Intake Build")
![[Hearth.com] Pleasant Hearth WS 2417 Outside Air Intake Build](/talk/data/attachments/264/264863-6f35c54758500ee7f1279f49da7e9023.jpg?hash=dpffYiUUkt)
![[Hearth.com] Pleasant Hearth WS 2417 Outside Air Intake Build](/talk/data/attachments/264/264875-e7404252be1a90901eb9103fb2aeb361.jpg?hash=8Y42c67RIZ)
![[Hearth.com] Pleasant Hearth WS 2417 Outside Air Intake Build](https://www.hearth.com/talk/data/attachments/264/264870-4fff06d38c2cf78262de6680854e7aeb.jpg?hash=Ogm0TVM5AI "[Hearth.com] Pleasant Hearth WS 2417 Outside Air Intake Build")
![[Hearth.com] Pleasant Hearth WS 2417 Outside Air Intake Build](https://www.hearth.com/talk/data/attachments/264/264871-5b47a4ec42d5a27596422b92a4d226f2.jpg?hash=hV3-7PMkWD "[Hearth.com] Pleasant Hearth WS 2417 Outside Air Intake Build")
![[Hearth.com] Pleasant Hearth WS 2417 Outside Air Intake Build](https://www.hearth.com/talk/data/attachments/264/264872-3ba3cc313215381cdc9e36771e2ec7c7.jpg?hash=RDtzUDBtjC "[Hearth.com] Pleasant Hearth WS 2417 Outside Air Intake Build")
![[Hearth.com] Pleasant Hearth WS 2417 Outside Air Intake Build](https://www.hearth.com/talk/data/attachments/264/264873-80696ae79fd17868ee917f84f7380ebf.jpg?hash=JPVaeIdD86 "[Hearth.com] Pleasant Hearth WS 2417 Outside Air Intake Build")
![[Hearth.com] Pleasant Hearth WS 2417 Outside Air Intake Build](https://www.hearth.com/talk/data/attachments/264/264878-a40bb4faaa209bbe3769c059433e3775.jpg?hash=rQZimMIDAI "[Hearth.com] Pleasant Hearth WS 2417 Outside Air Intake Build")
![[Hearth.com] Pleasant Hearth WS 2417 Outside Air Intake Build](https://www.hearth.com/talk/data/attachments/264/264879-86b15192c3afdf3ead77281486309a0c.jpg?hash=7RkSj9Uh4G "[Hearth.com] Pleasant Hearth WS 2417 Outside Air Intake Build")
![[Hearth.com] Pleasant Hearth WS 2417 Outside Air Intake Build](https://www.hearth.com/talk/data/attachments/264/264880-90af29f6070c4b2771bb0e6a35d85d5f.jpg?hash=1jps0MShTv "[Hearth.com] Pleasant Hearth WS 2417 Outside Air Intake Build")
![[Hearth.com] Pleasant Hearth WS 2417 Outside Air Intake Build](https://www.hearth.com/talk/data/attachments/265/265176-efc8b7a6fcf6c59b8fa4b4816e62c6b4.jpg?hash=_aF6_1443X "[Hearth.com] Pleasant Hearth WS 2417 Outside Air Intake Build")
![[Hearth.com] Pleasant Hearth WS 2417 Outside Air Intake Build](https://www.hearth.com/talk/data/attachments/266/266808-99635d83f76ca4ca167eb048783a5a58.jpg?hash=jPQc2oGrwZ "[Hearth.com] Pleasant Hearth WS 2417 Outside Air Intake Build")
![[Hearth.com] Pleasant Hearth WS 2417 Outside Air Intake Build](https://www.hearth.com/talk/data/attachments/266/266809-22408bc94d8060a00ae08cd8bd0dbaa7.jpg?hash=kLqRO5U4Fo "[Hearth.com] Pleasant Hearth WS 2417 Outside Air Intake Build")
![[Hearth.com] Pleasant Hearth WS 2417 Outside Air Intake Build](https://www.hearth.com/talk/data/attachments/266/266810-82f4d532ed8efc4b0644100703d8228d.jpg?hash=gQ-Y36ui-2 "[Hearth.com] Pleasant Hearth WS 2417 Outside Air Intake Build")
![[Hearth.com] Pleasant Hearth WS 2417 Outside Air Intake Build](https://www.hearth.com/talk/data/attachments/266/266807-bb44536cef049a0a857e7e3d18248ce9.jpg?hash=O6oWmVyra- "[Hearth.com] Pleasant Hearth WS 2417 Outside Air Intake Build")
![[Hearth.com] Pleasant Hearth WS 2417 Outside Air Intake Build](https://www.hearth.com/talk/data/attachments/266/266806-5af77e9874fdb40c7c1eb0be2eac310e.jpg?hash=4Q7T_h7MQ6 "[Hearth.com] Pleasant Hearth WS 2417 Outside Air Intake Build")
![[Hearth.com] Pleasant Hearth WS 2417 Outside Air Intake Build](https://www.hearth.com/talk/data/attachments/266/266805-f7895af3625a3e3ec5b2116b5d3d4ff4.jpg?hash=GhRNaIXLkw "[Hearth.com] Pleasant Hearth WS 2417 Outside Air Intake Build")