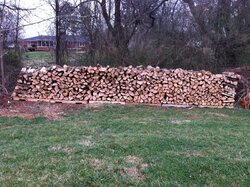
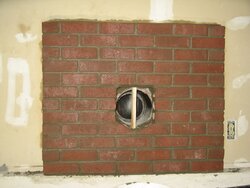
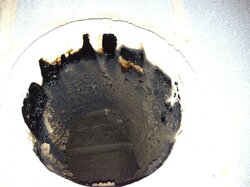
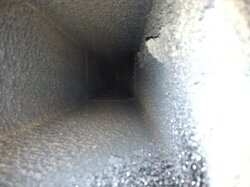
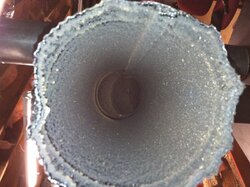
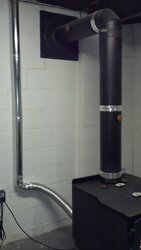
Creosote check this weekend.

  • Active since 1995, Hearth.com is THE place on the internet for free information and advice about wood stoves, pellet stoves and other energy saving equipment.

    We strive to provide opinions, articles, discussions and history related to Hearth Products and in a more general sense, energy issues.

    We promote the EFFICIENT, RESPONSIBLE, CLEAN and SAFE use of all fuels, whether renewable or fossil.
Status
Not open for further replies.
Yep, that's one way to make sure the chimney is clean before putting a liner in!

I even know one fella (may or may not be a member here, lives south of the Mason Dixon line yet East of West Virginia, might even burn an Englander 30 in a fireplace :p ) crazy enough to self induce a chimney fire before installing his liner!

Takes a pretty high level of swagger to do that though. Definitely not the recommended approach.

pen
That'll do it;lol When I installed my liner, I thought about it.....but not enough "swagger";)
 
  • Like
Reactions: CHeath and pen
I am totally bummed. In just one month, this has happened. I've killed myself gathering,splitting and stacking wood. I will stop burning before I install a liner in a chimney that's been used one month. That's defeating the entire purpose of me burning wood (to save $)

That's the purpose of many of us burning wood (to save money)! Although I love the work that goes into it of course!

Look, think of that work you've done gathering wood as an investment. Once that stuff dries out you'll be loving it for sure! It just takes time, and that is the frustrating part.

I certainly do NOT think you need a new liner - as you said, the chimney's only been used a few months. Try some of the powder or other chimney cleaner you can get in a store, then give it another cleaning. Even if you have to call a professional to check it out, that's not major money. I bet you'll have much better results next fall with the drier wood. Luckily in your climate, and mine too, the burning season should only go a couple of more weeks.
 
Question for the experts here: In the OP's situation, how would a SS liner help? Is it just extra protection in case of a chimney fire? Would it be easier to clean this type of creosote off a SS liner? Just curious...
 
  • Like
Reactions: PapaDave
Question for the experts here: In the OP's situation, how would a SS liner help? Is it just extra protection in case of a chimney fire? Would it be easier to clean this type of creosote off a SS liner? Just curious...
No expert but have experience with both. With a slammer install, the flue gasses exit the stove into the fire place fire box and expand and cool quickly, then go up the flue. Very difficult to keep the flue hot enough. When direct connected to a SS liner, the expansion is eliminated and the SS liner heats up much quicker than the massive clay liner and masonry chimney.
 
But even though this is a slammer, it's just an inch larger then the 6 inch flue pipe (7x7) but I will admit. I am reluctant to burn at high temps. This has caused the glaze I am 100% certain. 250 to 450 max flue temps with damp and sometimes really wet wood was the culprit for sure. I asked a lot of peeps what temps I could run but never really got an answer but honestly I didn't feel comfortable at those high (over 500) temps.
 
No expert but have experience with both. With a slammer install, the flue gasses exit the stove into the fire place fire box and expand and cool quickly, then go up the flue. Very difficult to keep the flue hot enough. When direct connected to a SS liner, the expansion is eliminated and the SS liner heats up much quicker than the massive clay liner and masonry chimney.


So this kind of creosote would be less likely to form in the first place in a SS liner? Makes sense.
 
But even though this is a slammer, it's just an inch larger then the 6 inch flue pipe (7x7) but I will admit. I am reluctant to burn at high temps. This has caused the glaze I am 100% certain. 250 to 450 max flue temps with damp and sometimes really wet wood was the culprit for sure. I asked a lot of peeps what temps I could run but never really got an answer but honestly I didn't feel comfortable at those high (over 500) temps.
You will have better results for sure when your wood is dry. How big is the space above the stove, before it enters the 7X7 tile? That is where I found the problem to be. Too much expansion and cooling and there, before it even entered the chimney.
 
  • Like
Reactions: DexterDay
But even though this is a slammer, it's just an inch larger then the 6 inch flue pipe (7x7) but I will admit. I am reluctant to burn at high temps. This has caused the glaze I am 100% certain. 250 to 450 max flue temps with damp and sometimes really wet wood was the culprit for sure. I asked a lot of peeps what temps I could run but never really got an answer but honestly I didn't feel comfortable at those high (over 500) temps.

Your 7x7 chimney has a MUCH larger cross sectional area. Your comparing it to a 6" round liner. Even a 6" round liner has a smaller criss sectional area than a 6x6 clay chimney.

A liner will not only improve your draft, keep your gases hotter (450 flue is a good temp, but if the gases cool to quickly? Your left with creo that condenses out) , and a liner will be much easier to clean.

Even if you just installed a 6" un-insulated liner, you would be much better off.

I always tell my Wife. Sometimes you have to spend money to save money. That liner will pay for itself and pay dividends for years to come. Plus having 2-3 yr seasoned wood helps tremendously also.

Many things factor in. But keeping the gases hot to the top of the chimney is key in any set up.
 
So this kind of creosote would be less likely to form in the first place in a SS liner? Makes sense.
Yes. If you can keep the flue temp up, the condensation of flue gases on the inside of the chimney is much less.
 
But even though this is a slammer, it's just an inch larger then the 6 inch flue pipe (7x7) but I will admit. I am reluctant to burn at high temps. This has caused the glaze I am 100% certain. 250 to 450 max flue temps with damp and sometimes really wet wood was the culprit for sure. I asked a lot of peeps what temps I could run but never really got an answer but honestly I didn't feel comfortable at those high (over 500) temps.


Lower temps create more creosote. Burning at 250 is going to create a lot of creosote with damp wood. I'd suggest stop burning for the year. Buy the chimney cleaning bricks/powder/whatever and get it nice and ready for next season when you will have dry wood from your hard work. Burn that dry wood nice and hot (not 250) and you should have a LOT less creosote.
 
  • Like
Reactions: Backwoods Savage
But even though this is a slammer, it's just an inch larger then the 6 inch flue pipe (7x7) but I will admit. I am reluctant to burn at high temps. This has caused the glaze I am 100% certain. 250 to 450 max flue temps with damp and sometimes really wet wood was the culprit for sure. I asked a lot of peeps what temps I could run but never really got an answer but honestly I didn't feel comfortable at those high (over 500) temps.

Agree with the damp wood being the cause, and I can also see how the clay liner would be harder to keep warm and would cool much easier. I'd like someone else to chime in on this, but I would (after my liner is clean) run that stove a bit hotter, in the 500-600 range. This SHOULD cut down on the creosote produced. With your damp wood, try splitting it smaller to get the fire hotter.
 
  • Like
Reactions: CHeath
You guys rock. I am shutting it down this week. Was planning on it anyhow. Ill work up to those high temps but it seems I need to keep the stove full and the drafts all wide open to get them there. If you didn't see my other porn thread then below you will see how determined I am to get this off the ground. Thanks a lot! image.jpg
 
Good advice given.

The cross sectional area of that 6 inch stove outlet is ~28 1/4 square inches. That 7x7 flue is 49 inches square.

If there isn't a good seal between how the smoke gets into that flue, then room air is leaking up as well cooling things in that chimney making the problem of wet wood and cooler temps even worse.

The temps you mention aren't terrible if you have dry wood (depending on how and where you measured those, I'm just guessing you are at least a foot up on that pipe) However, the temps your chimney are lower due to the increased area. Also, with less than ideal wood, and a slammer install giving less draft than is ideal, that stove isn't getting up to temps as quickly as it should which means you have a longer period of time after loading to deposit that crap.

Is this simply the stove and a piece of pipe up the flue of a fireplace? Is there a block off plate at all?

pen
 
Pen I have no idea. My earlier posts show my install pics.
 
Pen I have no idea. My earlier posts show my install pics.

Ah, I went back and found it. Looks like it's connected appropriately to me.

Is there a metal cleanout door on that chimney in the basement? Are you sure it's closed and sealed well? If it isn't sealed well, it can suck in room air and cool down the exhaust gasses exacerbating any creosote issues.

pen
 
With the right burning practices a clay liner will not get creosote in it, had one for 30 years, where do you guys get some of these ideas?
 
No clean out door. Heck, I guess I just remove the pipe and clean it out there? I want to burn for at least another week but you guys have got me a little reluctant to be honest. I've got dry wood now. I may just shut it on down for the year and hit the heat button just to be safe but I honestly do t think its a fire hazard at the moment but since I'm not "seasoned" ill take most everyone's word on it and get ready for next season. Thanks pen for taking the time to go back and look at my installation.
 
Yep, just pull the pipe for cleaning.

Have you run the brush down it yet? Scrub the heck out of it, and see how it looks. You've got the camera (wish it had a better light on it) scrub it up and send it down again.

Without a clean out door, I'm guessing there will be a void in the chimney below where your pipe enters, you can stick a shop vac (one with a bag in it) down there and suck out the goop, or reach the arm in there with a small junk margarine tub or similar to get the creosote out.

Also, when reinserting your stove pipe, there should be a lip there so that you cannot stick the stove pipe in too far. But, if your flue tiles / crock were built without a lip, make sure that you don't over insert the stove pipe as you don't want it sticking into the flue.

Here's a pic so you can see the lip that keeps your stove pipe form going in too far.

thimble006.jpg
 
Thanks alot, Yes, there is a lip on the pipe that wont let me go in to far. There is a void under the hole, no telling how large of a void but I know it is. Ill take pictures tonight of the flue opening now that I have decided to shut it down for the season. I am also going to raise the stove up approx 10 inches with cinderblocks so better viewing into the window and also, I will be doing a 45* pipe rather than the 90* to help draw. I got this from another member here. As well as installing a filter boc on the back to clean the air. Pics to come so stay tuned!
 
Ok people I just backed the stove away from the flue. I was surprised but at the bottom and as far as the camera will see, there is no glaze, it's just rather sooty. I'd guess from the hotter temps at the bottom of the chimney and the cooler ones at the top causing the glaze. See pix.


image.jpg


image.jpg

image.jpg
 
Those real dark spots where the flue enters the chimney/thimble, looks like there are a bunch of air leaks?

Did you try sealing that area where the pipe enters with Furnace Cement (2,000°)?
 
I used no sealant around entrance.
 
I used no sealant around entrance.

See the dents on the end of the pipe? Those dents correspond with the dark spots. Those are all air leaks.

That my friend, isn't helping any either.

A sealed system (whether its a liner or not), good fuel, and good burning habits (good flue temps, burning in full cycles when possible, getting up to temp quickly, etc) are all critical to keeping.your flue as clean and safe as possible.

On the connection from my stove to the first section of pipe, I sealed there, with furnace cement, then also at the thimble with cement, and I wrapped every joint with High temp foil tape (I have double wall. Wouldn't recommend that for your single wall, but cement wont hurt). It looks goofy, but I know I am doing everything I can to keep the gases as Hot as possible on there way up the flue

Click to enlarge
2013-02-02_19-04-12_531.jpg
 
See the dents on the end of the pipe? Those dents correspond with the dark spots. Those are all air leaks.

That my friend, isn't helping any either.

A sealed system (whether its a liner or not), good fuel, and good burning habits (good flue temps, burning in full cycles when possible, getting up to temp quickly, etc) are all critical to keeping.your flue as clean and safe as possible.

On the connection from my stove to the first section of pipe, I sealed there, then also at the thimble, and I wrapped every joint with High temp foil tape (I have double wall. Wouldn't recommend that for your single wall, but cement wont hurt). It looks goofy, but I know I am doing everything I can to keep the gases as Hot as possible on there way up the flue

Click to enlarge
View attachment 97114


How many thermometers do you need?!? :)
 
  • Like
Reactions: PapaDave
Status
Not open for further replies.