Insert not heating room

  • Active since 1995, Hearth.com is THE place on the internet for free information and advice about wood stoves, pellet stoves and other energy saving equipment.

    We strive to provide opinions, articles, discussions and history related to Hearth Products and in a more general sense, energy issues.

    We promote the EFFICIENT, RESPONSIBLE, CLEAN and SAFE use of all fuels, whether renewable or fossil.
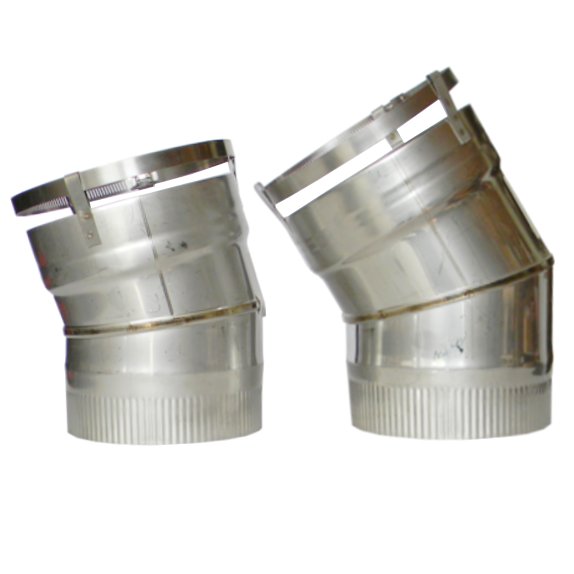
Is the liner appliance adapter seated in the stove? Sure doesn't look like it...looks to me like that connection needs a 15-30* stainless elbow... https://www.rockfordchimneysupply.com/fixed-elbow-for-flexible-liners.php
View attachment 273030

One nice thing about the Enviro Inserts is that the standard flue collar is removable and replaceable with an angled one. We needed to use both the angled collar and an elbow in our installation, but we were working in a much more confined space than you have. We do have room on the sides, though, and have lined it with rockwool insulation.
 
How tall is your chimney? You say you have a 3 story house and 10 ft ceilings, so I'm assuming the chimney is pretty tall?

If I were to stuff my Boston 1700 to the gills with seasoned wood and close it to 25% open, I would over fire the stove. It would get way too hot. If you are able to leave it 25% open on a full load, and you have as tall of a chimney as I think you do, then I'm guessing your wood may not be optimally seasoned. Could definitely be wrong, just a thought.
 
Yeah- I'd do anything to find a new Enviro Kodiak. Perfect insert for our application. Wish they did not stop making them.
 
Yeah- I'd do anything to find a new Enviro Kodiak. Perfect insert for our application. Wish they did not stop making them.
They didn't want to put the money into making them 2020 compliant.
 
I'm guessing the liner connection became displaced when he pulled the unit out 6 inches. Block off plate will help, and plastic on all your windows will reduce drafts and keep the heat in. Wood needs to be split, stacked properly, and properly dried for the right moisture content. I see a lot of discoloration on your glass which means woods wet. I think people should split, stack, cover wood for two years before being allowed to purchase a stove or run one. I think 90% of these issues people post are wood too wet.
 
  • Like
Reactions: moresnow
Also see that you used a 5.5" liner. My kodiak required 6". Could this half inch be limiting the fire? I don't know I'm not an expert on the volume and all of that. I had mine loaded with 2 big rounds of oak and 4 pieces of ash last night. It got down to 11F outside. My entire house never dipped below 66. I did have to load a little at 3am, but with those temps I was surprised how well it kept the house warm. Right above the door I was seeing 540F with the fan on full blast and the damper fully shut. My flue is only 13ft. My first year burning I could hardly get the stove over 400 because my wood was terrible and it burned out faster. Just noticed in your pictures it looks like the liner is to small and you or whoever used some sealer to fill the gap. Mine is only held on by the 3 screws. I thought about putting rope but I believe Begreen advised that there is no need if it is snug. 3 years going strong and no issues with the connection.
 
They didn't want to put the money into making them 2020 compliant.
They got out of the woodstove business and are focussing on pellet and gas stoves. My guess is that the woodstove line was their least profitable.
 
Lots of good advice here, as a Hail Mary option you might want to try loading on an established working fire many smaller splits stacked together and keep the fan on high all the time ...

...that heat you describe that makes your eyes water must be forced to the other side of the room.

It looks like you burn hot cause the glass appears to be clean; but hot is relative, to me is 500+...the red zone we always burn WOT, but a few splits at a time.

Give it a try, that seasoned locust should drive you out of the room.
 
Thanks everyone! Several changes have made a huge difference, thanks to the awesome help I have gotten in these forums from all of you.
1) insulated the damper with 2 layers of R15 Owens Corning Thermafiber plus a baffle I made from heat duct sheet metal. Pics attached. (Aside, the room got down to 58F while I was doing this work with the stove cold).
2) put a heat-powered fan on top of the stove behind the surround, left a 1" gap behind surround for heat to escape when shoving the stove back into the firebox after insulating the damper.
3) covered windows and exterior french doors in this room with 2 mil plastic drop cloth, wrapped around 3/4"x1/4" trim molding and nailed into the edge of the casing.
4) insulated a few drafty areas along the baseboard in the room by laying Thermafiber insulation along the floor. Will need to tackle blow-in insulation in the spring.
5) Loading the stove with more wood, less often.
6) storing several days worth of wood in basement so I can burn warm wood instead of loading stove with cold wood straight from outside.
7) I have had a fan in the room opposite the stove but today I pointed it toward the ceiling instead of keeping it level.

Astonishingly with all of the above, this cold room cranked up to 73.5F tonight (12F outside). The entire first floor felt noticeably warmer, including the kitchen which is on the opposite corner of the house. Before all these changes I could only get this room to 73F if outside temps were 45F and above.

In the spring I will tackle the attachment of the liner to the stove collar. I'm not getting any smoke out of that connection, but it does look janky. Anyone have thoughts about an adjustable offset like this one?

Again, thanks everyone for the input. This is a great forum. I had unrealistic expectations of the stove given the inefficiencies of my huge 110-year old house, but with your suggestions I am now comfortable!
 

Attachments

  • 20210128_182750.jpg
    20210128_182750.jpg
    141 KB · Views: 157
  • 20210128_215723.jpg
    20210128_215723.jpg
    226.8 KB · Views: 159
  • Like
Reactions: NoGoodAtScreenNames
Glad to hear those improvements are working well for you! In regards to the liner, I would avoid the offset box you linked. Based on your previous picture, it looks like a 15 or 30 degree fixed elbow would fit nicely. Rockford Chimney sells them in the 5.5" size.

 
Thanks for the compliment but really the picture is deceiving. I did a pretty messy job!
To support the back, I drilled a couple holes in the brick and used one tapcon 1.25" masonry screw on the back side of each half of the plate. The front edge is supported by a ledge on the inside bottom edge of the damper frame.
When I eventually change out the stove connection to a 15-degree offset, I might make version 2 of the plate using thicker steel and do a nicer install. For now this is the metal I used:

Master Flow 3.25 in. x 14 in. x 3 ft. Half Section Rectangular Stack Duct