
VC Resolute Newbie
- Thread starter VC Resolute III
- Start date
-
Active since 1995, Hearth.com is THE place on the internet for free information and advice about wood stoves, pellet stoves and other energy saving equipment.
We strive to provide opinions, articles, discussions and history related to Hearth Products and in a more general sense, energy issues.
We promote the EFFICIENT, RESPONSIBLE, CLEAN and SAFE use of all fuels, whether renewable or fossil.
You are using an out of date browser. It may not display this or other websites correctly.
You should upgrade or use an alternative browser.
You should upgrade or use an alternative browser.
I thought that the collar accepts a 6" round stove pipe that is slightly ovalized at the crimped end but it has been decades since I worked on a Resolute.
So, VC says if you are certain it's a version 3 then its a 6 inch round that you very slightly push on and install. It may have been awhile but you are exactly correct. Thanks very much.I thought that the collar accepts a 6" round stove pipe that is slightly ovalized at the crimped end but it has been decades since I worked on a Resolute.
Morning all. UPDATE.
So, all the soot has been removed. What s XZZ !!))))0 mess!! The flue being 12" X 12" and the dump pipe being 6" ovalized meant that when my FIL used a brush from the top down most of the soot fell around the ovalized pipe and piled up. I squeezed up on top of the stove and pushed up on what I thought was solid stuff and it was not and down it came. What a mess and I was covered. My wife ran in and could see I was livid and she just kept walking...LOL. I used my shop vac with a fine particulate filter and went to work and got all the soot out.
So there is no way I am repeating the mickey mouse installation of 1985 where the installer flattened the dump pipe to get it to pass through the old damper. So out with my trusty Sawzall and several new blades I squeezed over the stove again and cut out sections of the old damper so I now have a large enough opening for my flex pipe. THIS WAS NOT EASY.
In speaking with VC i did learn that the 6 inch butterfly damper installed in the black stove pipe just above the stove throat was not a factory thing but added later and most likely by my FIL.
I am researching liners and needed items now and have been looking at Fireside Supply as well as Rockford. Both companies seem solid and with everything I need added up Rockford is only about $100 higher than Fireside for everything.
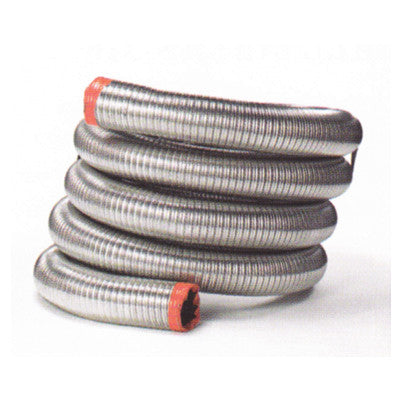
I do like the smooth wall flexible liner and really not that much more than the standard. I need the 20 foot kit but will only need 17 feet of it. I am going to insulate as well.
Getting a 12" X 12" flue cover for the top and a wind/rain resistant pipe cap to finish it of. $1100-$1200 when all is said and done.
Thanks again.
So, all the soot has been removed. What s XZZ
!!))))0 mess!! The flue being 12" X 12" and the dump pipe being 6" ovalized meant that when my FIL used a brush from the top down most of the soot fell around the ovalized pipe and piled up. I squeezed up on top of the stove and pushed up on what I thought was solid stuff and it was not and down it came. What a mess and I was covered. My wife ran in and could see I was livid and she just kept walking...LOL. I used my shop vac with a fine particulate filter and went to work and got all the soot out. So there is no way I am repeating the mickey mouse installation of 1985 where the installer flattened the dump pipe to get it to pass through the old damper. So out with my trusty Sawzall and several new blades I squeezed over the stove again and cut out sections of the old damper so I now have a large enough opening for my flex pipe. THIS WAS NOT EASY.
In speaking with VC i did learn that the 6 inch butterfly damper installed in the black stove pipe just above the stove throat was not a factory thing but added later and most likely by my FIL.
I am researching liners and needed items now and have been looking at Fireside Supply as well as Rockford. Both companies seem solid and with everything I need added up Rockford is only about $100 higher than Fireside for everything.
I do like the smooth wall flexible liner and really not that much more than the standard. I need the 20 foot kit but will only need 17 feet of it. I am going to insulate as well.
Getting a 12" X 12" flue cover for the top and a wind/rain resistant pipe cap to finish it of. $1100-$1200 when all is said and done.
Thanks again.
Don't use the two-ply smooth wall liner. This type often has problems with delamination and fish-mouthing on the interior. Go for a medium or heavy-duty single-ply liner.I do like the smooth wall flexible liner and really not that much more than the standard. I need the 20 foot kit but will only need 17 feet of it. I am going to insulate as well.
Thanks! I hadn't read that. Good to know!Don't use the two-ply smooth wall liner. This type often has problems with delamination and fish-mouthing on the interior. Go for a medium or heavy-duty single-ply liner.
Don't use the two-ply smooth wall liner. This type often has problems with delamination and fish-mouthing on the interior. Go for a medium or heavy-duty single-ply liner.
These are the two I am looking at. They both seem very similar and 7 ply each.

FireFlex 316L Smooth Wall Chimney Liner
FireFlex 316L smooth wall chimney liner only .011 thick - designed to reline existing chimneys or to be used in new construction.
 firesidechimneysupply.com
Smooth Wall Chimney Liner - Flexible Smooth Wall Flue Liner - Rockford Chimney
Rock-Flex Smooth Wall stainless steel chimney liner is gaining popularity due to its superior flexibility & increased BTU capacity. DIY installation guide.
 www.rockfordchimneysupply.com
Here is what can happen with 2 ply liners:
 www.hearth.com
This is an alternative to consider:
www.hearth.com
This is an alternative to consider:
Flex King Pro
Has anyone had any issues with their Flex King Pro liner coming apart? I cleaned my liner for the third time and looking up from the stove connection I could see a piece of the liner pulling apart creating a 3 inch wide flap. This would probably be a place for creosote to collect correct...
Forever Flex 6" Chimney Liner Kit | 6" Flexible Chimney Liner
High-quality and reliable, Forever Flex 6" chimney liner kits are available in your choice of alloy and vent style. Pick up this chimney liner kit today!
www.discountchimneysupply.com
Thanks, I am a bit confused though. Both of the ones I am looking at say 7 ply. Am I getting mixed up as they are really 2 ply?Here is what can happen with 2 ply liners:
This is an alternative to consider:Flex King Pro
Has anyone had any issues with their Flex King Pro liner coming apart? I cleaned my liner for the third time and looking up from the stove connection I could see a piece of the liner pulling apart creating a 3 inch wide flap. This would probably be a place for creosote to collect correct...
Forever Flex 6" Chimney Liner Kit | 6" Flexible Chimney Liner
High-quality and reliable, Forever Flex 6" chimney liner kits are available in your choice of alloy and vent style. Pick up this chimney liner kit today!www.discountchimneysupply.com
Hmmmm......is the 7 ply seams with 2 inner linings just word salad for bottom line being its a 2 ply liner?
Thanks again.
Rock-Flex chimney liners are fabricated with 316Ti .006 stainless steel, have 7 ply seams with 10 corrugations per seam, air and water tight, and provide the best flexibility and strength to contain moisture and flue gases. Our Smooth Wall Deluxe chimney liners are fabricated with 316L .013 stainless steel and have 7 ply seams with 2 inner linings. Use our flexible chimney liners inside a masonry chimney with stoves, fireplaces, inserts and more. Round flue liners are the most common type of flexible liner. In the case that you can't fit the ideal size round liner down your flue, a shaped liner is the next best choice. If you have questions, please contact us! We'll be glad to help you choose the correct size chimney liner.
I owe a follow up. This project was delayed by a rotted sill and main carry beam on the camp that I worked on in 2024. I was determined to get it done this year. The top of the chimney is showing how I extended the pipe 18" before installing a wind/rain cap. The stove for sure is a 1985 Resolute and Graham The Stove Man said it was still in great shape but he cleaned, re-sealed and polished it on-site. I did add a Hearth Extender to protect the wood floor.
When I lit the first fire it went right out. I could tell it was starving for air. On the lower left corner there is a flapper air valve and I opened and it helped but the stove was still air starved. This model has a spring/chain/flapper valve on the upper left back. I reached around and the flapper was closed. So I turned the small wire handle attached to the flapper and chain and manually opened the flapper and the stove flame took off nicely. The spring is intact, the area is clean, the chain is intact and all looks OK but I guess I need to look into how the darn thing is supposed to work. I "think" it should already be open when cold and slowly close as the stove get hot.
The 3rd picture ain't great but it's the upper chamber now sealed off with the Rock Wool board.
6" SS pipe, insulated via kit, flue chase cover, extension and rain and wind cap. All purchased through Rockford Chimney Supply. I have less than $1450 in all the supplies. $350 for the stove cleaning, re-sealing and polish. A NH company quoted me $5500 and that didn't include the 18" extension or the wind/rain cap.
BTW, the stones are for looks. The chimney from the old damper up was built with cement blocks and then lined with a 12"X12" flue. I insulated the new liner and dropped it down through the flue.
After say 30 minutes of burning I could tell this stove could heat the camp easily.
I worked on this all summer here and there and glad it's done!
Behind schedule but done.
Thanks to all for the help I received here.
Attachments
-
![[Hearth.com] VC Resolute Newbie](/talk/data/attachments/341/341206-c357374abab98cae5c13d6a464ba31b1.jpg?hash=Ky6D_0RTsd) PXL_20250930_143852885.webp459.1 KB · Views: 25
PXL_20250930_143852885.webp459.1 KB · Views: 25 -
![[Hearth.com] VC Resolute Newbie](/talk/data/attachments/341/341207-ea39471413e2a535ccb19213a937df1c.jpg?hash=-sz6NHzsCm) PXL_20250930_142613612.MP (1).webp383 KB · Views: 23
PXL_20250930_142613612.MP (1).webp383 KB · Views: 23 -
![[Hearth.com] VC Resolute Newbie](/talk/data/attachments/341/341208-1cdd4068b190db9c01f56b69db48daa6.jpg?hash=n38TjQqRBA) PXL_20250930_142802075.webp725.7 KB · Views: 20
PXL_20250930_142802075.webp725.7 KB · Views: 20 -
![[Hearth.com] VC Resolute Newbie](/talk/data/attachments/341/341209-8ab7df834f8b48f6a8d725d1e63b987c.jpg?hash=bUrGjS1lHi) PXL_20250920_163928042.webp340.8 KB · Views: 27
PXL_20250920_163928042.webp340.8 KB · Views: 27 -
![[Hearth.com] VC Resolute Newbie](/talk/data/attachments/341/341210-9488bf7b82d258c67ee92e348792e3f5.jpg?hash=mIA46G6CtU) PXL_20250930_143637741.MP.webp326.4 KB · Views: 23
PXL_20250930_143637741.MP.webp326.4 KB · Views: 23 -
![[Hearth.com] VC Resolute Newbie](/talk/data/attachments/341/341211-47e9b9511f6fec8717e607ecfbcc079b.jpg?hash=1QLkWqH-gs) PXL_20250930_143617208.webp467 KB · Views: 25
PXL_20250930_143617208.webp467 KB · Views: 25 -
![[Hearth.com] VC Resolute Newbie](/talk/data/attachments/341/341212-c47baa44272544eb4f45810fbca3b94e.jpg?hash=-sz6NHzsCm) PXL_20250930_142613612.MP.webp383 KB · Views: 22
PXL_20250930_142613612.MP.webp383 KB · Views: 22
It's a later model Resolute and a good little heater. We loved ours way back when though it was a Resolute I. The side flap is for secondary air. Leave it open. The stove is thermostatically controlled, but this could perform poorly due to the location. The thermostat responds to room temperature, but with it back in the fireplace cavity, it's going to get thrown off by the heat buildup there. If you can place a small fan on the hearth blowing into the back of the fireplace, that may help the thermostat and with heat circulation.
Are you engaging the bypass once the fire is burning well? Have you downloaded the manual for this stove (and all VC stoves of this vintage)?
Are you engaging the bypass once the fire is burning well? Have you downloaded the manual for this stove (and all VC stoves of this vintage)?
Thank You. Once I pulled the stove out of the fireplace so Graham could work on it it was marked 1985 on the back. The serial # 075585. After reading your comment I "think" I understand why my late FIL added the damper to the exit pipe. Indeed the stove sits against the back wall of the old firebox. Perhaps he was having issues with the thermostat damper flap system and added one he could control by hand. I will do the same. The chimney was built in 1955/56. It wasn't until I pulled the stove out and looked up that I saw the cement block under structure. I'm actually happy that's the case. I haven't had a good bed of hot coals yet to close the bypass to throw heat. Graham said first couple fires keep it small and break it in from the new seals. I did down load the manuals so thanks for that. Not to be too cocky but I'm starting to feel like more of a wood stove veteran than a rookie!It's a later model Resolute and a good little heater. We loved ours way back when though it was a Resolute I. The side flap is for secondary air. Leave it open. The stove is thermostatically controlled, but this could perform poorly due to the location. The thermostat responds to room temperature, but with it back in the fireplace cavity, it's going to get thrown off by the heat buildup there. If you can place a small fan on the hearth blowing into the back of the fireplace, that may help the thermostat and with heat circulation.
Are you engaging the bypass once the fire is burning well? Have you downloaded the manual for this stove (and all VC stoves of this vintage)?
")
You may need to open up the air control a bit when the bypass is first closed. Then as the firebox heats up, the air can be reduced. It's an easy to run stove and well-behaved once you get used to it. Just be sure to only feed it dry, fully seasoned wood.
Similar threads
- Replies
- 2
- Views
- 359
- Replies
- 1
- Views
- 121
- Replies
- 40
- Views
- 5K
- Replies
- 2
- Views
- 233