So, I bought my class A pipe and accessories over the weekend and planned to install it today. I got a good start but need to finish on another day. I have my heat shield and hearth project going at the same time. I just figured since a few nice days left, I better get the chimney installed before the weather gets too difficult to deal with.
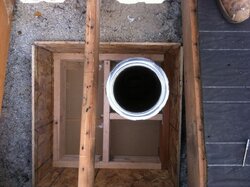
Today, I set the wood stove in the exact location relative to the combustible wall since clearances are measured from the nearest combustible surface. I left enough gap to accomodate the heat shield and river rock that is also in the construction phase, which was delayed due to special ordering some supplies.
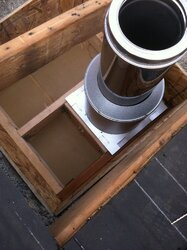
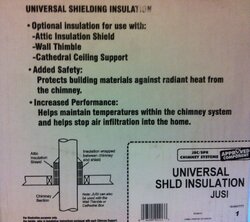
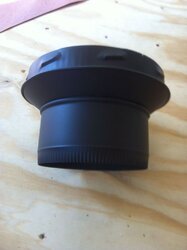
Selkirk's SuperVent class A chimney seems like a solid product. All the parts were in great shape right out of the box which is what I expected. The directions that came with the ceiling support contained errors, so I printed the updated directions from www.supervent.com. I recommend obtaining the directions from their website.
My home is a ranch with 4/12 pitch roof. The stove is located in my open concept living, dining, and kitchen. The chimney will go through my living room ceiling through the attic and out the roof. This is not a very tall installation. My overall height will be 14', which is the minimum recommended by Jotul.
Step 1: Transfer the center of the stove exhaust to the ceiling.
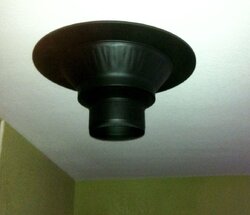
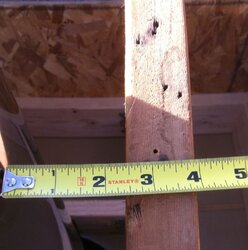
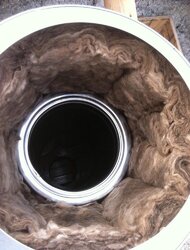
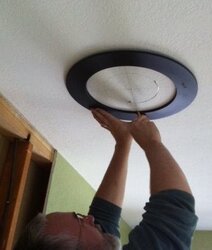
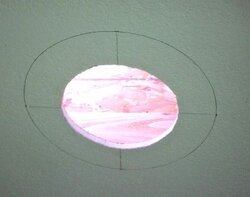
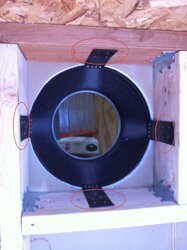
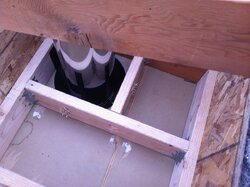
The wood stove exhaust is located on the top of the unit. I used a plumb bob to transfer the center of the exhaust flange on the stove to the ceiling. I did not include a photo of this step. The picture below shows the center point, two lines running through it creating an "x", and two concentric circles. The inner circle was created with a compass using the center point. I used my compass to create an 8" inner circle. My compass was too small to create a 12 3/8" circle, so I measured 6 3/16" from the center point along each leg of the "x" and made a mark. This gave me four points to center the ceiling support collar (large black ring in photo).
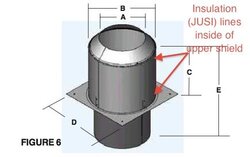
The inner circle is about 4" narrower than the actual finished opening of 12 3/8". I did this to double check my hole placement relative to the framing above in the event that I miscalculated. I knew I was close but 4" would allow for some final adjustment. By the way, the directions can seem confusing. Basically, if using the ceiling support, you'll need a 12 3/8" round hole in the drywall. You'll notice that I'm using the collar of the ceiling support as a template. The directions do not point out the benefit of doing this. It works great. Just be sure you use the inside of the collar, not the outside!!
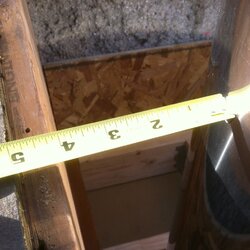
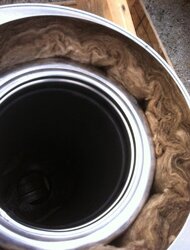
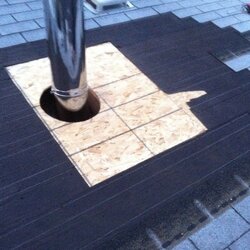
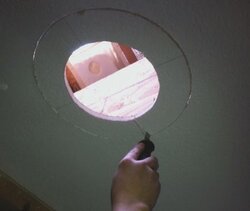
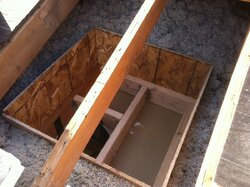
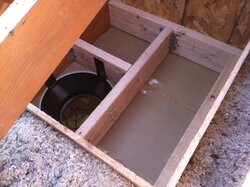
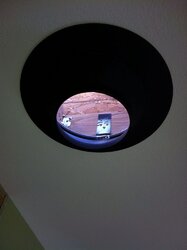
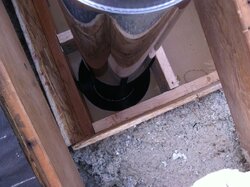
The second photo (close-up) shows more clearly the marks that I made. Notice the black dot within the red circle. That's actually a nail head. That was my first center mark. After cutting open my roof directly above the location for my chimney, I realized that I needed to move things a little bit. Sure glad I looked before cutting my ceiling out.
Today, I set the wood stove in the exact location relative to the combustible wall since clearances are measured from the nearest combustible surface. I left enough gap to accomodate the heat shield and river rock that is also in the construction phase, which was delayed due to special ordering some supplies.
Selkirk's SuperVent class A chimney seems like a solid product. All the parts were in great shape right out of the box which is what I expected. The directions that came with the ceiling support contained errors, so I printed the updated directions from www.supervent.com. I recommend obtaining the directions from their website.
My home is a ranch with 4/12 pitch roof. The stove is located in my open concept living, dining, and kitchen. The chimney will go through my living room ceiling through the attic and out the roof. This is not a very tall installation. My overall height will be 14', which is the minimum recommended by Jotul.
Step 1: Transfer the center of the stove exhaust to the ceiling.
The wood stove exhaust is located on the top of the unit. I used a plumb bob to transfer the center of the exhaust flange on the stove to the ceiling. I did not include a photo of this step. The picture below shows the center point, two lines running through it creating an "x", and two concentric circles. The inner circle was created with a compass using the center point. I used my compass to create an 8" inner circle. My compass was too small to create a 12 3/8" circle, so I measured 6 3/16" from the center point along each leg of the "x" and made a mark. This gave me four points to center the ceiling support collar (large black ring in photo).
The inner circle is about 4" narrower than the actual finished opening of 12 3/8". I did this to double check my hole placement relative to the framing above in the event that I miscalculated. I knew I was close but 4" would allow for some final adjustment. By the way, the directions can seem confusing. Basically, if using the ceiling support, you'll need a 12 3/8" round hole in the drywall. You'll notice that I'm using the collar of the ceiling support as a template. The directions do not point out the benefit of doing this. It works great. Just be sure you use the inside of the collar, not the outside!!
The second photo (close-up) shows more clearly the marks that I made. Notice the black dot within the red circle. That's actually a nail head. That was my first center mark. After cutting open my roof directly above the location for my chimney, I realized that I needed to move things a little bit. Sure glad I looked before cutting my ceiling out.

 Please keep us updated as things proceed.