• Active since 1995, Hearth.com is THE place on the internet for free information and advice about wood stoves, pellet stoves and other energy saving equipment.

    We strive to provide opinions, articles, discussions and history related to Hearth Products and in a more general sense, energy issues.

    We promote the EFFICIENT, RESPONSIBLE, CLEAN and SAFE use of all fuels, whether renewable or fossil.

KPru

New Member
Nov 13, 2018
12
MA
I recently completed rebuilding the top of my chimney, adding a liner and installing a wood insert. I wanted to share here for several reasons:
  1. I'm pretty proud of about 95% of the project and wanted to document it
  2. As an amateur DIY'er, this took a lot of research/learning (much here), and figure this could help someone similar down the road
  3. As a thank you to all the contributing members of hearth.com, whose advice was invaluable, and following much of it made this work
House is a 1970 cape, full dormer in back, ~2000 sq ft, north of Boston, natural gas furnace with forced hot water on 4 zones

About a week of labor went into this, spread out over the course of a month (October)
Day 1: setup ladder/tarp and demo existing chimney top
Day 2: replace and extend tops of 3 clay flues, lay 3 rows of brick
Day 3: lift up crown tools/materials, build form, lay bond break and support
Day 4: tape off form seams, cut reinforcement mesh, mix/pour concrete
Day 5: remove form, apply sealant, caulk exposed bond breaks
Day 6: remove damper, insert liner, install blockoff plate
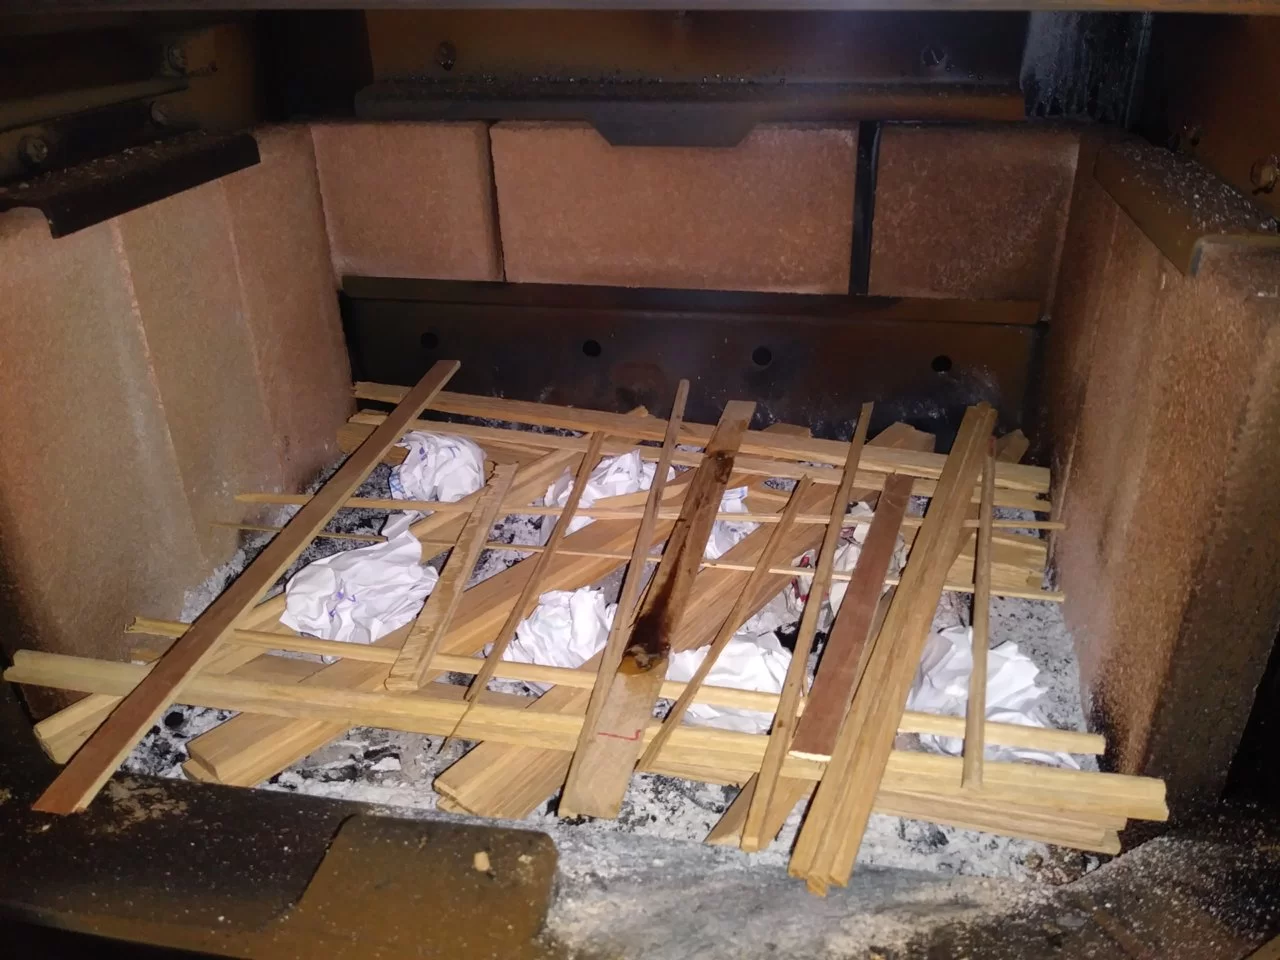
Day 7: install/connect insert

Crown before (top cap removed for picture)
Wr9utyV.jpg

Crown after (rain cap/cage not shown)
NYGxcNF.jpg

Insert installed (Quadra-Fire 4100i)
Ld99g9O.jpg

The next 4 replies to this thread detail the following:
  1. Chimney top demo, clay flue extension, brick laying
  2. Crown build
  3. Liner and Insert installation
  4. Additional useful links and final thoughts
 
Last edited by a moderator:
Demollition, flue extension and brick laying
  1. Inspection of chimney top
    • no flue extension
    • no bond break
    • crown with no overhang
    • crown cracked with mostly loose pieces
    • top 3 rows of brick mostly loose
    • Wr9utyV.jpg CFRXqg3.jpg
  2. Hauled up tools and materials
    • for heavier items, I'd tie them off with rope on the ground, carry the other end of the rope up the ladder, and then pull up from the roof
    • for smaller items, I'd either stuff in a backpack and carry up, or in a duffel bag and tie off with rope
    • ladder is a Little Giant 24' type 1A fiberglass HyperLite SumoStance extension ladder
      • I also use a Ladder-Max stand-off stabilizer as to not rest on the gutter
      • between the wide SumoStance base and wider stand-off resting on the roof, side-to side stability is pretty solid
      • ladder extends about 4 rungs above roof line to help with getting on and off
      • IffV1F9.jpg
  3. Demolition of chimney top
    • removed concrete, hammer and chisel for the few areas actually still connected
    • removed top 3 rows of brick, mostly just by pulling with hands
    • removed top section of 2 of the 3 flues
    • swept chimney flue and used creosote cleaner on brick in fireplace
    • gEP5eQd.jpg
  4. Clay flue tile replacement and extension
    • purchased (2) 8.5"x13" and (1) 8"x8" sections in 2 foot lengths
    • used angle grinder with 4.5" masonry wheel to cut to desired lengths
      • planned for left and right flues to extend 3-4" above eventual concrete crown
    • purchased (1) 12.5lb tub of Rutland refractory cement = $32: Amazon
    • mixed refractory cement in 5 gallon bucket with a mud mixer paddle on the end of a RIDGID 8-amp corded 1/2in drill with auxiliary handle
    • used a trowel to apply refractory cement to tops of existing flues, before stacking new sections
    • EDGEtfs.jpg
  5. Laid 3 courses (rows) of brick
    • purchased (40) bricks = $0.50 / brick: Home Depot
      • my wife and I were OK with not matching bricks, and old ones were pretty beat up
    • purchased (1) bag of 80lb type S mason mix mortar = $7 / bag: Home Depot
    • mixed mortar in 5 gallon bucket and then on plywood mortar board with 10inx4.75in london pattern brick trowel
    • laid brick, one row at a time using large trowel to apply mortar and small 3/8" tuck pointing trowel to help with the vertical sections
      • useful link for chimney top specific brick laying:
      • useful link for general brick laying best practices:
 
Last edited:
  • Like
Reactions: Easy Livin’ 3000
Crown build
  1. Wrapped flues
    • purchased (2) rolls of Frost King self adhesive foil and foam duct insulation: 1/8" thick x 12" tall x 15 feet long = ~$20 / roll: Home Depot
    • each flue was wrapped around twice to get to 1/4" thick
      • thinner allows less buffer between different thermal expansions
      • thicker can become more challenging to caulk afterwards
      • y7C6746.jpg
  2. Made crown form
    • purchased (8) 2"x6" lumber in 4 foot lengths = ~$3 / board: Home Depot
    • purchased (1) flexible half round moulding: 5/16" tall x 5/8" wide x 8 feet long = $16: Amazon
    • Form prep
      • cut (4) 2x6 boards down to 3 feet, left others at 4 feet (this method will create 5.5" tall crown sides)
      • sanded down one side on all boards to 150 grit (to leave smooth concrete faces)
      • painted on canola oil a couple nights before (to act as release agent when removing form)
      • cut a 2x4 to (8) 3" lengths to act as standoffs for establishing 3.5" overhang
    • Form sizing
      • used Bessey 12" clamps to position 2x6's around chimney top with standoffs
      • made fine tune adjustments to butt ends of boards together and to make flush with top of brick
      • used (8) 3" deck screws to secure 2x6's to one another
      • released clamps, and removed 2x6 "rectangle", flipping it upside down to work on
      • place remaining 2x6's on now top of "rectangle", this will become the bottom of the form, on top of the side walls
      • used standoffs to position clamps on side walls, allowing the bottoms to slide side-to-side and in-and-out in the throat of the clamps
      • positioned wood shims in clamp throats to locate bottoms while matching chimney top dimensions plus small ~1/8" clearance per side
      • used (8) 3" deck screws to secure bottoms to sides
    • Form finishing
      • performed trial fit on chimney to assure no adjustments were needed
      • cut (4) 45 degree wedges, nailed to form to create concrete chamfer, removing 90 degree corners
      • nailed half round flexible moulding ~3/4" from the side walls to create drip edge
        • lesson learned: 1"-1.25" from side wall would leave more room for caulk and eventual concrete to fill smoothly
      • caulked all 2x6 seams (and chamfer, but not moulding) with large bead of silicone
        • lesson learned: latex caulk is much easier to work with to smooth to nice radius, durability of silicone not needed for this temporary form
      • worked on other tasks before pouring to allow caulk to cure
      • lesson learned: this form construction prevented me from having to cut any 2x6's to a precise length (saving trips down the ladder). It also gave nice little ledges to tap a hammer for form removal after pouring.
      • QMhYaxU.jpg MD1XFOF.jpg mOVWnOJ.jpg
  3. Fit angle iron supports
    • purchased (4) zinc-plated slotted 14-gauge angle iron lengths: 1.5" tall x 1.5" wide x 48" long = $11 / each 4 foot length: Home Depot
    • purchased (1) Midwest left cut offset aviation snip = $28: Amazon (use good snips, also offset is big help)
    • purchased (1) Malco 3.25in hand seamer = $54: Amazon
    • cut sections of angle iron to length with angle grinder, leaving small ~ 1/2" clearance from edge of brick
    • used snips, hand seamer and hammer to flatten vertical sections to lay on brick
      • lengths spanning the short dimension of the chimney are placed first
    • placed a couple dabs of high temp silicone caulk at one end of each of the lengths to hold in place for next steps
    • BNUoj9C.jpg
  4. Put down sheet metal bond break
    • purchased (1) 24"x48" sheet of 24-gauge 304 stainless steel
      • ~$36: Ebay (higher with shipping, I ended up getting other sheet metal in this order for a block off plate, etc.)
      • useful link for sheet metal gauge thicknesses: https://www.metalsupermarkets.com/sheet-metal-gauge-chart/
      • good pair of aviation snips can cut through 24 gauge (.025") pretty easily, can get pretty fatiguing thicker than that, however was able to get through both 18 gauge stainless and 14 gauge galvanized with quite a workout
    • cut shapes to size in place on chimney, leaving small ~1/8" overhang with brick, and small gap between panels
    • painted with stove paint, to possibly further bond break?
      • purpose of bond break is to not only create the bottom of the form, but to allow the freedom for different amounts of thermal growth between the crown and the chimney
      • brick and concrete have different coefficients of thermal expansion and can be at different temperatures
      • i gather that concrete curing in the coarse surface of the brick is not good for allowing thermal growth freedom
      • although the sheet metal is smooth, I figured the weak bond with the paint could be sacrificial in the case of a thermal growth fight
      • probably overkill and overthinking it, but it's done, and wasn't too much extra effort (had the paint for the block-off plate)
      • aco3jtP.jpg
  5. Positioned form and taped seams
    • purchased (4) rolls of 3M high temp flue tape: 1.5" wide x 15 feet long = $8 / roll: Amazon
    • temporarily removed sheet metal bond break panels to position crown form around brick
      • used wood shims to not only level the form into place, but also support it off of the chimney
      • I did wedge in a couple 2x4's underneath to the roof, but I think the shims would have supported all the weight fine when pouring
    • put sheet metal bond break panels back into place
    • used flue tape to seal gaps in between sheet metal first, then around flues second, and lastly with form
      • tape did not stick to the wood (slight film of canola oil), so I had the tape overlap quite a bit
      • thought was I'd make sure the first concrete poured would be put on the sheet metal and I'd trowel it out over the tape to press it down, and not get any concrete under (this worked well)
      • nsnRnRg.jpg
  6. Cut reinforcement mesh
    • purchased (1) roll of Aleko 16 gauge steel mesh reinforcement: 30" wide x 10 feet long (1/2" x 1" openings) = $29 / roll: Amazon
    • did a rough unrolling, using text books to hold down to cut 2 sections to length
    • loaded on text books and dumbbells to flatten for about a week
    • still curled back a bunch after removing, so used the edge of a table with a long stiff straight edge to roughly straighten out over every inch or 2 of length
    • before pouring concrete, positioned one of the sections to the front and side of the flues to mark with a sharpie where I'd need to make cuts
    • took the section down and basically drew the profile of the flues with sharpie, leaving at least 1/2" clearance
    • used aviation snips to easily cut through mesh at all the sharpie markings
    • used this first piece as a template for cutting the second
    4Q77qTB.jpg
  7. Mixed and poured concrete
    • purchased (7) 80lb bags of crack resistant Quikrete concrete mix = $6 / bag: Home Depot
      • "crack resistant" means it is fiber reinforced, and generally doesn't require mesh reinforcement
      • I see the mesh as more of a belt and suspenders as it's not that much more time and money
      • each 80lb bag makes 0.6 cu ft of mixed concrete. My rough (but conservative) volume calculations (including a taper) came to 3.9 cu ft. (3.9 / 0.6 = 6.5 bags)
      • also was tempted to mix my own blend of portland cement, small and large aggregate after hearing some pro's talk about how they avoid the premixed stuff. Chimney crowns could probably use a little more portland cement and less/smaller large aggregate, as they're not load bearing. Ultimately, I avoided this as I figured as a first timer I'd probably screw it up, especially with trying to mix in fiber reinforcements.
    • purchased (12) 5 gallon buckets = $3 / bucket: Home Depot
      • already had 4, and wanted to fill each with 40lb of concrete mix for lifting to the roof
    • split each 80lb bag into 2 5-gallon buckets with roughly 40lbs in each
    • tied buckets to rope and lifted onto roof
    • once on roof, mixed in 20lb batches
      • started with a 40lb batch, and was pretty tough with the RIDGID 8-amp corded 1/2in drill with auxiliary handle and mud mixer paddle
        • ended up putting a shin guard on my right leg for when the bucket would whip around and have the handle gouge my shin
      • 20lbs ended up being a breeze after getting a feel for how much water was needed (auxiliary handle to hold with left hand was huge)
        • 1st I'd add ~.75 quarts of water to an empty bucket
        • next I'd add ~75%-90% of the 20lbs of dry mix
        • I'd use the drill and paddle mixer to mix up the pretty wet batch (much less resistance than a dry batch)
        • then I'd add the remaining dry mix (10%-25%) of the 20lb batch, and do one last mix, adding water if necessary, which wasn't often
        • water was on the low side as it was around 50 degrees with a rain storm coming the next day
        • as a first timer, it was tough to know what the proper water content mix looks like
          • best method I found was to drag a trowel through the mix. If the side walls crumble in: too dry, if the side walls are soupy and flow: too wet. Can't find the site now, but it had pictures of both cases, and what to target.
    • poured 40lbs at a time, would dump it in, then use a 8"x3" trowel to work the concrete in and around
      • for the first pour, I made sure to work it over the tape seal (not under) and to work the concrete in between the drip edge moulding and side wall
    • placed the reinforcement mesh at 2" and 4" heights (side walls are 5.5" high)
    • 2 or 3 time during the pour, I went around the sides of the form with a reciprocating saw (sawzall) with no blade to vibrate the form to get better fill
    • tapered the final concrete up towards the shorter center flue (where the eventual top plate will sit holding a stainless liner)
      • I wanted the top plate to sit on the concrete and not on the clay flue, so I tapered the concrete slightly above the clay (wrap extends well above). I tried to leave a small flat that fits inside the rain cap, that I'd trim the top plate back to.
        8c4wEKa.jpg
    • useful link for crown specific concrete pouring:
      • not sure I can give this link enough credit, as I felt pretty clueless beforehand, and pretty confident afterwards
  8. Added some "roofing" for the approaching Nor'easter
    • sounds like a little rain on day-old concrete is alright, but not necessarily a rainstorm
      • with 3 children under 5 years old, this was about the best window I had, so made the best of it
    • used 4 sections of 2'x4' 1/8" plywood and some cut 2x4's to cover the concrete with a generous overhang for high winds
      • left an opening for our gas furnace flue, and secured the raincap around that
      • held together through the storm, and kept the concrete surface from washing out
    • if pouring in hotter weather, common recommendation is to cover with wet towels to slow down curing process
    • oMrZipt.jpg
  9. Power trowel
    • finished pouring around 8pm, with rain expected at 8am the next morning
      • put the kids to bed, had some food, then cleared off the roof (high winds with storm)
    • sounds like depending on weather conditions, concrete could be ready to power trowel (final surface finishing) anywhere from <1 hour (hot/dry/windy day) to 6+? hours (cold/humid) after finishing pouring
      • I checked every hour or so, until around 2am, at which point the top was still too soft/wet.....so went to bed
      • my biggest regret with this was not going back up early the next morning to check and likely power trowel
      • instead I waited another 24 hours until the storm passed, at which point the surface was too hard to work at all
    • I believe this final surface finishing to be so critical as it not only fine tunes your slopes but creates a very smoothed finish
      • a properly sloped and smoothed top surface will withstand more freeze/thaw cycles by preventing melting snow/rain from collecting in divots during the day and then freezing at night creating the potential for crack formation and growth
      • L7QKzjP.jpg
  10. Remove form and trim flue bond break
    • waited 5 full days after pouring with weather in the 40s/50s (finish pouring 8pm 10/26, removed form ~noon 10/31)
      • definitely was a long enough wait, form came off very easily
      • barely had to do any hammer tapping as just unscrewing the 16 screws made most of the separation
      • I believe the smooth sanded surface and canola oil treatment was a big help
    • used an x-acto knife to cut the flue bond break to be flush with the crown top
      • center flue (which is slightly below crown) was cut to be flush with the top of the clay flue
      • xwvDCZf.jpg
  11. Apply acrylic cure and seal
    • purchased (1) 1 gallon bottle of Quikrete acrylic cure & seal = $29 / bottle: Amazon
    • applied 2 coats with a paint brush, goes on white, dries clear
      • applied same day that the form was removed (temperatures in the 50s, as called out)
      • PpRUvAz.jpg
  12. Caulk exposed bond breaks
    • purchased (2) 10oz bottles of Midwest high temp RTV silicone (500F continuous, 600F max) = $15 / bottle: Amazon
    • purchased (2) 10oz bottles of GE 30-min rain ready silicone 2+ caulk = $6 / bottle: Home Depot
    • waited >24 hours after applying concrete sealer
      • high temp red silicone used around the flues
      • general use clear silicone used underneath crown where sheet metal bond break separates brick from concrete (picture below is before caulking)
      • tkRG9bq.jpg
 

Attachments

  • y7C6746.jpg
    y7C6746.jpg
    141.8 KB · Views: 627
  • BNUoj9C.jpg
    BNUoj9C.jpg
    120.8 KB · Views: 643
  • mOVWnOJ.jpg
    mOVWnOJ.jpg
    70.7 KB · Views: 591
  • MD1XFOF.jpg
    MD1XFOF.jpg
    80.9 KB · Views: 582
  • QMhYaxU.jpg
    QMhYaxU.jpg
    141.8 KB · Views: 573
  • 8c4wEKa.jpg
    8c4wEKa.jpg
    96.1 KB · Views: 604
  • aco3jtP.jpg
    aco3jtP.jpg
    129.3 KB · Views: 581
  • nsnRnRg.jpg
    nsnRnRg.jpg
    80.3 KB · Views: 563
  • 4Q77qTB.jpg
    4Q77qTB.jpg
    105.6 KB · Views: 725
  • PpRUvAz.jpg
    PpRUvAz.jpg
    154.7 KB · Views: 544
  • tkRG9bq.jpg
    tkRG9bq.jpg
    128.8 KB · Views: 540
  • xwvDCZf.jpg
    xwvDCZf.jpg
    105.7 KB · Views: 533
  • L7QKzjP.jpg
    L7QKzjP.jpg
    97.7 KB · Views: 528
  • oMrZipt.jpg
    oMrZipt.jpg
    50.1 KB · Views: 458
Last edited:
Liner/Insert install
  1. Remove damper and increase opening size
    • damper came out pretty easy, couple of cotter pins and a screw was all holding mine in. Rotated it to get it out
    • used an angle grinder to increase the size of the opening pretty generously so I'd know we could position the liner wherever it needs to go
    • also the opening at the top of the smoke chamber needed to be opened up slightly, as the liner passes through at maybe a 15 degree angle
    • both of these were through pretty thick steel, and being in a tough area to work, took a bit of time
    • CD1rF7Q.jpg
  2. Insert liner
    • purchased (1) 6" heavy flex 304L stainless liner: 25 foot length, .018" thick = $518: Woodland direct
    • purchased (1) 6" 24 gauge stainless flat top plate: 13"x18" = $45: Rockford Chimney Supply
    • purchased (1) 6" 24 gauge stainless flex top plate: 13"x18" = $45+$13 shipping: Fireside Chimney Supply
    • purchased (2) 2" thick rockwool mat (Roxul - 1200F capability): 24"x48" = $24: Amazon
    • tied rope around coiled flex liner and lifted onto roof
      • heavy flex was very easy to straighten out on roof with one person
    • fed the "down" end (crimped, "up" end was labeled) down the center flue
      • twisted it a couple times when it would hang up on a clay flue tile lip
      • need a second person to help guide it through the damper plate opening
      • has a good 1-2" of "accordion" stretch to it, so initially positioned it about an inch high
    • then pulled it back up around 4 feet, to slide an upside down Fireside top plate
      • I had cut out the corners and bent up the sides to make an insulation "bottom plate"
      • added slits to make the side finger seals flexible
      • also bent the tops of the sides in, so they wouldn't catch if I needed to pull it up
      • tightened the hose clamp to secure this "bottom plate", then slide the liner back down the 4 feet
    • next I cut 4 foot lengths of rockwool to a width a little shorter than the flue width
      • had a 2nd person hold up the liner while doing this
      • slid these down the gap between the flex liner and flue, resting on top of the "bottom plate"
      • packed these in to insulate the top of the liner and the flue cavity
    • then secured the Rockford top plate
      • this had to be trimmed to size, otherwise I might have gone with their premium version which is sloped
      • also I had some 18 gauge (.050" thick) 304 stainless sheet that I cut to match the top plate profile along with a 6.5" hole. I placed this underneath the top plate for extra rigidity with this support
    • lesson learned: In terms of meeting code, an insulated liner could help satisfy the clearance to combustible requirement if your chimney does not meet the minimum 2” (for interior chimney, 1” for exterior chimney). In terms of performance, insulated liners should improve draft, make it quicker to start fires cold and reduce heat escaping through masonry…especially on an exterior chimney. With the inside width of my clay flue being 6.5", a round insulated liner would have been difficult to impossible to slide down (without going the oval route). The 4 feet of rockwool insulation at the top might be overkill, but I'd have to imagine it will do something in keeping a better draft.
    • lesson learned: was very happy with the heavy flex liner: not too heavy to lift up, easy to straighten out, easy to feed from just the top without a pull cone/rope from the bottom, feels very thick/durable...suspect it will last for more fires/cleanings than a .006" thick easy flex liner (went with 304 stainless as it will just be for wood fires...vs more expensive 316 needed for some other fuels)
    • lesson learned: Rockford flat top plate for the same price as the Fireside flex top plate, but no shipping, appeared stiffer. Took out the calipers, checked around 5 or so different spots, and the Rockford plate measured .024"-.025", the Fireside plate was .021"-.022". Both maybe within spec for 24 gauge, but for this batch at least, enough to feel the difference.
    • h1kjnXx.jpg
  3. Install block off plate
    • purchased (2) 18"x24" sheet of 24-gauge 304 stainless steel = $14 / each: Ebay
    • purchased (1) 24" Malco folding tool = $28: Amazon
    • purchased (1) 16oz can of Rutland 1200F stove paint = $27: Amazon
    • purchased (1) 7/8" x 8 foot Quadrafire stove door ceramic rope gasket = $22: Amazon
    • purchased (4) 3oz tubes of LavaLock high temp RTV silicone (500F continuous, 650F max) = $9 / tube: Amazon
    • purchased (2) 1" thick ceramic fiber insulation blankets (2300F capability): 24" wide x 8 feet long = $30 / blanket: Amazon
    • purchased (1) 75-pack of Tapcon 3/16" x 1-3/4" phillips flat head concrete anchors = $14: Home Depot
    • Main plate construction
      • cut piece of cardboard to match size of opening (above lintel, below damper opening)
      • used this as template for cutting 24 gauge sheet metal, notching corners, accounting for eventual bend height/radius
      • used 24" folding tool to bend up sides to less than 90 degrees (lets sides flex to match opening size)
      • oversized slot cut with aviation snips tracing semi-circle with 1.5" clearance side-to-side and 0.5" clearance fwd-to-back
      • main plate made in two pieces to create large overlapping area for sandwiching a sliding plate
      • painted with 3-4 coats of 1200F stove paint on each side, and cured in my grill. Probably not necessary, but thought was to possibly further protect the steel, maybe reduce top side radiation, nice aesthetics for something that will never be seen.
    • Sliding plate construction (unpainted)
      • sliding plate with smaller 1/4-3/8" clearance hole
      • 7/8" rope gasket sized to still seal even if liner is not centered in hole
      • coiled rope gasket around liner 3 times, secured safety wire about both free ends, and then twisted it together to keep it tight around the liner
      • 2 pieces of safety wire hooked around rope gasket to pull down and ensure seal after connecting insert
    • Assembly into fireplace
      • first wrapped around 2 feet of ceramic insulation around the bottom section of the liner above where the block off plate will go. Secured in place with safety wire.
      • stuffed area above damper opening with ceramic fiber insulation blankets
      • stacked 3 piece block off plate into place with flexing sidewalls holding it in place
      • match drilled (4) 1/4" holes through both main plates at both ends of overlapping section on both sides (drill access just to both sides of liner)
      • used hammer drill with 5/32" masonry bit to drill hole ~2" deep into brick
      • screwed in (4) 3/16"x1-3/4" Tapcons at these locations. Just 4 connections in these overlapping sections kept things pretty stiff. Thought was to allow wide direction a little more thermal growth freedom via flex of the bent side walls and not clamp down on the side walls there with anchors.
      • lastly, all seams between metal and masonry were caulked with high temp RTV silicone
    • useful link for making blockoff plates with examples: https://www.hearth.com/talk/wiki/why-damper-seal-is-needed-block-off-plate-install/
  4. Prepare liner connection to insert
    • purchased (1) 6" x 15 degree fixed elbow for flex liner = $62: Rockford Chimney Supply
      • insert I ordered came with a 15 degree DuraVent elbow, but for a rigid liner, so had to scramble and order the Rockford part last minute. Quality welds, good design for making tight seals, and they got it over really fast
    • made small modification to add 2cutouts to elbow, allowing clearance with crossbar in insert's flue collar
    • tapped elbow down with hammer to get tight fit, match drilled holes and secured with screws
    • secured other end of elbow to bottom of flex liner, tightening hose clamp
    • all of these male/female connections are male facing down, so any condensates that are able to form and drip down remain within the exhaust path
    • 6cz50pl.jpg
  5. Install insert
    • purchased (1) Quadrafire 4100i with large cast surround = $2,650 + $550: Yankee Fireplace - Middleton, MA
      • chose this model to allow for possible N-S loading, minimize how much sticks out into room and maximize firebox size that would fit in the existing open fireplace
        • also wanted a model with a blower to get the heat out, and was recommended by many to avoid catalytic inserts
      • goal is not to heat the whole house all winter, but to really get the family room/kitchen toasty on weekends when we're all there
    • placed 18"x24" sheet of left over 304 stainless at bottom of hearth, secured by small amount high temp silicone
      • this along with cardboard at front of hearth made sliding the insert back and forth easy for one person
    • installed leveling legs, swung baffle tube assembly down, removed baffle boards and insulation for liner connection access
    • slid insert back, pulled flue collar/liner down from inside insert, bolted in place
    • assembled surround and secured to insert (shown below without surround)
    • DGb1xvI.jpg
  6. Trim/caulk liner top
    • back on roof, loosened top plate hose clamp and pulled liner up an inch or so for a light stretch
      • idea is that this "stretch" will be compressed when the liner heats up and wants to grow
    • used angle grinder to cut liner about 1" above the top plate cylinder
    • used high temp silicone to seal in between the liner OD and top plate cylinder
    • used general silicone to caulk around the edge of the top plate
    • NYGxcNF.jpg
  7. Cap unused flue
    • house has another open fireplace that is unused, and should remain so (inadequate clearance to combustibles)
    • trimmed left over sheet metal to match flue perimeter, but offset in by ~1/4"
    • drilled (3) 1/4" clearance holes for eventual 1/4" threaded rod to pass through
    • used this as a template to make another similar sized sheet but with bent up sides, curled in at tops to make a bottom plate for insulation that can be easily installed down and removed up.
    • secured (3) 1/4" x 36" threaded rods through holes in bottom plate with washer/nut/jam nut on each side
    • fed bottom plate down ~3 ft through unused flue, temporarily held in place with clamps on tops of threaded rods
    • cut 3 foot lengths of 2" thick rockwool to width and lowered down in between threaded rods to rest on bottom plate
    • put bead of general silicone caulk around top of flue then pushed top plate down on top
    • secured threaded rods to top plate with washer/nut/jam nut on each side
    • 4fgBC6F.jpg
  8. Secure rain cap/cage
    • purchased (3) 6" and (1) 4" stainless hose clamp = ~$2 / each: Home Depot
    • previous wash (badly cracked) had cracks passing through each of the Tapcon holes drilled into the wash
    • to protect this new crown, decided to secure the rain cap to the (2) clay flue extensions
    • to try and protect the flues as well, 2 hose clamps were hooked in series to wrap around flue and through side of rain cap cage
      • larger flue has (2) 6" hose clamps, smaller flue has (1) 6" and (1) 4" hose clamp
    • tightened these down and rain cap isn't going anywhere, and clamp load seems pretty well distributed around the flues
    • oRIuAiG.jpg
  9. Install metal shelf
    • purchased (1) black steel ledge: 60" wide x 5" deep x 2" tall = $89: Room & Board
    • purchased (1) 75 pack of black 3/16" x 1-1/4" WallDog phillips pan head screws = $15: Amazon
    • main purpose of this shelf is a heat shield to hopefully lower temperatures seen by the TV a little bit
      • we have short 7' ceilings, so this shelf ended up being at just over a 4' height (TV is wall mounted)
    • secured into mortar with (4) black WallDog screws after drilling 3/16" holes into mortar
      • for load bearing applications (like TV mount) I'll anchor to brick (and likely use a sleeve anchor), but for this I think mortar should be fine
      • used some left over lumber/shims/clamps to adjust and hold in place for drilling/securing
      • Ld99g9O.jpg
  10. Install child gate
    • purchased (1) metal adjustable safety gate = $40: got 2nd hand locally, not sure of make details, but in great shape
      • 3 children in house under 5, insert in high traffic area
    • secured to mortar with (2) WallDog screws on each side
  11. 1st burn!!!
    • opened burn rate air control to high, opened startup air control as well
    • loaded (2) 16" splits N-S on sides of firebox and then ~10 crumpled newspapers in middle with some kindling above that
      • Ash, aged ~ 2 years, only tarp protection on top foot or so
    • took probably 3 or 4 more loads of kindling to catch splits, so a little smokey opening the door too much
    • start up air control closes after ~25 minutes, so I opened this one more time during the process
    • splits burned ~4 hours, could smell a strong stove paint curing smell
    • reloaded 4 smaller splits on top of hot coals with newspaper/kindling and fire started with little effort on my end at all
    • burned 6+ hours, put on blower for this and got some pretty good heat, room got to low/mid 70's, top of metal shelf under TV never got above 84 degrees
  12. Future plans
    • still need to refine my fire skills a bit....starting cold, loading up for an overnight burn, not overfiring, thermometer purchase, etc.
    • in the spring, want to use some left over PVC to make a support structure for covering the stacked splits and figure out a good roofing material
      • right now, have just been using tarps to cover the top during spring/summer/fall, and to drape over everything in the winter
      • feel like I've got some room for improvement to get moisture content down
 
Last edited:
Other useful more general links:

Final thoughts
Total cost was about $3,700 for the insert, surround and liner, $1,000 in materials and a couple hundred in tools. Initial motivation for DIY'ing this was to save some money, which then turned into completing the challenge and learning some useful skills along the way. Likely not as good as a professional could do it, but a lot better than it was before, and I think good enough. Even if I was hiring someone to do this work, I think it'd be worthwhile to do a lot of this same research. One, so that I'd know what to ask for in discussions of scope to quote. And two, so that I'd know to throw out some of the low bidders who fail to include key items, like say a blockoff plate, or a proper crown/chase.

Hope this wasn't too long-winded. I wanted to find a balance between conciseness and relevant detail to possibly make this of use. Appreciate any comments/criticism.
 
Very nice work and great write up. But i do have to correct you on the liner insulation thing. Your comments are simply incorrect. The requirement to insulate a liner is based on clearance to combustibles from the outside of the masonry chimney structure. Externam chimneys require 1" of clearance while internal ones require 2". Yes there us a performance aspect to it as well and in that respect it is more important in an external chimney. But from a saftey standpoint it is more inportant for an internal one.
 
But i do have to correct you on the liner insulation thing. Your comments are simply incorrect. The requirement to insulate a liner is based on clearance to combustibles from the outside of the masonry chimney structure. Externam chimneys require 1" of clearance while internal ones require 2".

Thanks for the feedback, I've corrected those statements to what I believe captures your comments.
 
  • Like
Reactions: bholler
Really great write up, and looks fantastic!
 
  • Like
Reactions: KPru
Thanks so much for postings. I can tell you put alot to thoight and planning into the porject. I'll go out on a limb and tell you thats a better job than many professionals would do.
 
  • Like
Reactions: KPru
Appreciate all the kind words. 1st snow last night, so excited to really get a fire going for the weekend

9pm - cold start with improved kindling from last time
  • loaded up kindling, 6 small/medium splits ~17% moisture content
  • burn rate control at high, start up control open, door cracked
  • closed door after ~15 minutes, start up control closed after 25 min, burn rate control to low after ~40 min and blower turned on to medium
  • room consistently held at 75F (~30F outside)

2am - reload on hot coals
  • loaded up with 6 small/medium splits, 3 small E-W at bottom, 3 larger N-S on top
  • door kept closed, blower kept on, start up control open for ~25 min, burn rate control changed from high to low after ~15 min
  • fire got going pretty good after ~10 minutes
Been reloading every 5-6 hours, will try and see how long I can get it to go overnight :)
 
Fantastic Post. The amount of effort it took to build a proper crown like yours overwhelmed me so I endend up installing a stainless steel chase cover over my 6'x3' crown. I had a very similar project this Summer and they got to know me pretty good at O'Mahoney Company in Lawrence.

I noticed you used Type S mortar for the brick repair. O'mahoney did not even stock Type N - it seems S is mostly what masons use around here. I liked the way you clamped the forms to take the guess work out of making it an exact size. It sure does not look like an ovalized liner you installed.

Nice work!
 
  • Like
Reactions: KPru
Fantastic Post. The amount of effort it took to build a proper crown like yours overwhelmed me so I endend up installing a stainless steel chase cover over my 6'x3' crown. I had a very similar project this Summer and they got to know me pretty good at O'Mahoney Company in Lawrence.

I noticed you used Type S mortar for the brick repair. O'mahoney did not even stock Type N - it seems S is mostly what masons use around here. I liked the way you clamped the forms to take the guess work out of making it an exact size. It sure does not look like an ovalized liner you installed.

Nice work!
Type s is pretty standard for modern brick
 
Type s is pretty standard for modern brick
That's exactly what Conproco (masonry product company) told me. After hearing the debates about Type S and N I just wanted to be sure.
 
Another project I thought I'd include:

Liner/Insert instrumentation and test runs
  1. Stove top thermocouple
    • purchased (1) type K surface thermocouple: 900F capability, 6ft cable = $22: McMaster-Carr
    • purchased (1) set of K type M/F connectors = $11: Amazon
    • purchased (1) magnetic Inferno stove top thermometer = $23: Amazon
    • connected thermocouple leads to male connector
    • removed trapezoidal cast iron stove top
    • placed magnetic Inferno gauge on top of exposed thermocouple to press it to stove top surface at rear, center location
      • will need to come up with better way to force contact and shield thermocouple from any blower air convection effects....suggestions welcome
    • ran cable along stove top, then down and under the surround, then back up to the ThermaQ controller
    • will replace cast iron stove top when I get better agreement between magnetic gauge and thermocouple
      • anyone know if running the insert without the stove top could present any issues?
      • uJa5xJU.jpgcT7DI2e.jpg
  2. Flex liner flue gas temperature probe
    • purchased (1) type K Flat-Pin bendable thermocouple probe for gases: 12" length, 1/8" diameter, 1700F capability, 3ft fiberglass cable = $36: McMaster-Carr
    • purchased (1) clip-on bimetal thermometer: 500F capability, 8" stem, 3" diameter face = $26: Dwyer Instruments
    • purchased (1) 1/8" diameter by 12" long black oxide Dewalt drill bit = $6: Amazon
    • purchased (1) 3/16" diameter by 12" long black oxide Dewalt drill bit = $7: Amazon
    • was somewhat fortunate in that the hole for the (now removed) fireplace damper control is so close to 18" above our insert exhaust (recommended probe height).
      • I wasn't able to find many examples of people using this for flue gas temperature monitoring on an insert install, but being an inexperienced wood burner, thought these readings could be useful.
      • worst case, my digging didn't find many concerned with an 1/8" hole in the liner, as a good draft would just pull air into the exhaust.
      • 5fpOaL2.jpg
    • drilled 1/8" diameter hole in heavy flex 304 stainless steel liner as installed
      • used extra long bit to pass through the fireplace's hole for the (now removed) damper control
      • started with the 3/16" bit just to start an indentation. The more flexible 1/8" bit walks around a bit on the heavy flex cylindrical surface, so having the indentation helped steady it. I did a couple test holes on the excess liner length that was left over from the install. Having the black oxide bit helped as well for a somewhat difficult hole to drill.
      • after drilling through liner, used bit sidewalls to "ream" diameter slightly larger for 1/8" probe.
    • bent probe 90 degrees at base
      • vvYWOG6.jpg
    • slid probe through damper control hole until hitting the outer liner surface. Measured remaining extension to verify eventual immersion of ~2.5".
      • with 6" diameter liner, this immersion gets pretty close to the center. Plan to do some sensitivity testing on immersion depth, as I thought I saw comments about being at the outer third for ideal immersion.
      • KlYK1Y3.jpg
    • pushed probe through hole in liner. Fairly tight fit to minimize leakage. Will be keeping an eye on how easily it can be removed/installed over time. Don't want to run into a situation where the tip swells and makes it impossible to remove.
    • ran probe cable behind the surround and to the ThermaQ controller.
    • I placed a dial thermometer with an 8" stem through the same opening. This was mainly just to cover the probe to "improve" aesthetics, but will also give the air temperature in the cavity above the block off plate and below the damper opening (stuffed with ceramic insulation above opening). Likely unnecessary, but could help for calculating local liner temperatures
      • NYCKWUd.jpg
  3. Temperature data logging
    • purchased (1) dual channel type K temperature meter with WiFi capability = $167: ThermaQ
    • was a bit apprehensive about dropping so much money to get WiFi capability, but so far haven't regretted it, as it makes real time monitoring (free phone app) and any data post-processing a breeze.
    • let's you set limits for an alarm to sound if that temperature is exceeded.
    • dual channel allows for both thermocouples to be monitored side-by-side.
      • qIOsyWo.jpg slpEh4S.jpg
  4. Test runs
    • I've included data for the 1st 3 loads of burning since adding the instrumentation.
      • All with 16%-18% moisture content Ash on 30F-40F days, 4 medium splits
    • In addition to the 2 thermocouple data sets, I also have periodic spot check data for the following:
      • magnetic stove top gauge: to compare to stove top thermocouple and ensure insert is not being over-fired
      • magnetic gauge had good agreement with IR gun
      • Cu8aTZp.jpg o45A0uP.jpg
      • dial gauge positioned at the flex liner chimney exit: to see flue gas temperature change from 18 inches to 19 feet
      • 3CkPqqt.jpg
    • 1st test was to simulate a hotter morning run to "burn off" any creosote.
      • link discussing what "burning off" might actually mean: https://www.hearth.com/talk/threads...urning-off-creosote-and-a-chimney-fire.10532/
      • goal was to get flue gas to 800F (100F below self imposed 900F limit) and get stove top temp to 650F (100F below self imposed 750F limit)
      • SJ6REMf.jpg
      • having the door cracked open really let the fire ramp up. Flue gas temps responded very quickly, dropping after shutting the door.
      • although the stove top thermocouple topped out at ~650F, the magnetic gauge shows things went higher. Turning on the blower dropped the stove top temps, will do this sooner on subsequent runs.
        • discrepancy between stove top thermocouple and magnetic gauge continued throughout the burn, and seemed to increase with higher blower speeds.
        • I suspect the surface thermocouple is too exposed to blower convection
      • data taken from 3 different flue gas temperatures consistently showed around a 42% drop in temperature from 18 inches up to 19 feet (at the exit).
    • 2nd run was to recreate the 1st run with lessons learned
      • W1XghMh.jpg
      • turning the blower on earlier kept stove top temperatures below 600F
      • having door cracked open for 1st 30 minutes allowed flue gas temps to climb to 800F, dipping quickly after shutting door
    • 3rd run was to simulate an overnight burn without pushing the temperature limits initially and see when the "auto" control eventually turns off the blower
      • jGljUL6.jpg
      • targeted 600F flue gas temp for closing the door, resulted in similar burn temps for the 2nd hour
      • stoked coals twice the following morning to see effect
      • took 16.5 hours for things to cool enough for the blower to turn off
  5. Temperature targets and limits
  6. Next Steps
    • modify stove top thermocouple to get better agreement with magnetic gauge and IR gun
    • get a better understanding of some of the knobs I have to turn
      • how soon to close the door on startup
      • effectiveness of the start up air control
      • effect of the rear air control on this unit
      • effect of different wood types
 
Last edited:
  • Like
Reactions: Ryan723
Congratulations on the great job you did on rebuilding the top of your chimney. It looks like it should be good to go for a long time. Your next project might be to rework the chimney flashing, which looks pretty rough in your photos. The reason I mention this is because I just went through some chimney leaking problems due to new flashing the roofers installed when I got a new roof installed about a month ago. Can you get into an attic an take a look at the roof decking around the chimney? In my case, I can spot leaks right away because the chimney is exposed in my living space where the chimney comes through my cathedral ceiling. When you can't see that area it's possible to have some unseen leaks that can do some serious damage without ever showing up inside your house until it gets bad enough to start leaking and damaging the ceiling.
 
Good project. Try lowering the target temps. Burning dry wood, you should be able to start turning down the air supply at 500-600ºF.
 
  • Like
Reactions: KPru
One last update with regards to the stove top thermocouple running low, especially for higher blower speeds. Combination of poor contact and convection exposure appears to have been the culprit.
  • purchased (1) type K thermocouple with flat bolt on ring: 900F capability, 6ft cable = $17: Automation Direct (THMK-B01L06-01)
  • purchased (2) alnico disc magnets: 1000F capability, 3lb pull = $2/each: Amazon
Cut a small square of 24 gauge sheet metal left over from the block off plate. Used a hand seamer to add a couple of bends creating a cavity that fits the thermocouple probe. Sandwiched a short length of ceramic rope gasket in between and used two high temp magnets to "seal" the ends. Used an IR gun to help position the thermocouple at the location roughly reading the highest. The new setup now has very good agreement with the IR gun.
GBL9AVP.jpg nkN1Ap7.jpg
begreen, thanks for the advice on the 500F-600F target range for turning down the air. Still trying to get the feel for getting a good secondary burn, but it's looking like the high end of that range for a cold start and nearer the low end for a reload. Tried closing the door a couple times with the cold start at lower temps and ended up having to re-open it.
iClAE1p.jpg D68Z3DQ.jpg
Got a little nervous with stove top temps with that second fire. The Quadra-Fire 4100i has a rear air option that's controlled by the same knob as the startup air, and isn't quite intuitive to me yet. I think I inadvertently had this open, even as I cut back on the primary air.
 
Last edited by a moderator:
  • Like
Reactions: Ryan723
Great writeup and resource with that dual-channel wifi setup.

I really wanted a 3-channel (cat, stovetop, & flue), and couldn't justify buying 2 of those units, so i went the DIY route. But that looks like a really good solution!

Digital instant readout is great for knowing what your stove is doing and reacting, but adding datalogging really lets you start to tune your process, identify trouble, and burn safer. Nice work!
 
  • Like
Reactions: KPru
First time seeing this thread. Excellent job. I saw somewhere you said something about a pro probably able to do better. In my experience, if you have some smarts, do the research (use right materials) and have some ability, that's mostly not the case.

It's difficult to find a contractor who will spend the time to think it out and really pay attention to every detail along the way. I'd say not only did you save money but probably ended up with a better job than most contractors would have done. Anyway, well done.
 
  • Like
Reactions: KPru
Another project I thought I'd include:

Liner/Insert instrumentation and test runs
  1. Stove top thermocouple
How long does the batteries last in the wifi thermocouple before they need changed?

How often does it take a reading from the thermocouples?
 
Damn - Nice job

*edited for clarity*
 
  • Like
Reactions: KPru
I don't understand. Since you installed a code stainless steel liner in the middle flue, why did you leave the clay chimneys on either side, especially when you say at the end they don't meet code and are not going to be used?
 
How long does the batteries last in the wifi thermocouple before they need changed?

How often does it take a reading from the thermocouples?

Website says 4,000 hrs, but 2 grocery store brand AA's were a little less than 2 months. I've got some better brand name ones in there now, and still going strong after 2 months.

It lets you set the sampling rate at one reading every 30 seconds, 1 minute or 2 minutes.....I've been using every 30 seconds.
 
I don't understand. Since you installed a code stainless steel liner in the middle flue, why did you leave the clay chimneys on either side, especially when you say at the end they don't meet code and are not going to be used?

Well, the one side is for our natural gas furnace, so definitely wanted to leave that one. But the other side is for an open fireplace that has wood very near the opening. I capped that one off for a little better insulation, as opposed to taking it down which seems like a bit more of an undertaking.