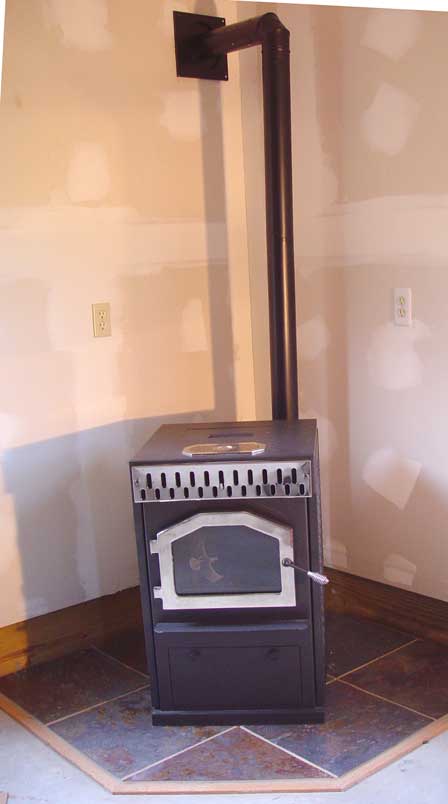
I recently installed a Baby Countryside in my new shop/addition. This stove is quite small and can get very close to the wall, so it takes up very little room. It is also very flexible with fuels, and can burn corn as well as
Pellets and other biofuels.
Although it is a shop, we though a nice hearth would help protect the stove and give a good feel. We went to Home Depot and purchased some slate tiles which could create a hearth with hardly any tile cuts. A total of 9 tiles with one cut did the job!
http://hearth.com/images/uploads/1_tilelay.jpg - see pic of tile being laid
The tile was laid on a concrete slab using thin-set mortar. The mortar should be spread on both the floor and the tile with a notched trowel. Tiles should be firmly pressed into place and wiggled around until you are certain they have seated well. Leave an even space between tiles for grout.
http://hearth.com/images/uploads/20_finishtilelay.jpg - Picture of tile set - without grout and border yet
A small oak trim (door stop) was added around the perimeter of the hearth by gluing it down to the cement using Liquid Nails caulk tube adhesive. The hearth was then grouted and sealed.
http://hearth.com/images/uploads/30_grout-seal-border.jpg
In this picture you can see the grout, oak trim and sealer being applied.
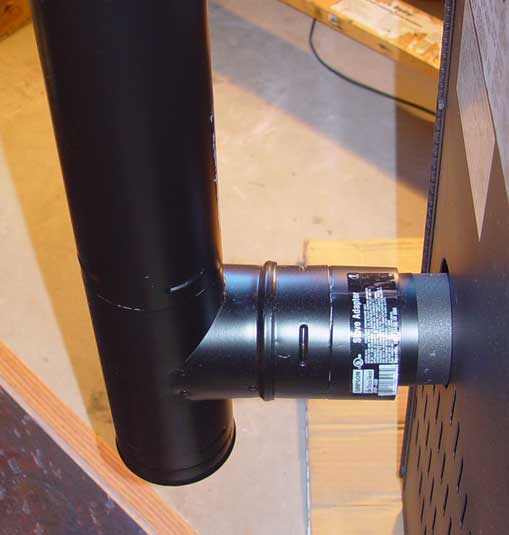
Now it's time to trial fit the pipe together and determine where the holes through the wall must be cut. In my case, I wanted to use the following parts:
1. Stove adapter on stove rear
2. TEE section connected to adapter, allowing for easy cleaning
3. 2 - 3 foot sections heading up vertically
4. An elbo to turn toward the outside wall
5. Another piece of 3 foot pipe to exit through wall and past overhang
6. A horizontal termination outside facing approx 30 degree downwards.
By fitiing the pipe together with the stove on hearth in approx position, I was able to accurately mark the interior hole for wall pass-through.
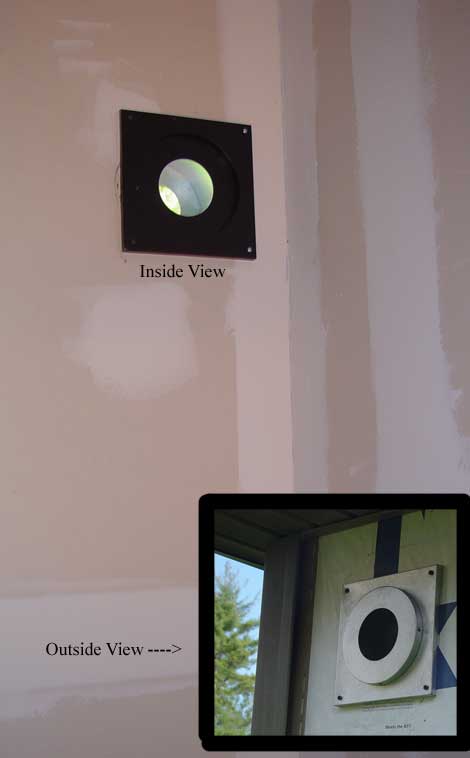
Using a drywall saw, I cut a slightly oversized round hole through the wallboard and pushed the insulation down and up so as to clear out the hole. I then marked and cut a similar sized hole in the plywood exterior of the home. Note: This house was not fully sided yet. If you are installing through existing siding you must plan for this and be more careful with the saw!
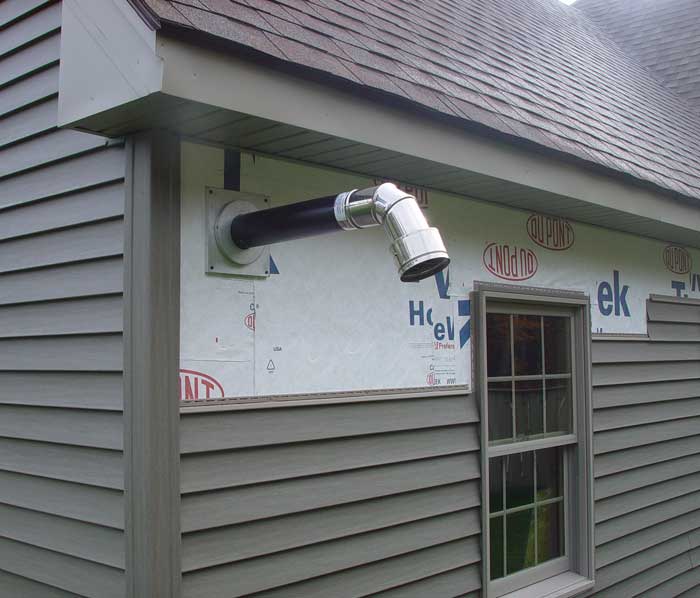
The pic above shows the holes inside and outside with the wall pass-through installed. The picture below shows the completed exterior piping with Horizontal cap. The pipe brand is Dura Pellet Pro, which calls for 6 inches under the soffit and 4 feet from any opening window - this installation exceeds those standards.
The completed interior piping is show below - and if you want to see the stove burning it's first load of corn, check this link -
http://hearth.com/images/uploads/babycs1.jpg